
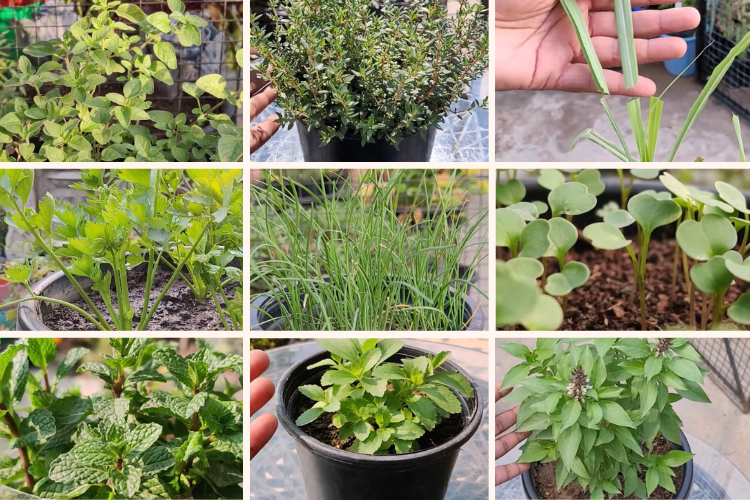
Fresh herbs from your own pots? Yes! I find it so rewarding to grow herbs in small containers, especially when space is limited. Whether it’s a sunny kitchen window or a balcony corner, you can enjoy growing flavorful herbs from seed to harvest. In this post, I’ll show you how I grow 10 beginner-friendly herbs right at home—no garden needed!
Contents
1. Oregano
Oregano is one of the easiest herbs to grow. It’s also super flavorful and useful in the kitchen!
From Pot to Plant
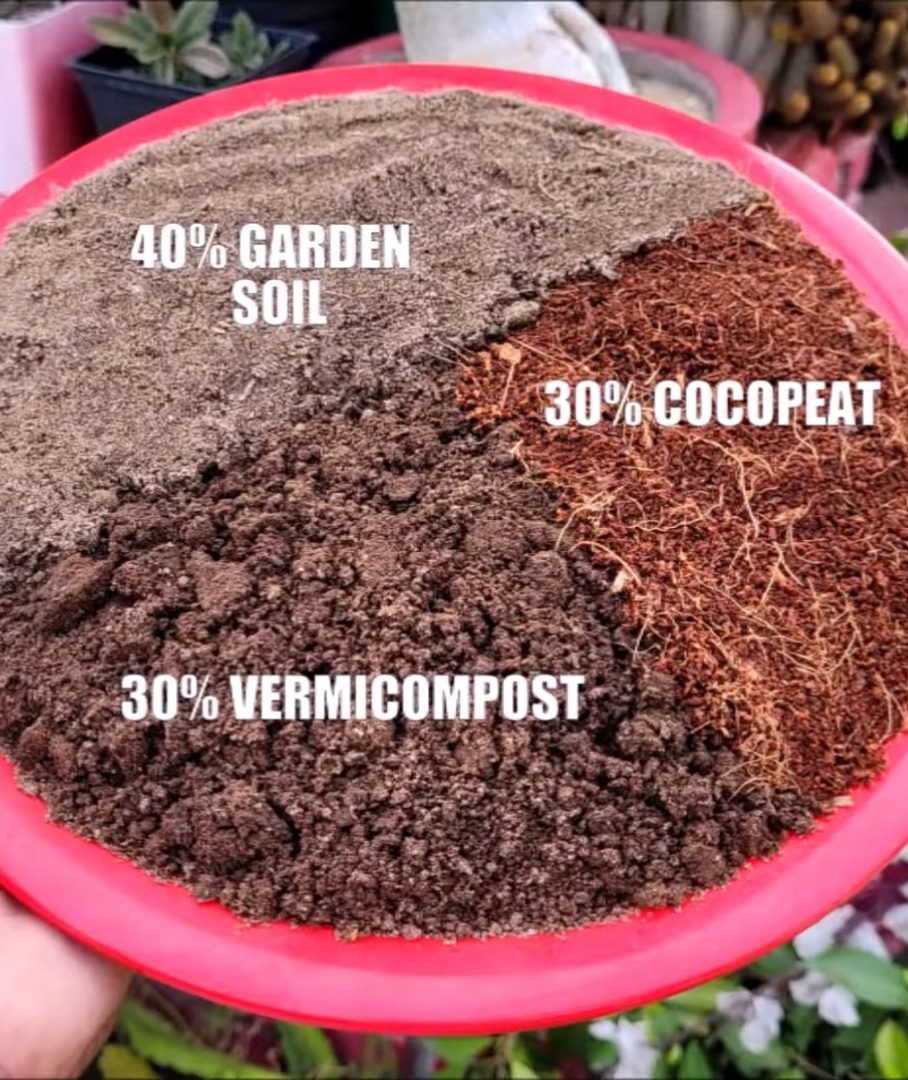
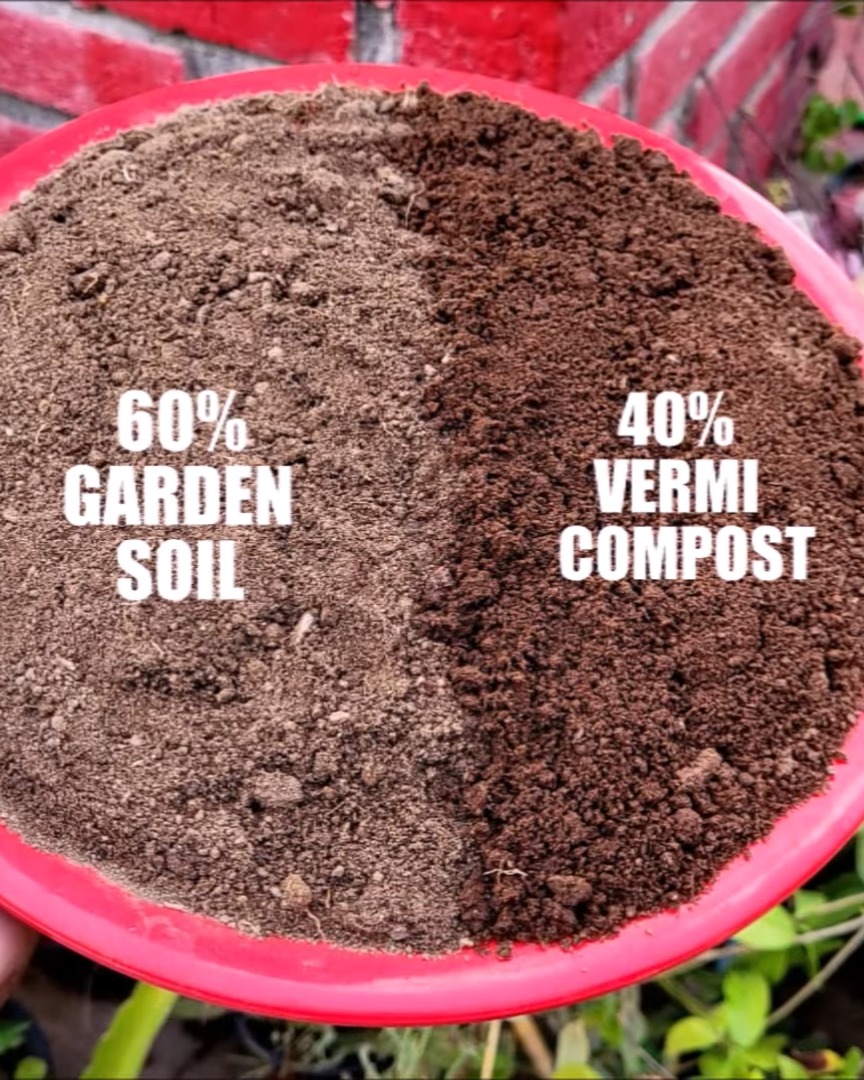
I always start with a good pot—7 to 8 inches deep and wide with drainage holes. For the soil, I use:
- 40% garden soil
- 30% cocopeat
- 30% vermicompost or leaf mold
Before sowing, I moisten the mix well.
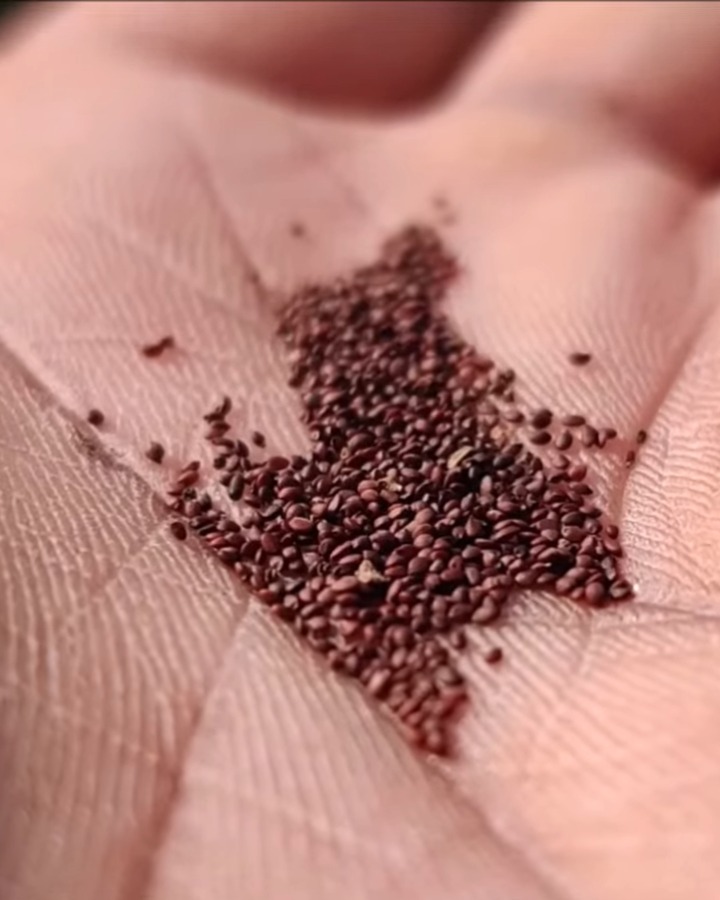
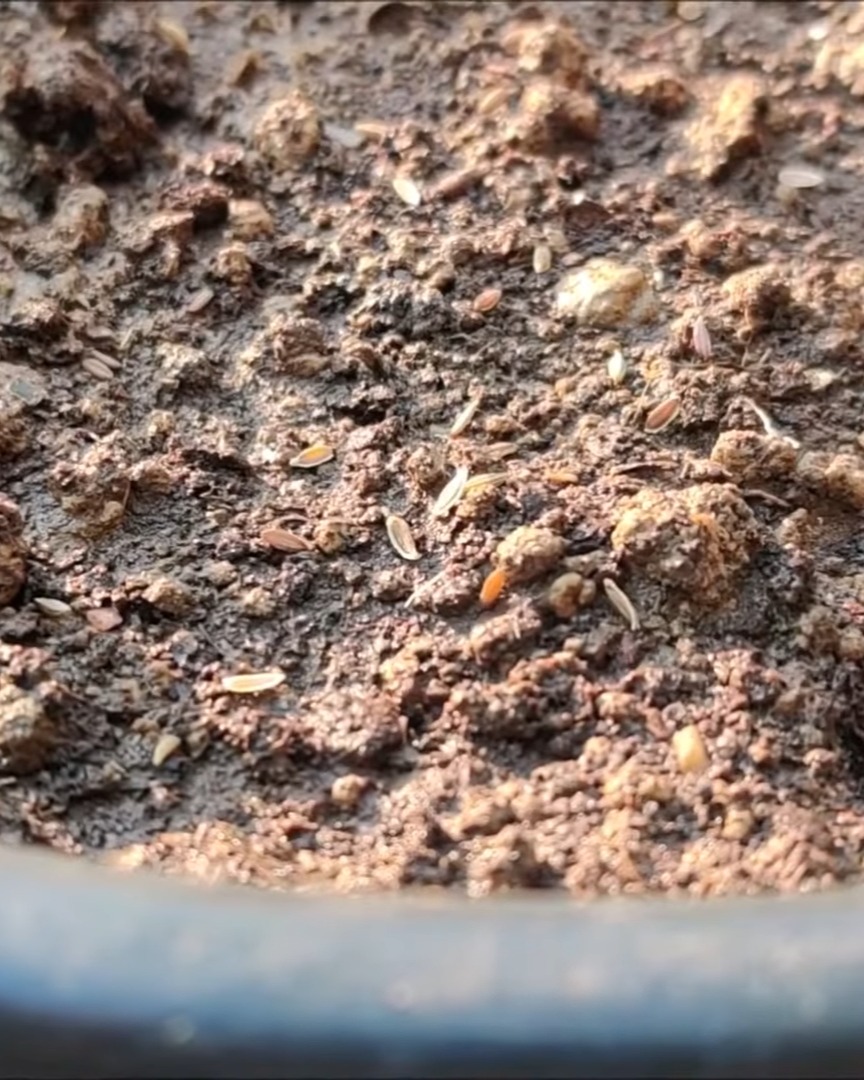
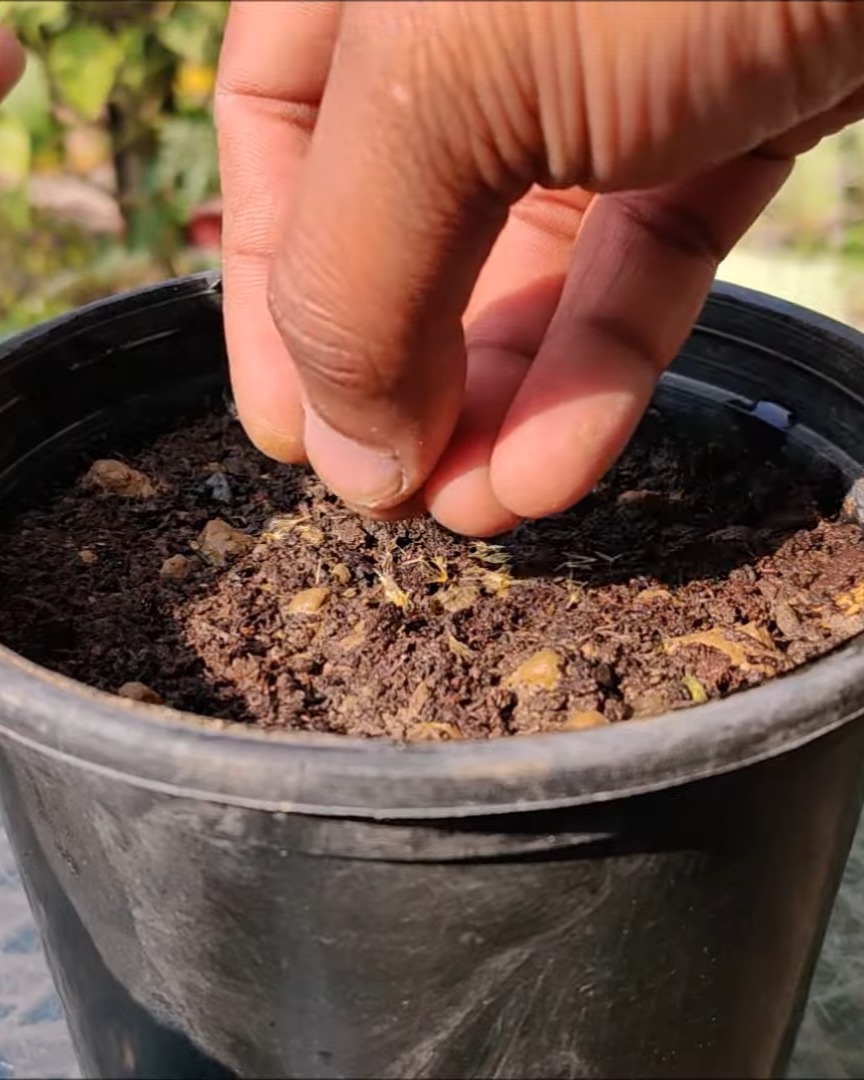
Oregano seeds are tiny and look like dust, so I handle them carefully.
I sprinkle them evenly across the soil and give a very light cover using the same mix.
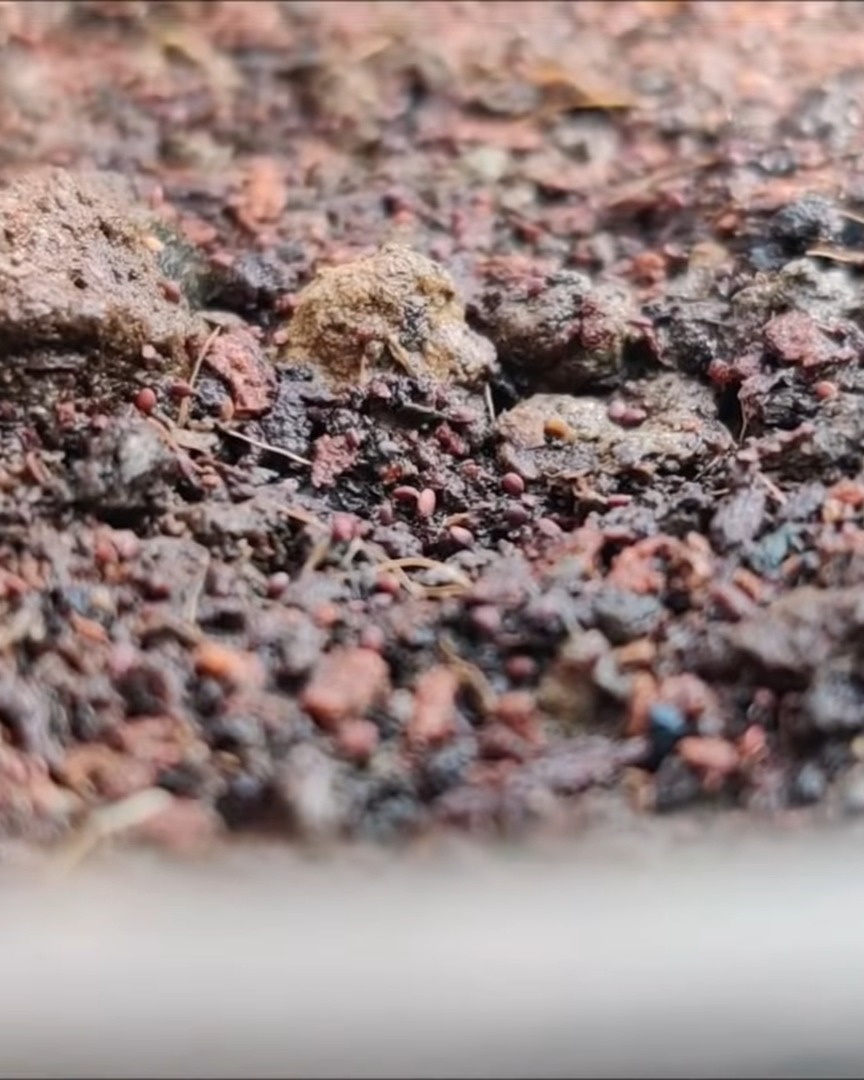
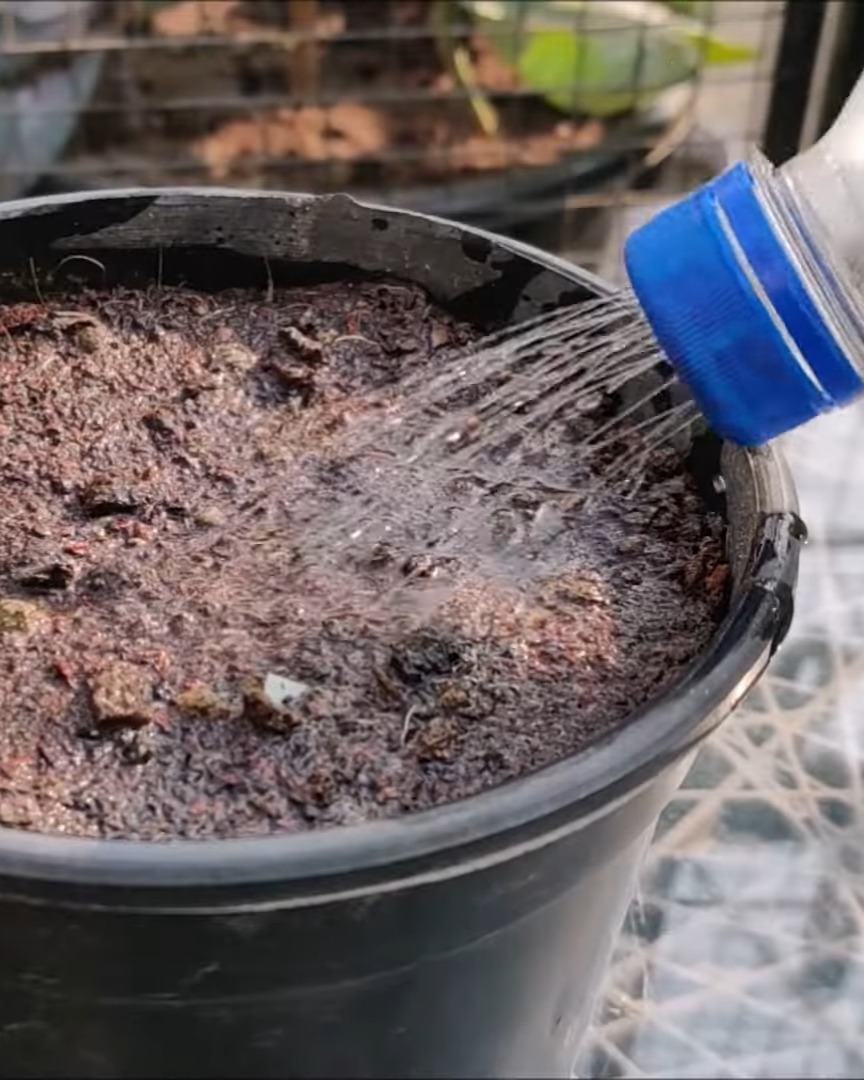
I gently press the soil and water it using a soft shower.
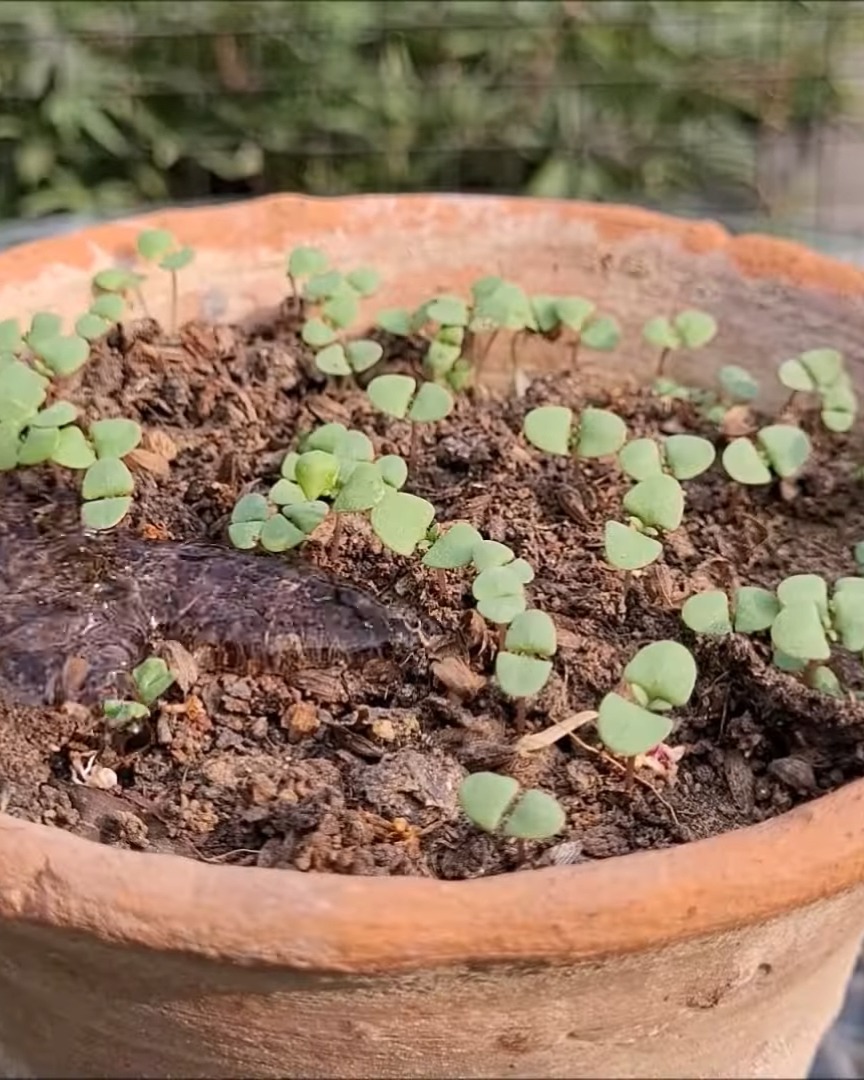
Oregano usually sprouts in 8–12 days. During this time, I keep the soil slightly moist, not soggy!
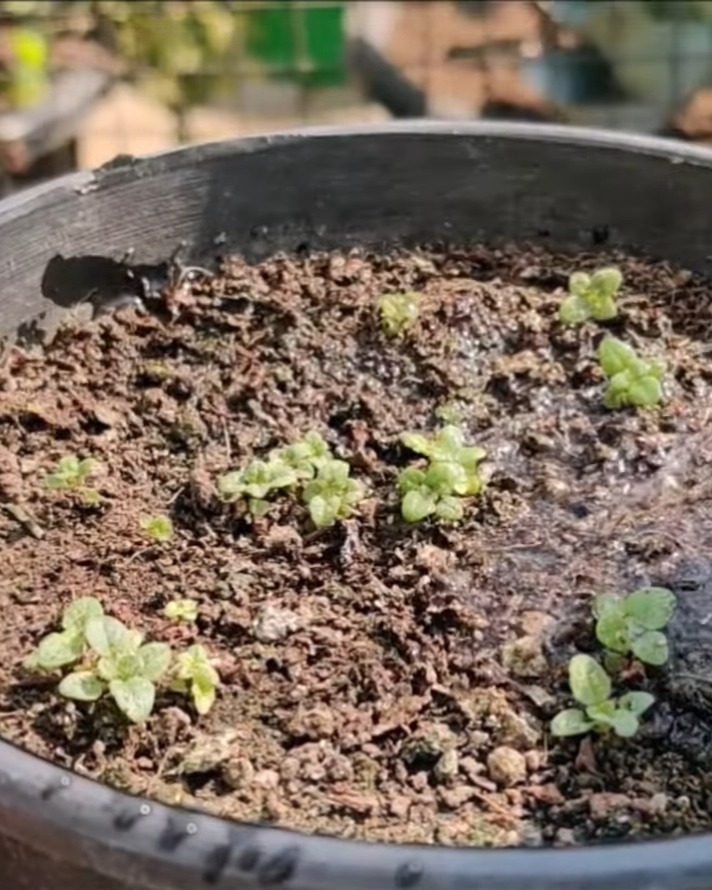
Ongoing Care
Once the seedlings appear, I make sure the soil drains well and dries a bit between waterings. I avoid splashing water on the leaves to prevent diseases.
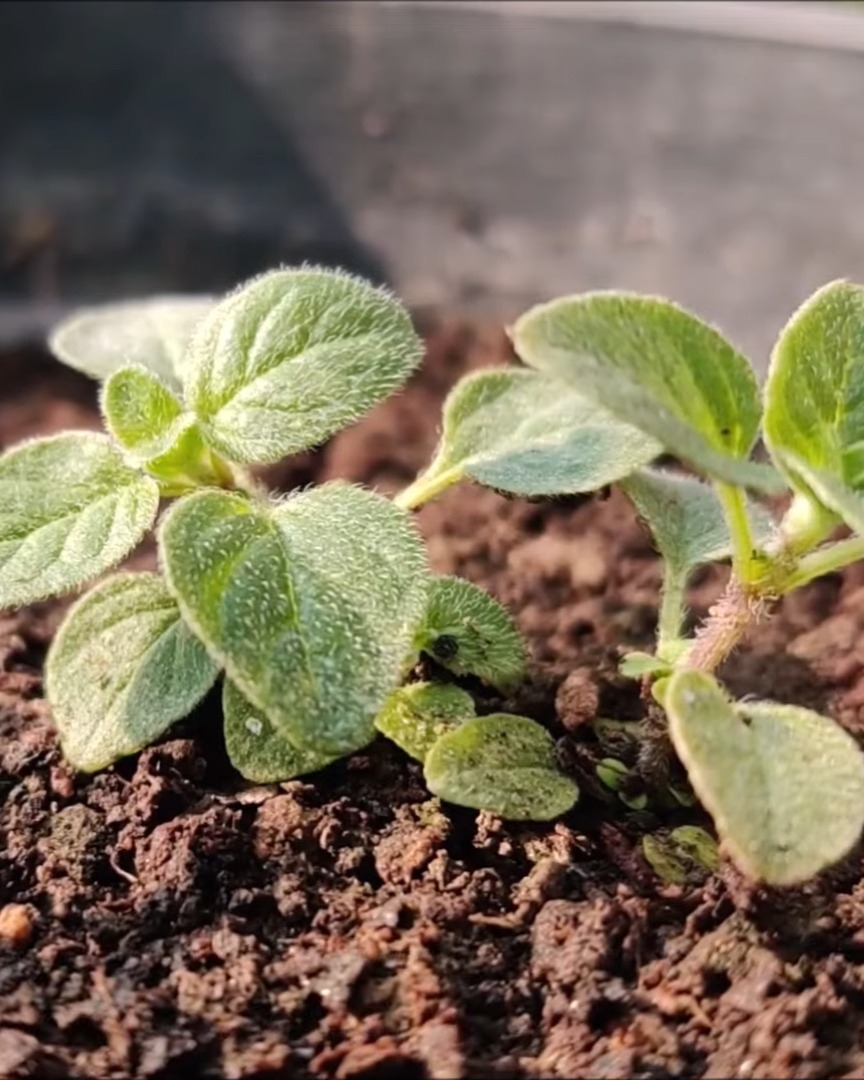
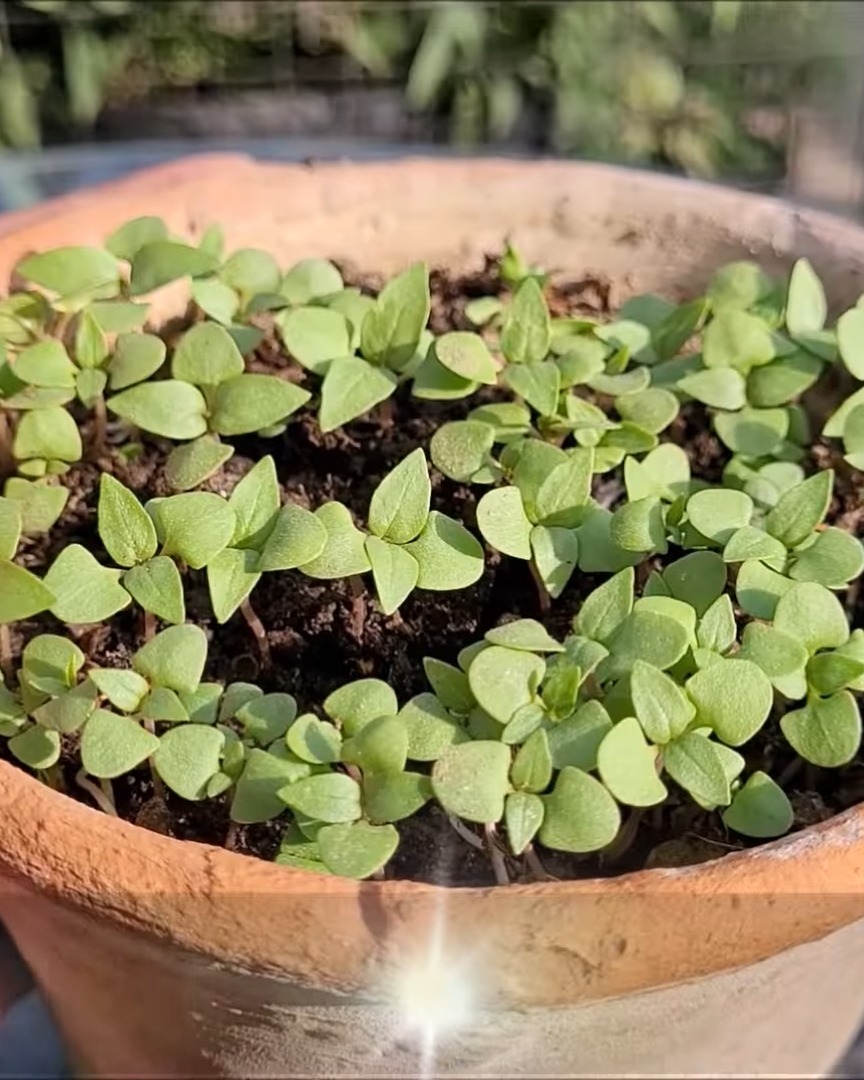
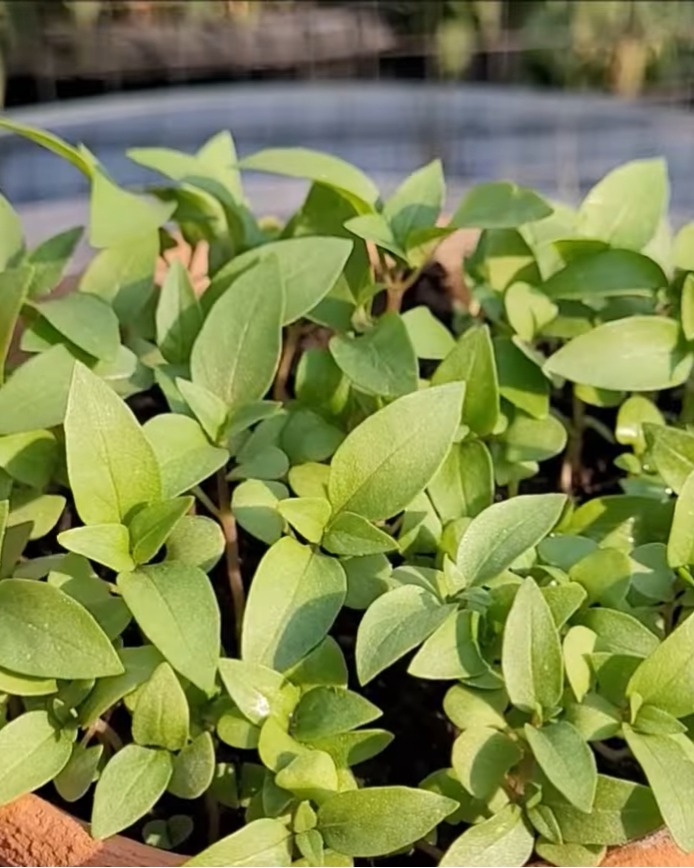
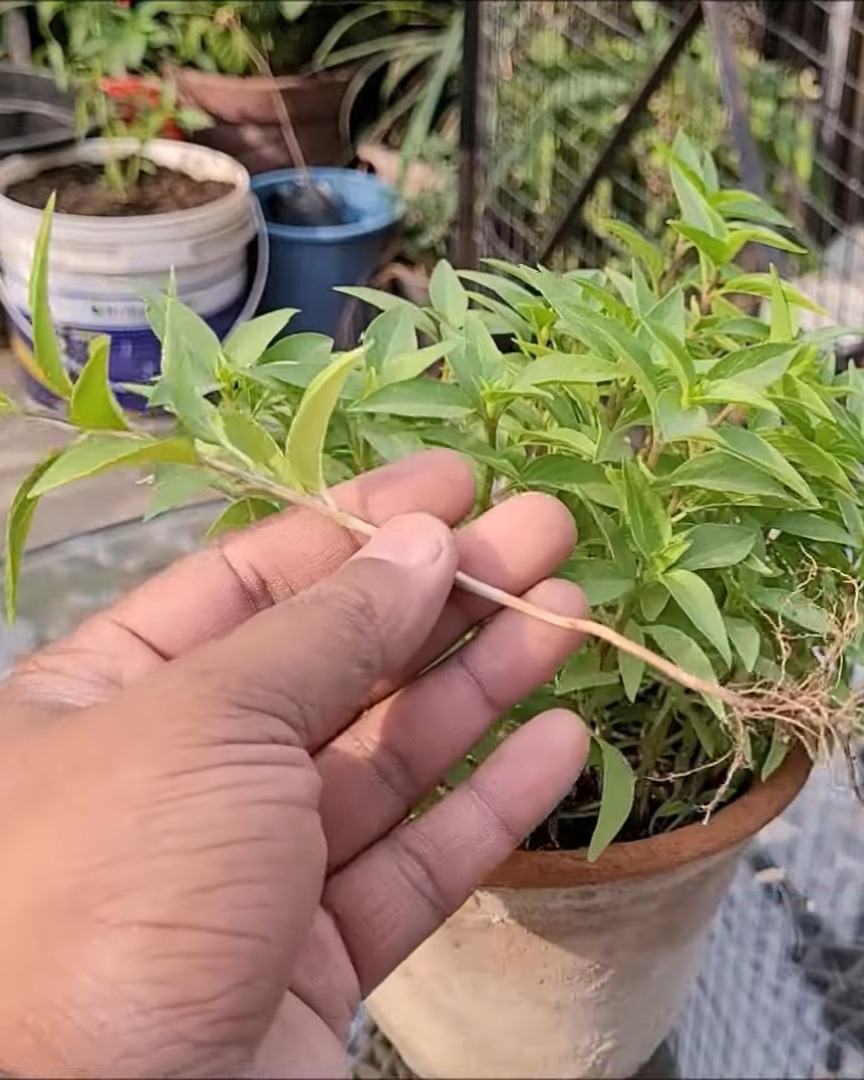
Oregano plants love to spread. When the plant reaches 5–6 inches tall, I begin harvesting.
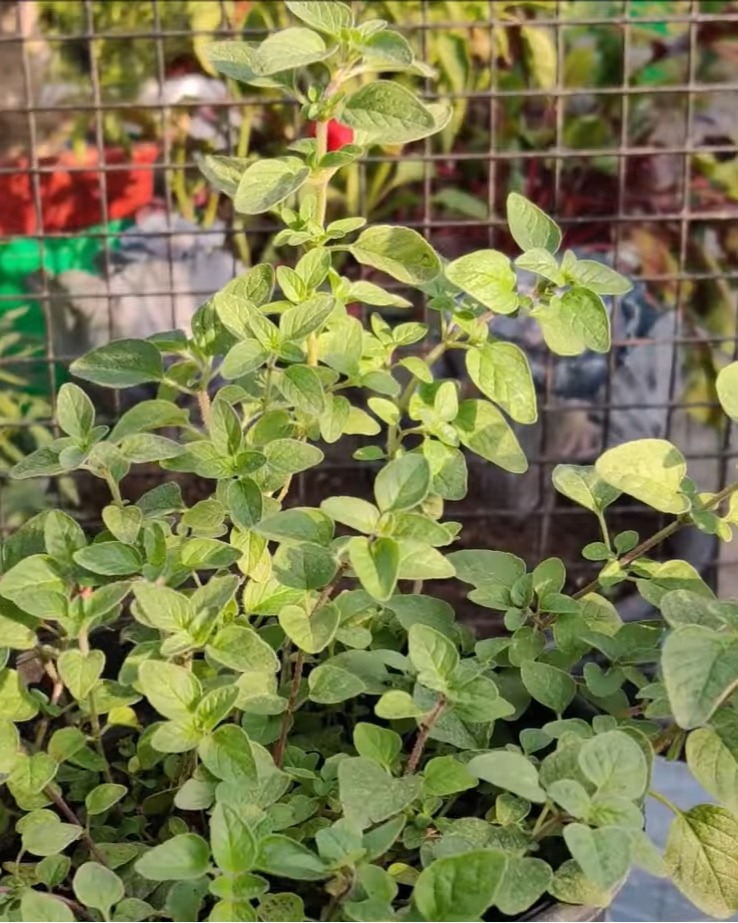
Harvesting Tips
I pinch the growing tips to keep the plant from flowering and seeding. This also helps it grow bushier! I dry or freeze the leaves and store them in airtight containers, away from light.
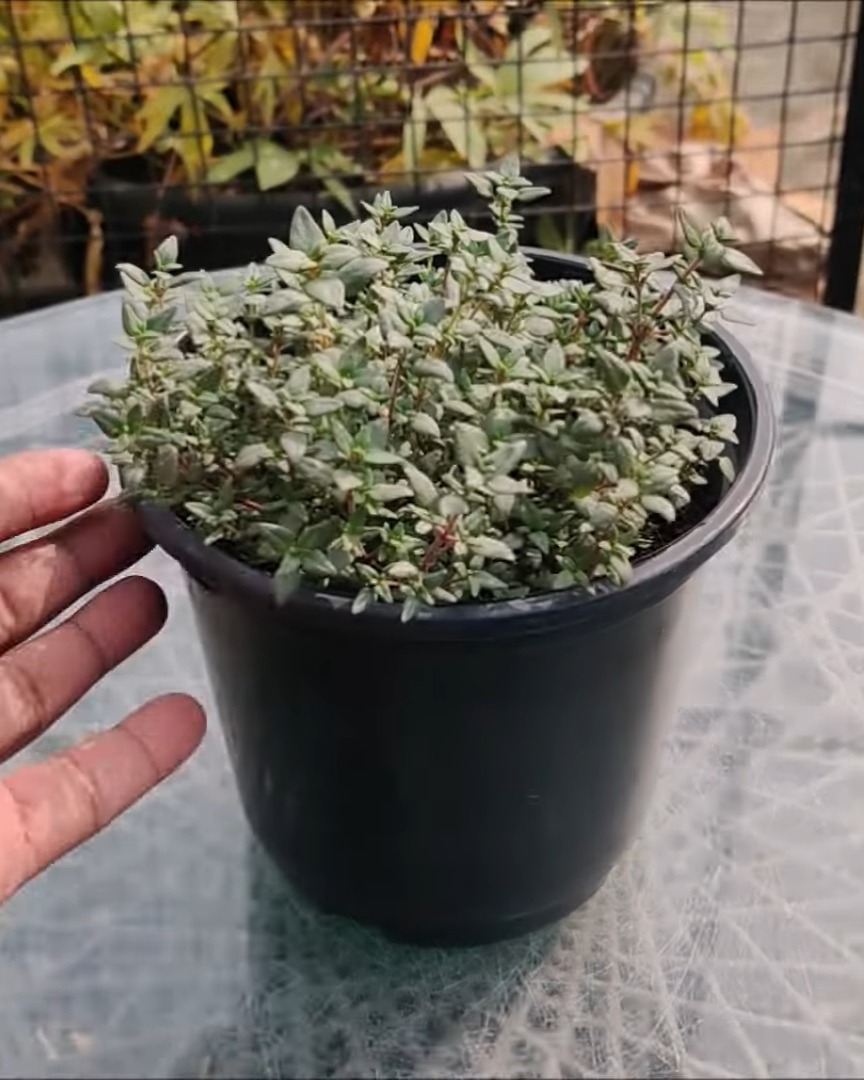
2. Thyme
Thyme adds fantastic flavor to dishes and is super low-maintenance.
Planting from Scratch
I use a pot with drainage and prepare my soil mix:
- 50% garden soil
- 30% vermicompost
- 20% sand
I moisten it before sowing. Thyme seeds are tiny, so I scatter them on the surface and don’t cover them with soil—they need light to sprout. I press them gently into the surface.
A spray bottle works great for misting the top without disturbing the seeds. I keep the soil moist and place the pot in a sunny spot.
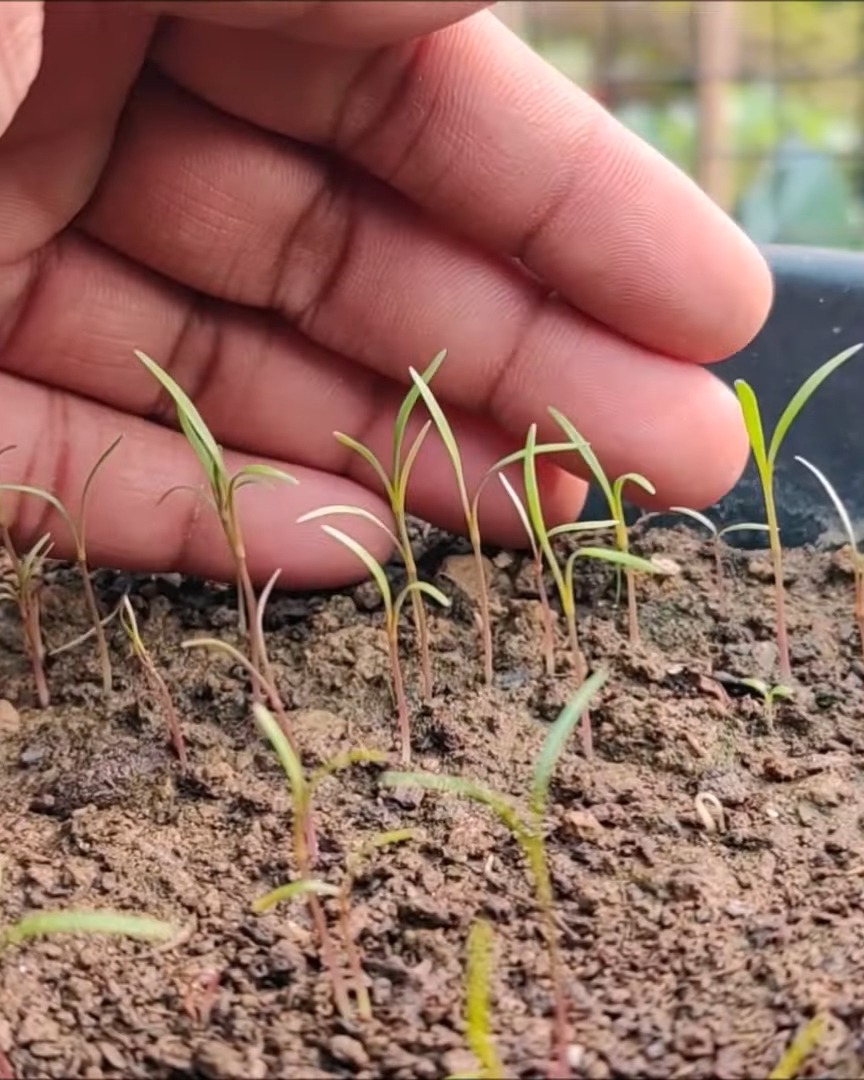
Seeds usually germinate in 5–8 days.
Light and Water Needs
Day 22:
Day 36:
Once they grow, I make sure my thyme gets 5–7 hours of sun daily. I only water at the base and avoid the leaves.
Day 56:
Harvesting Thyme
Thyme is ready in 70–90 days.
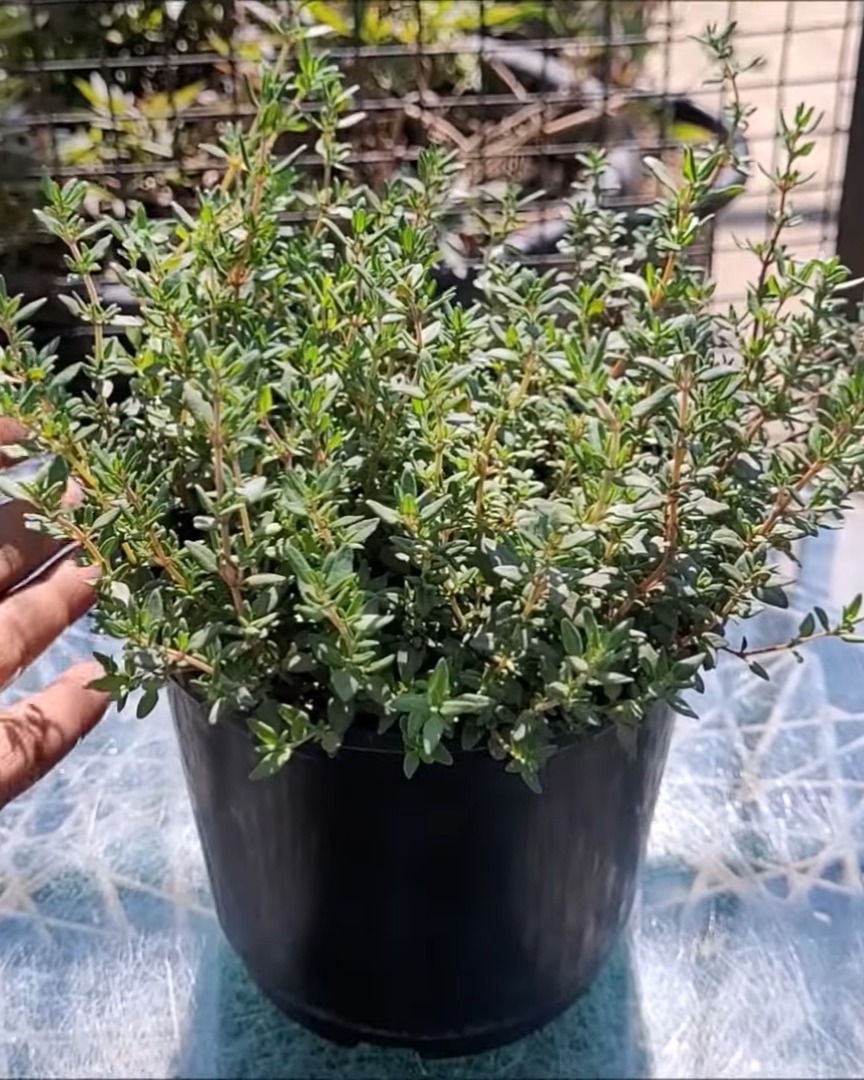
I harvest by pinching off the outer stems and leaves, but I always leave some for the plant to keep growing.
Bonus: In spring and summer, thyme blooms with tiny pink, lavender, or white flowers—and bees love them!
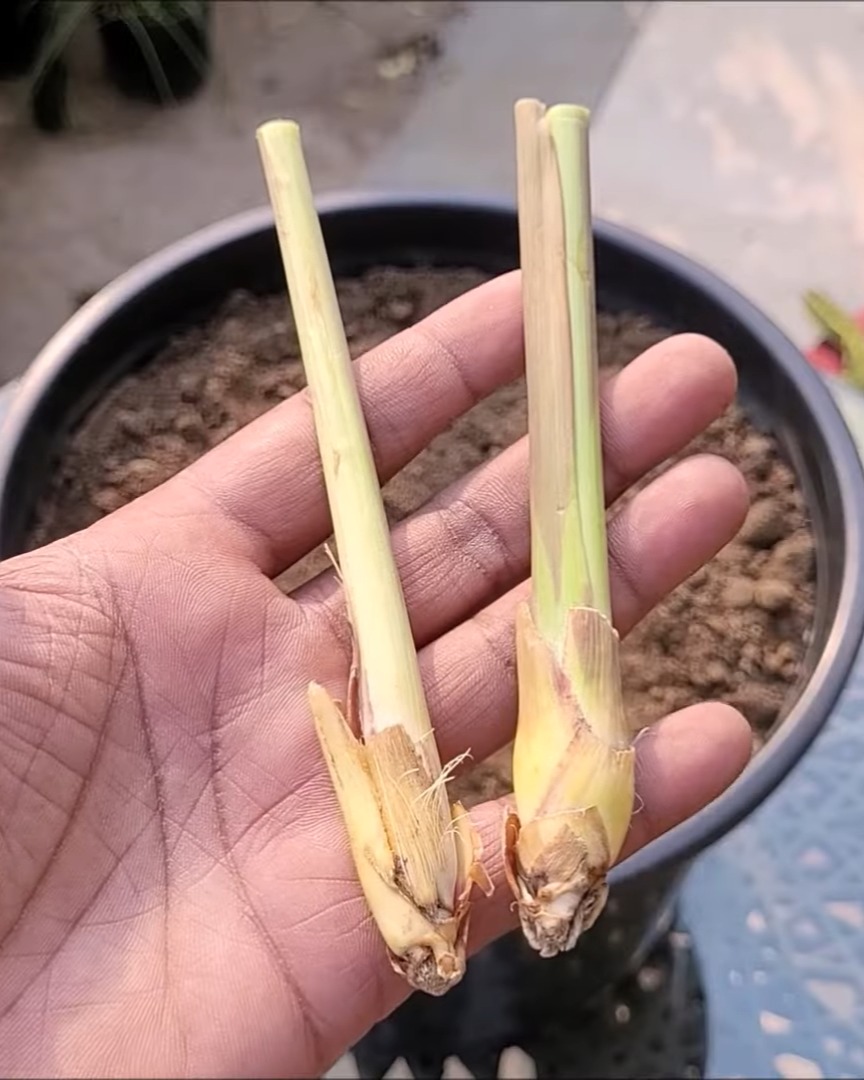
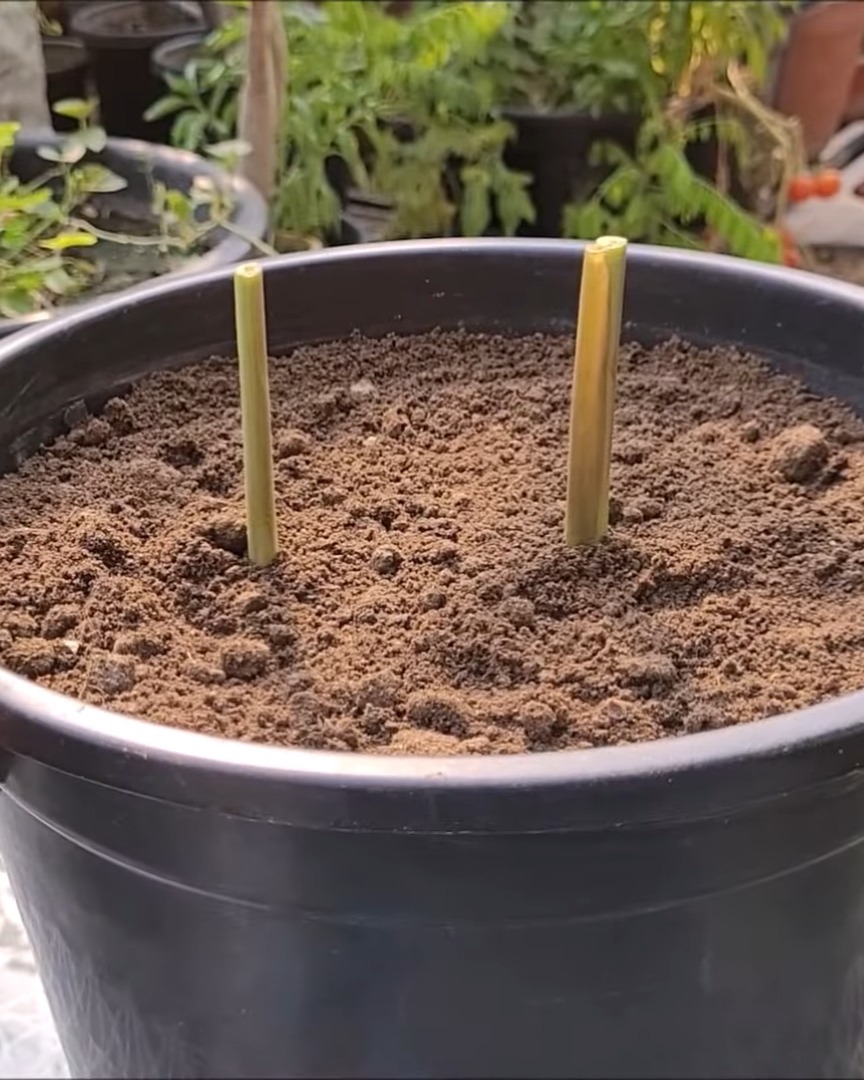
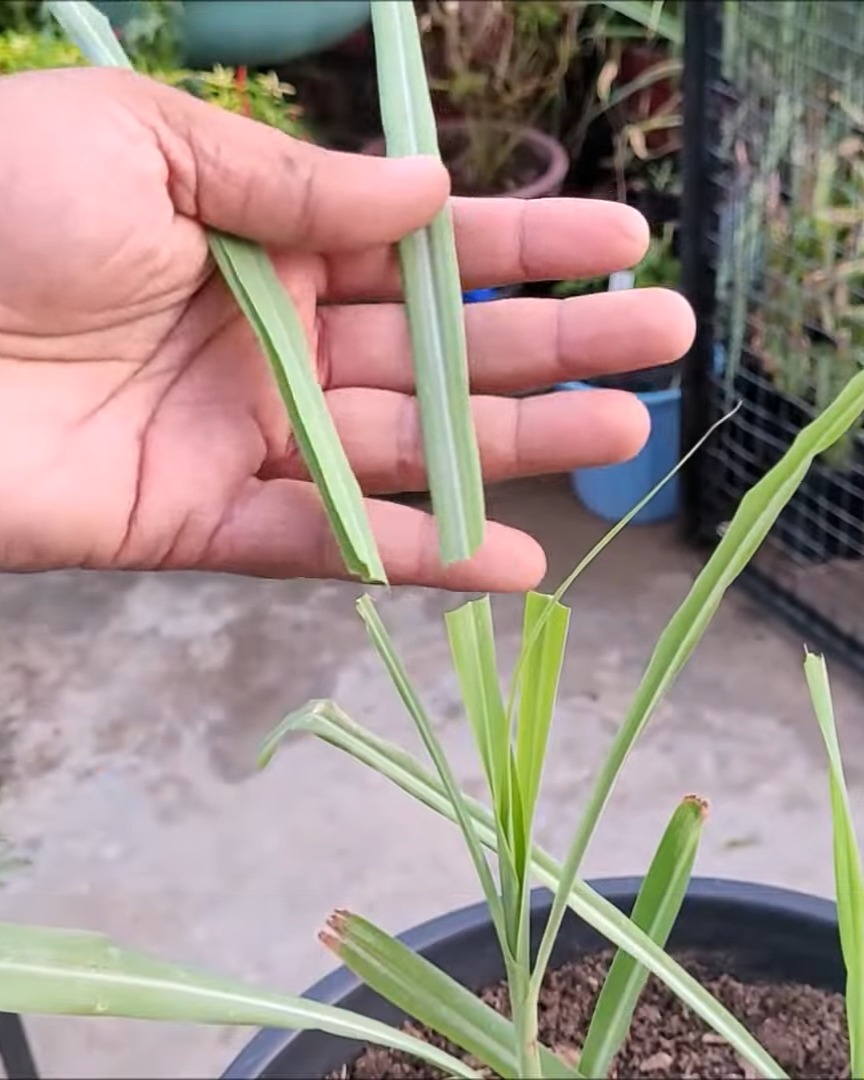
3. Lemongrass
Lemongrass is fragrant and grows beautifully from stalks—no seeds needed!
Start with Store-Bought Stalks
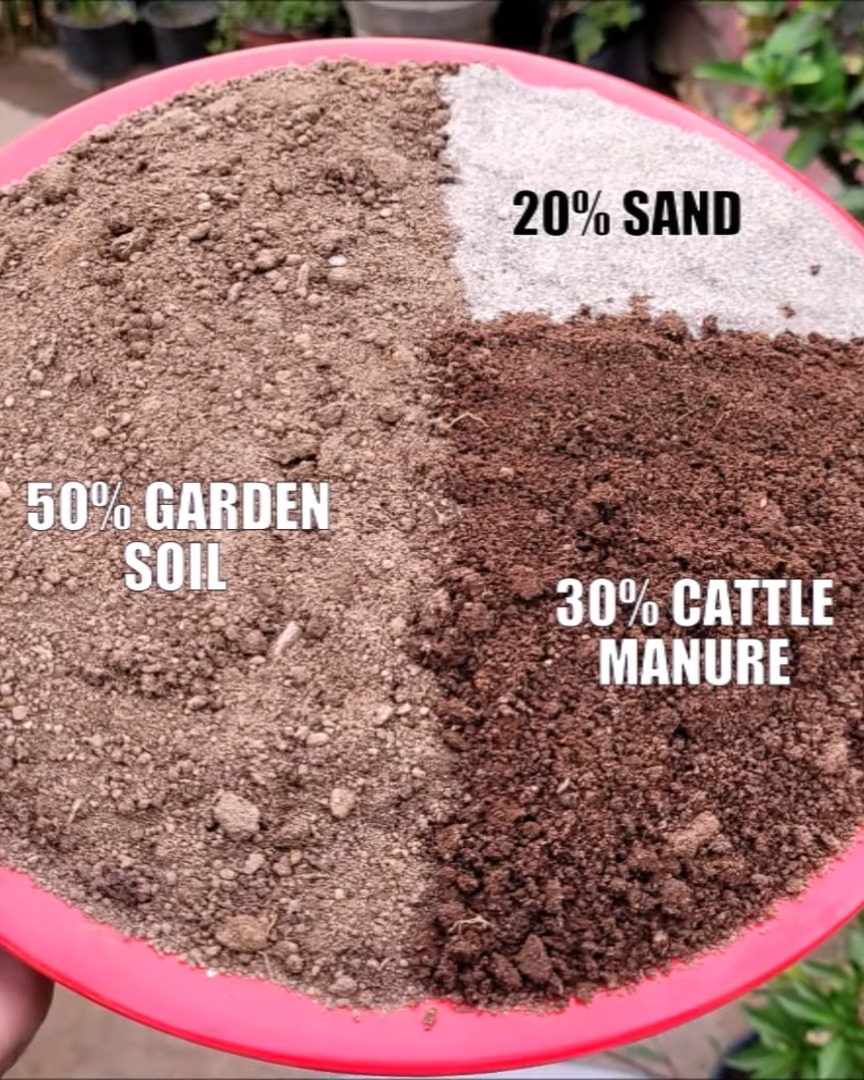
I pick stalks from the market that are fresh, not moldy or dried. For planting, I use a medium pot (12 inches wide, 15 inches deep) with drainage holes.
I mix:
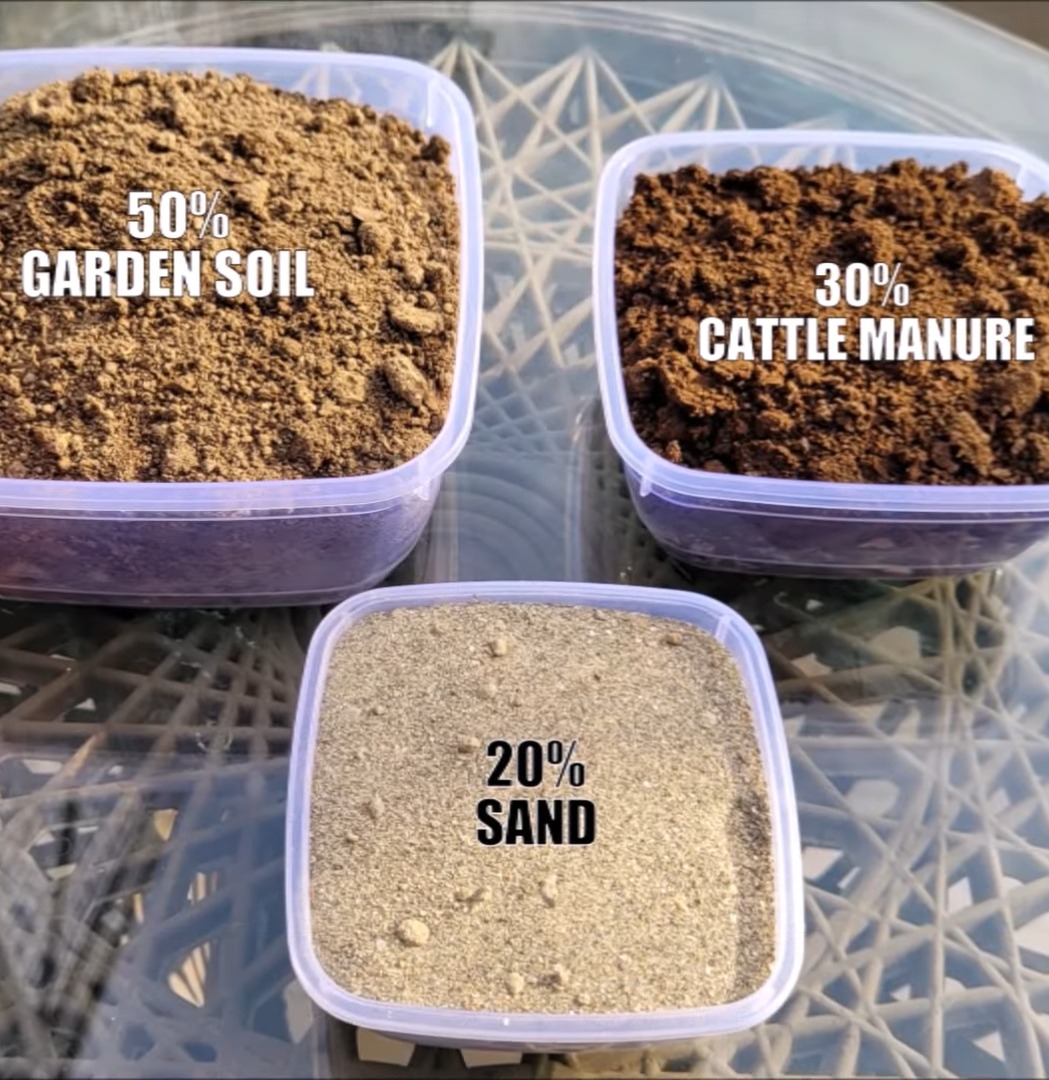
- 50% garden soil
- 30% cattle manure
- 20% river sand
I trim the upper part of the stalks for cooking and plant the base (3–4 inches long) about 2–3 inches deep.
I press the soil around them and water thoroughly.
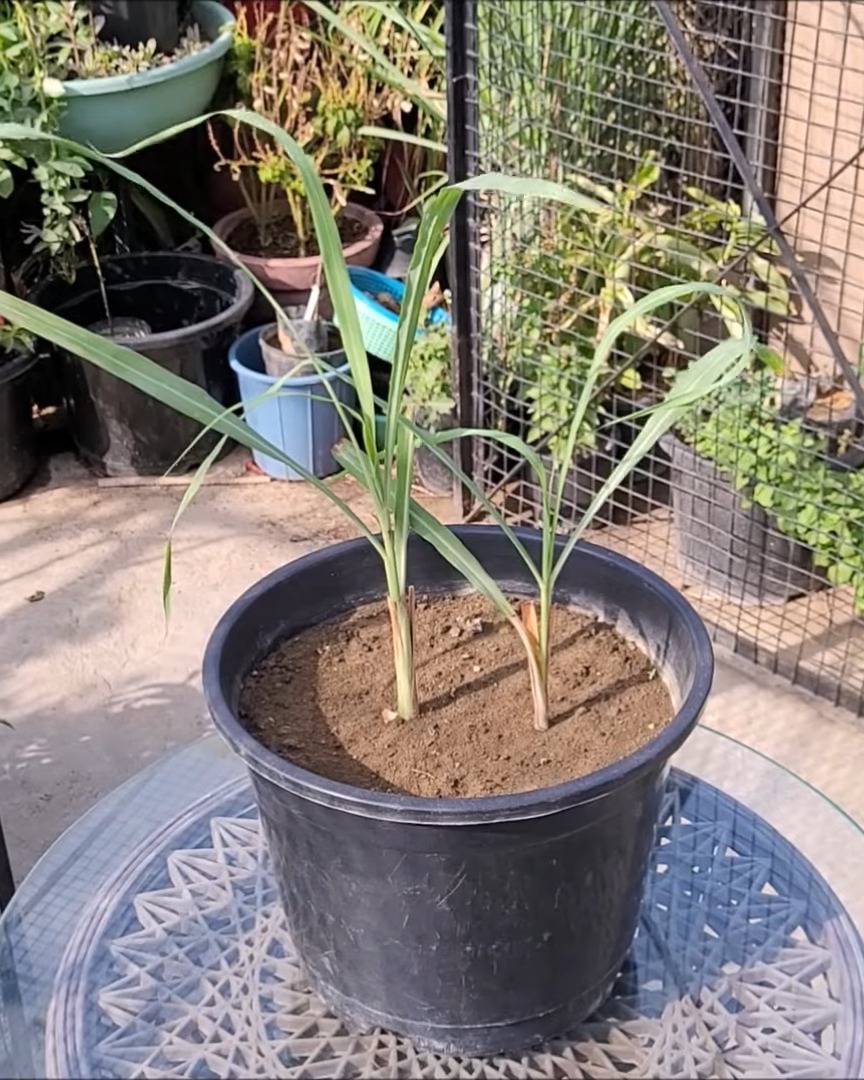
Sunlight and Fertilizing
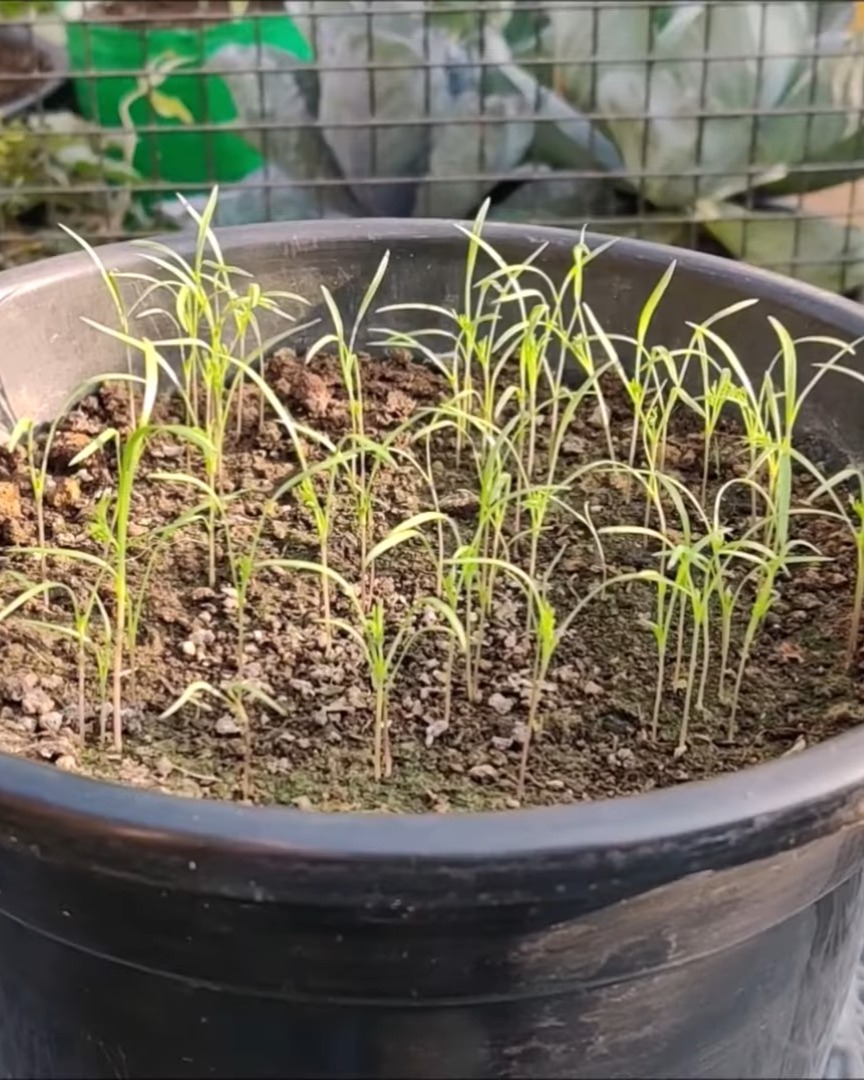
In 7–8 days, I usually see new leafy growth. Lemongrass loves sun, so I place it outside where it gets 5–7 hours of direct light.
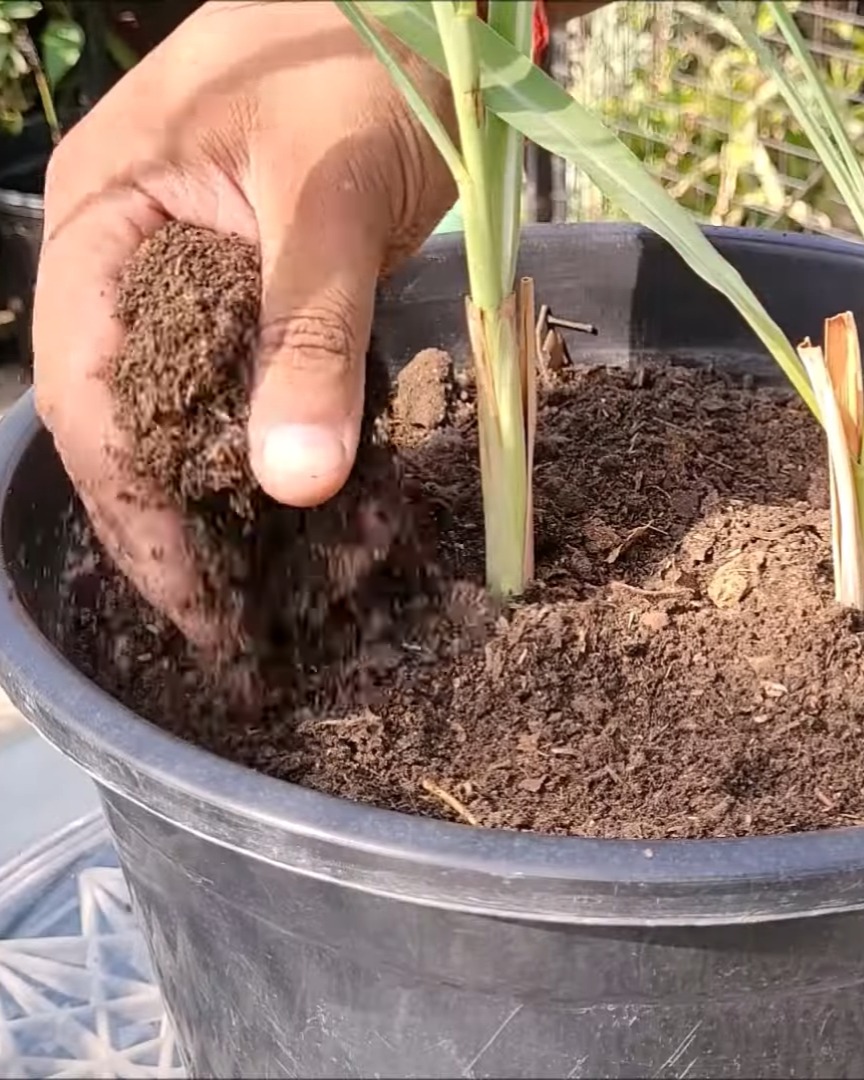
This plant drinks a lot of water, so I make sure the soil never dries out. Once it’s established, I feed it cattle manure or vermicompost every 18–20 days.
Day 28:
I mix it well into the soil and water right after.
How I Harvest
Day 35:
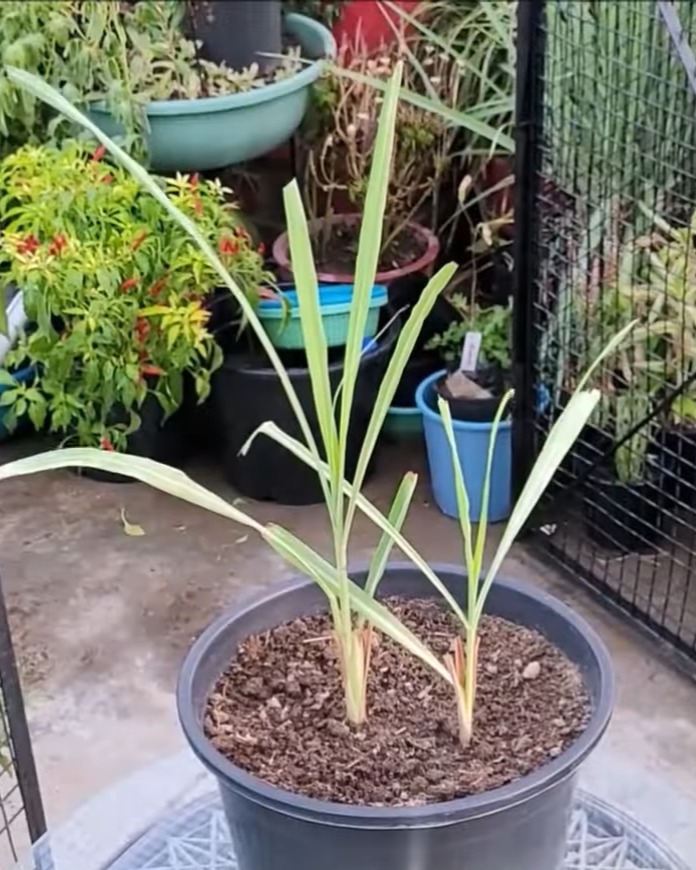
I cut the top 4–6 inches of growth, but leave plenty on the plant for regrowth. Lemongrass has a strong citrus taste—perfect for teas and soups!
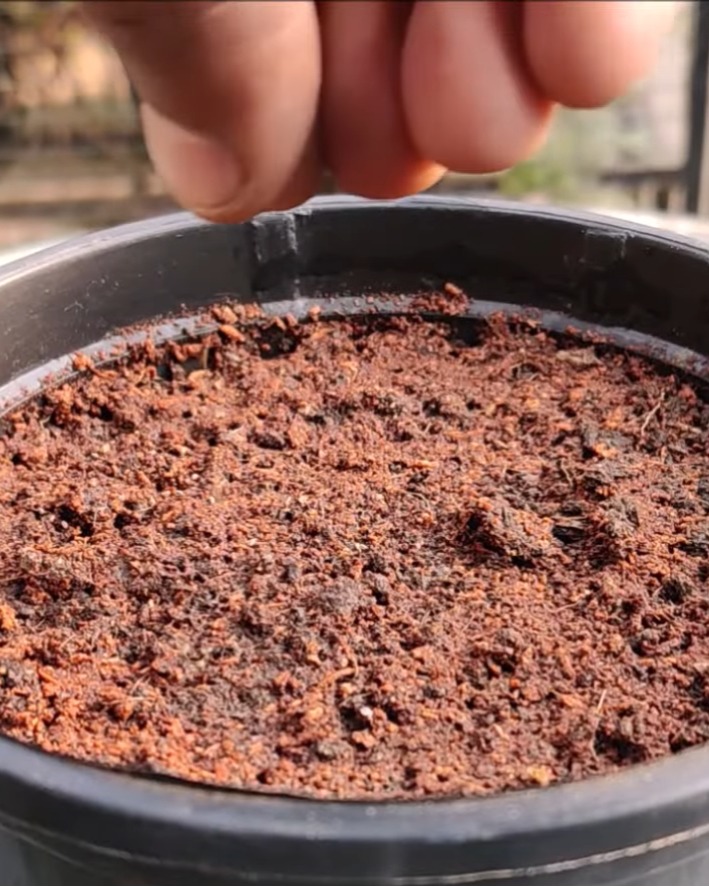
4. Celery
Celery can be tricky with its tiny seeds, but once it grows, it’s worth it!
Getting Started
I use a seed starting mix made from:
- 40% garden soil
- 30% cocopeat
- 30% vermicompost
After moistening the soil, I sprinkle the seeds on top and cover them very lightly. Too much soil can block their growth!
I water gently and wait 8–10 days for them to sprout.
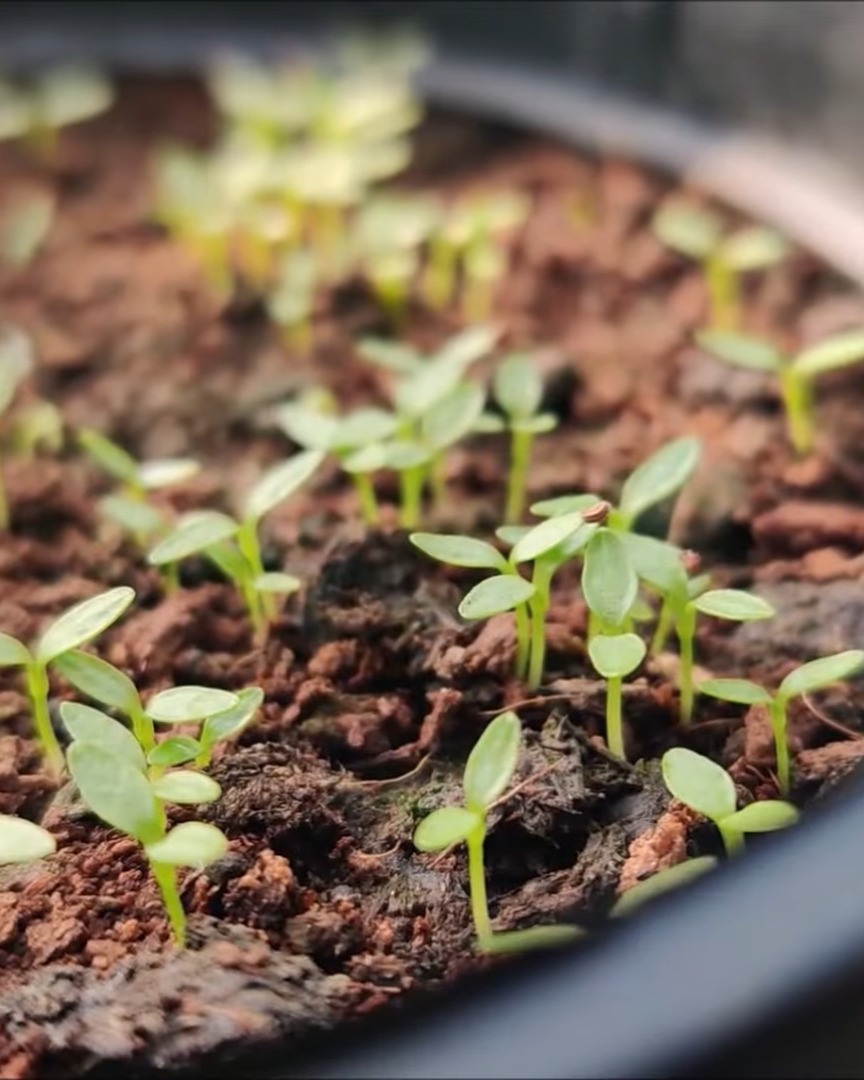
Celery loves mild weather, so I grow it in spring or autumn.
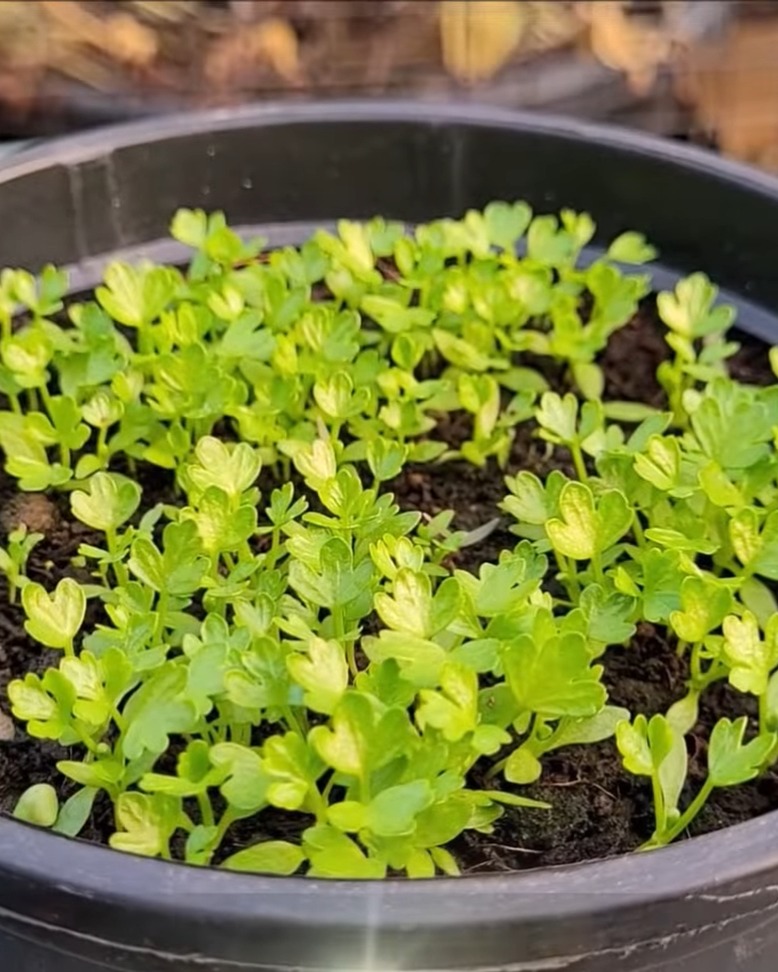
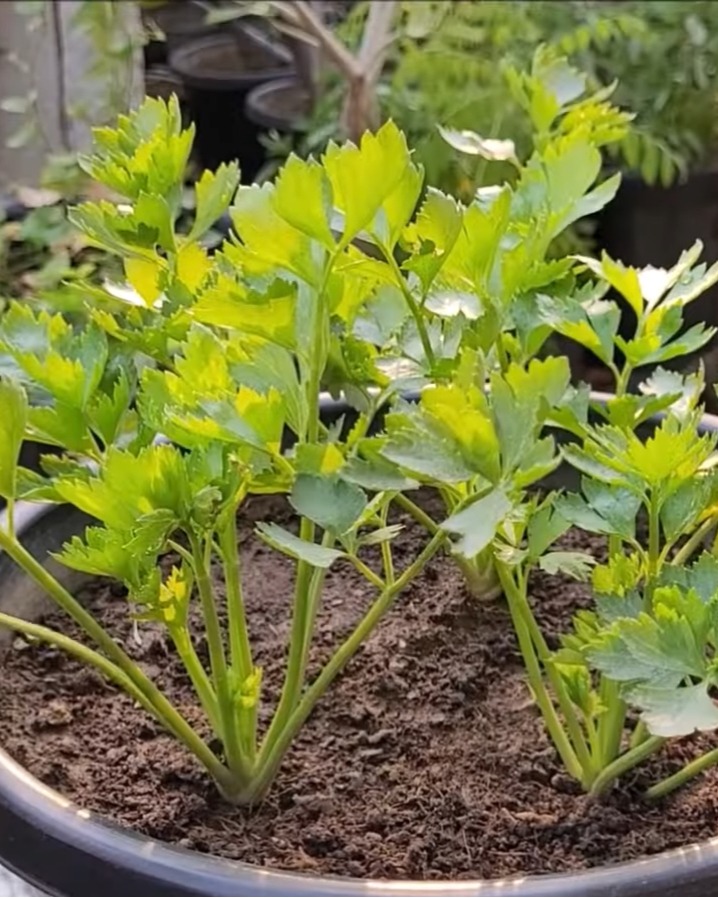
Day 30:
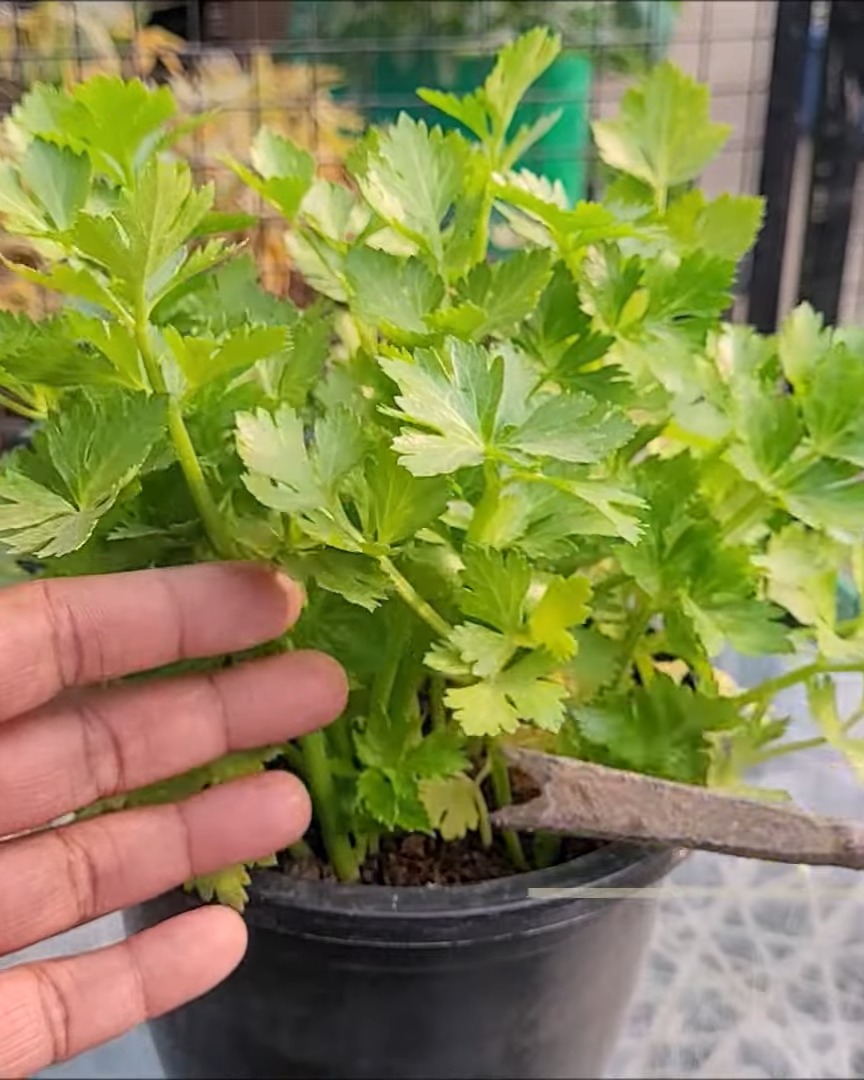
Once the seedlings reach 4–6 inches tall, I transplant them.
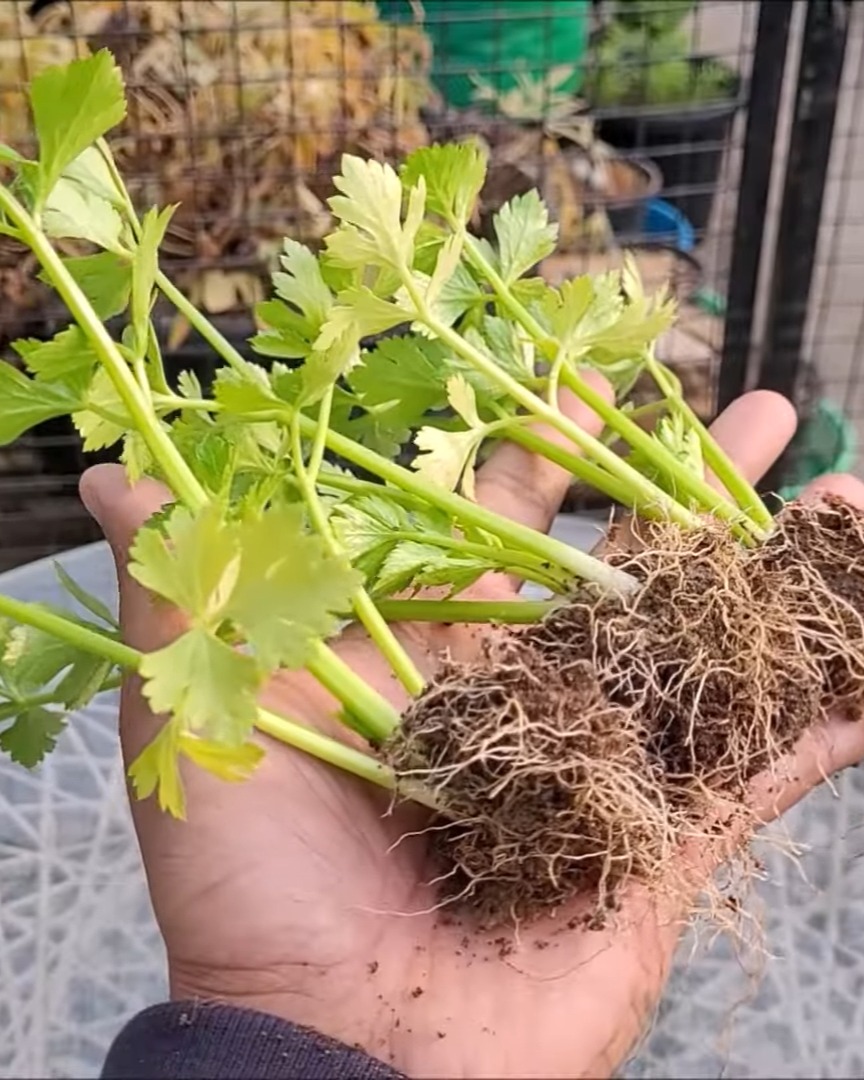
Transplanting Celery
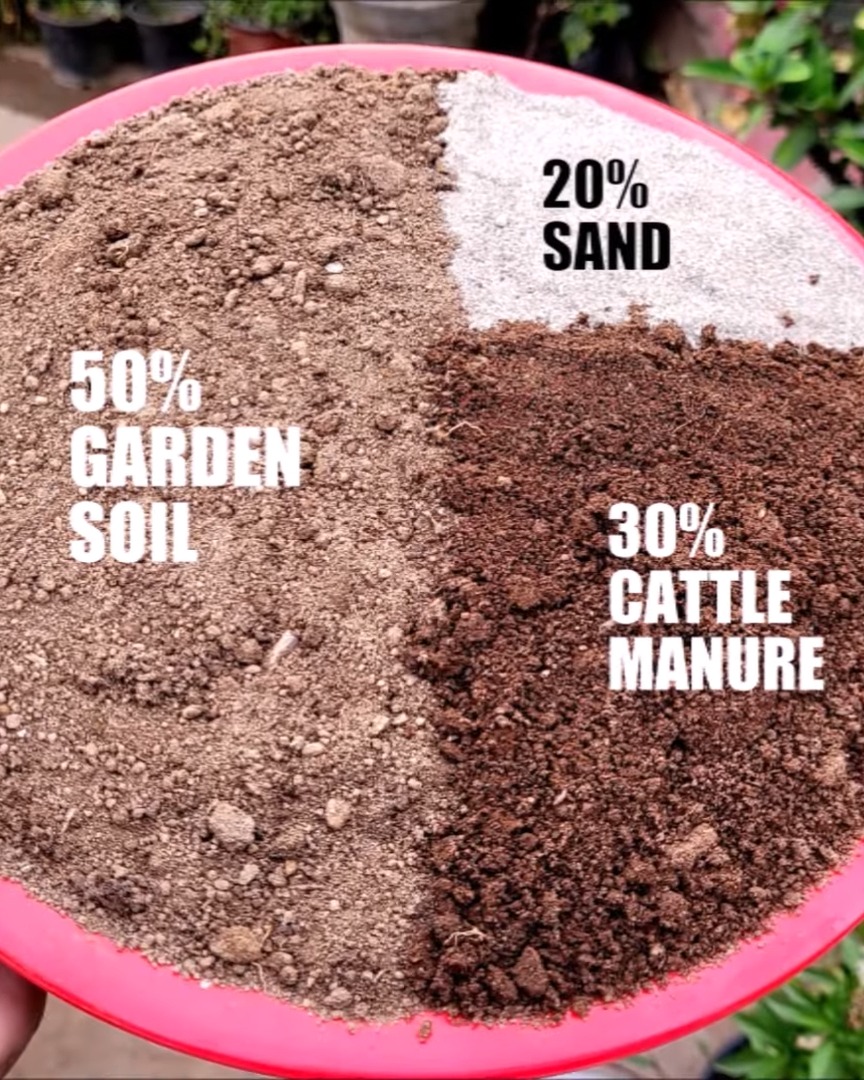
For the final mix, I use:
- 50% garden soil
- 30% cattle manure
- 20% river sand
I dig holes just big enough for the root ball. I space the plants 4–6 inches apart in a 12-inch pot and water well.
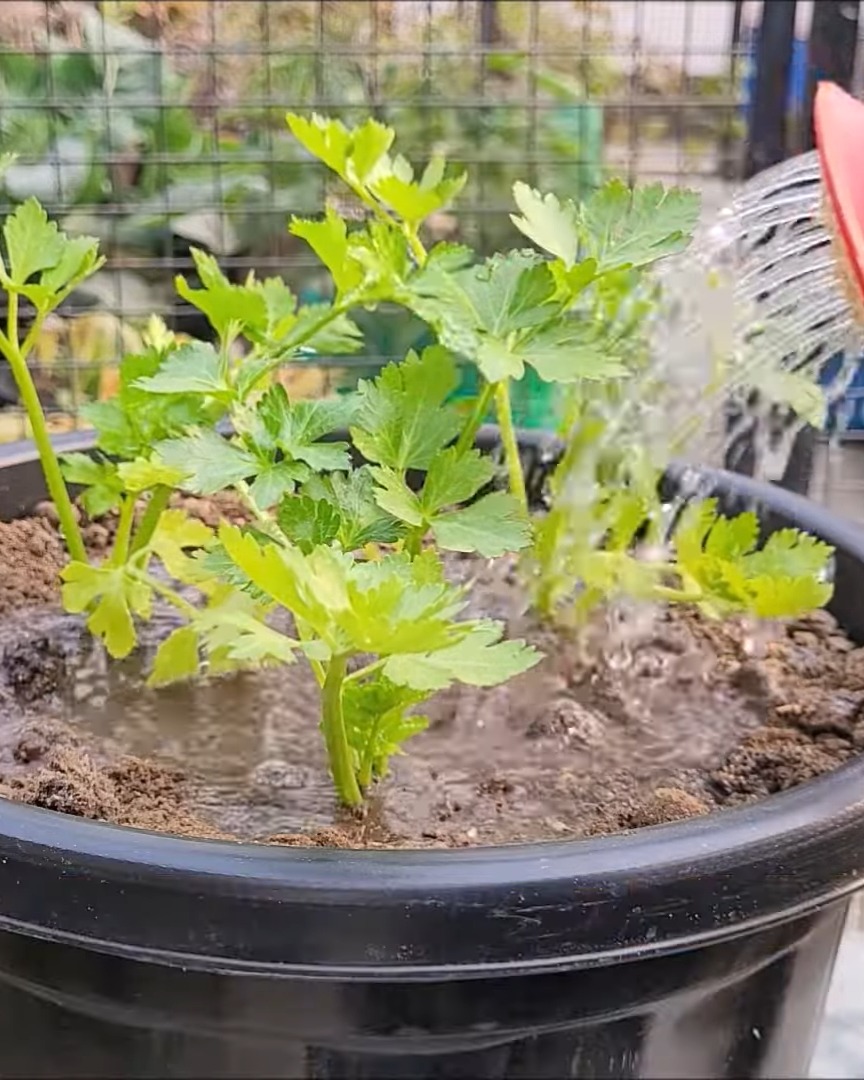
Growth and Feeding
Day 72:
Celery needs 6–8 hours of sunlight.
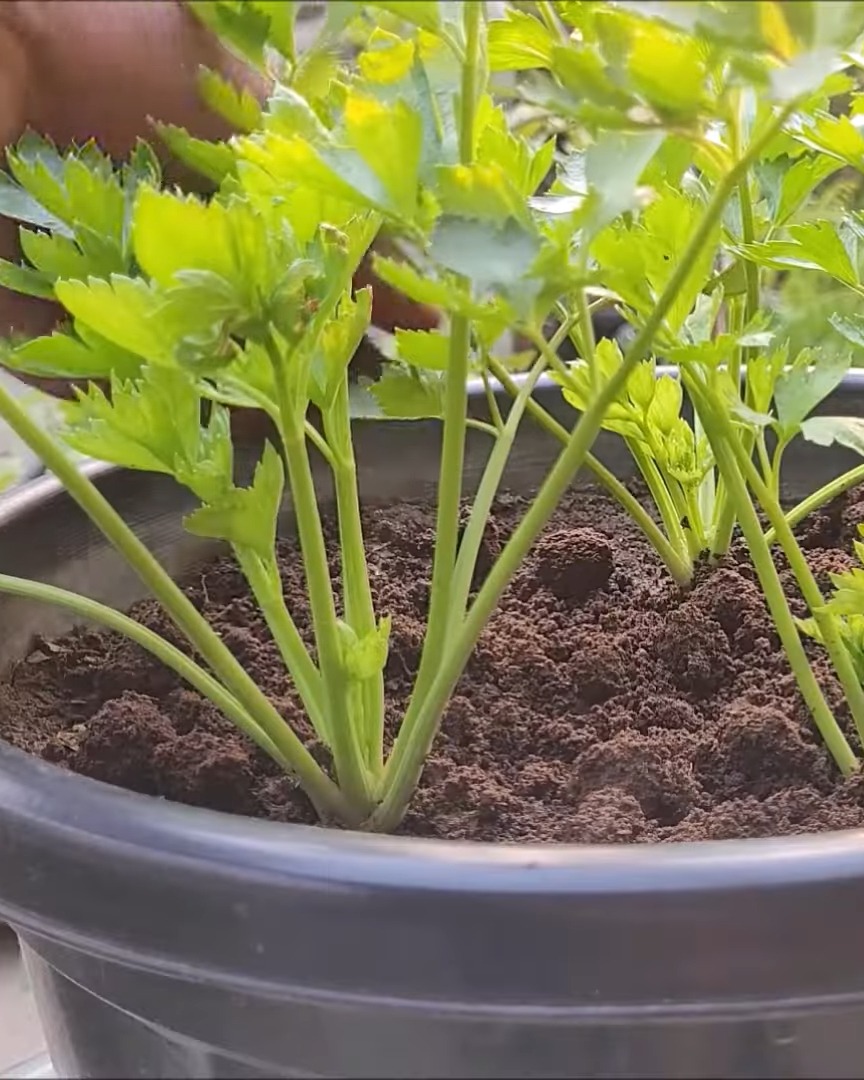
It also requires rich, moist soil. I feed cattle manure every 15 days to support their heavy growth.
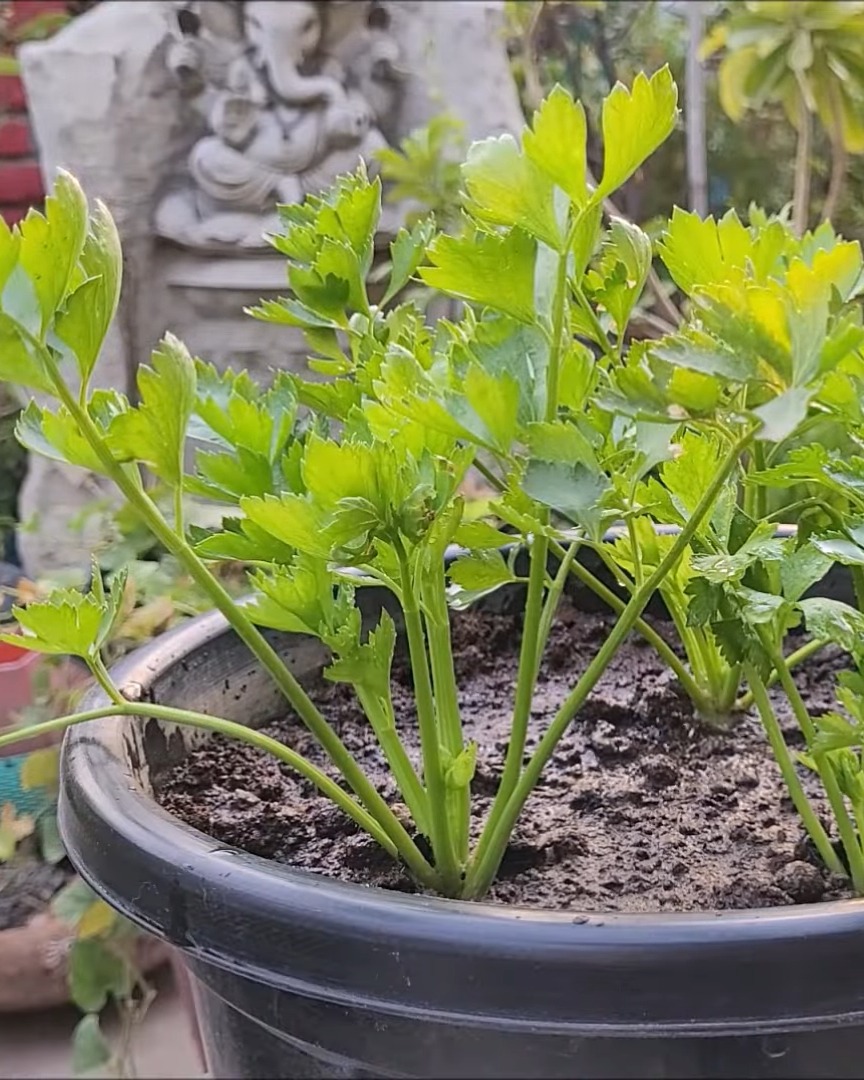
Harvesting
Day 110:
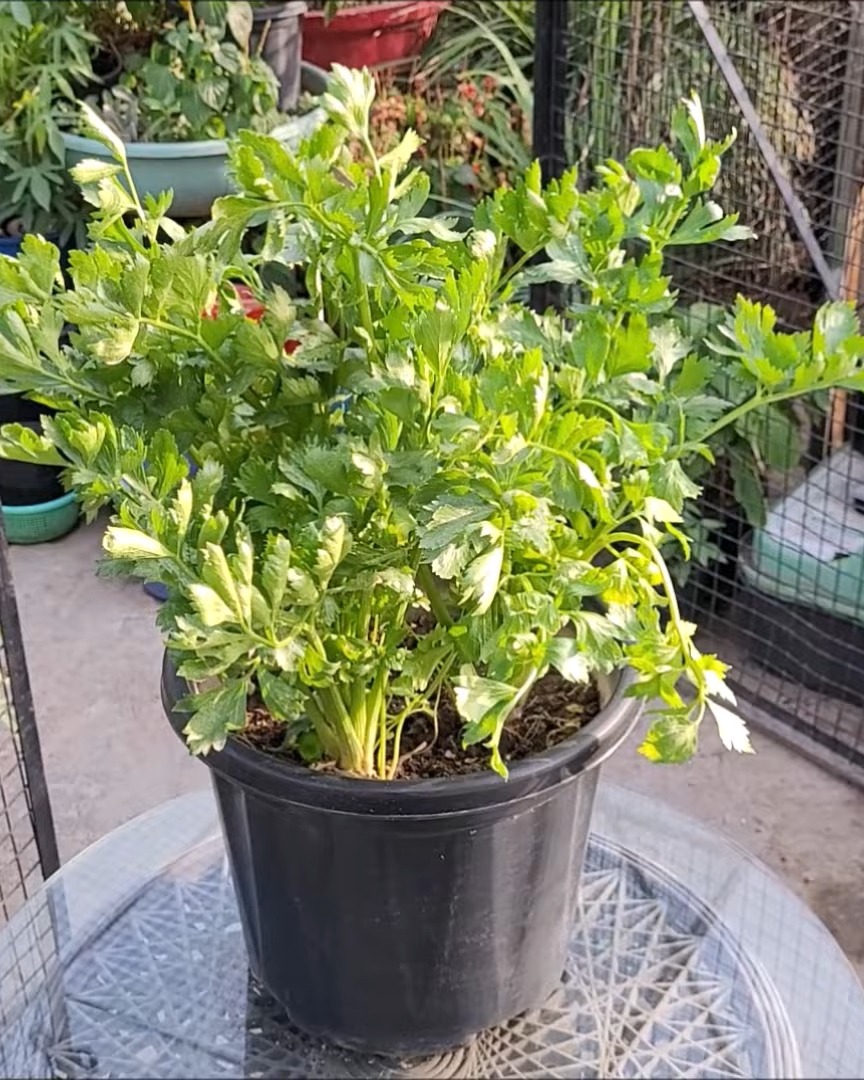
I never pull the whole plant! I take outer stalks when they’re pencil-thick using a down-and-out motion.
The leaves and even roots are edible, too!
5. Chives
Chives are so easy—they practically grow themselves!
Soil and Pot Prep
I use a 7–8 inch pot and fill it with:
- 50% garden soil
- 30% cattle manure
- 20% river sand
I moisten the soil and scatter the seeds evenly. Then, I lightly cover them and press the surface gently.
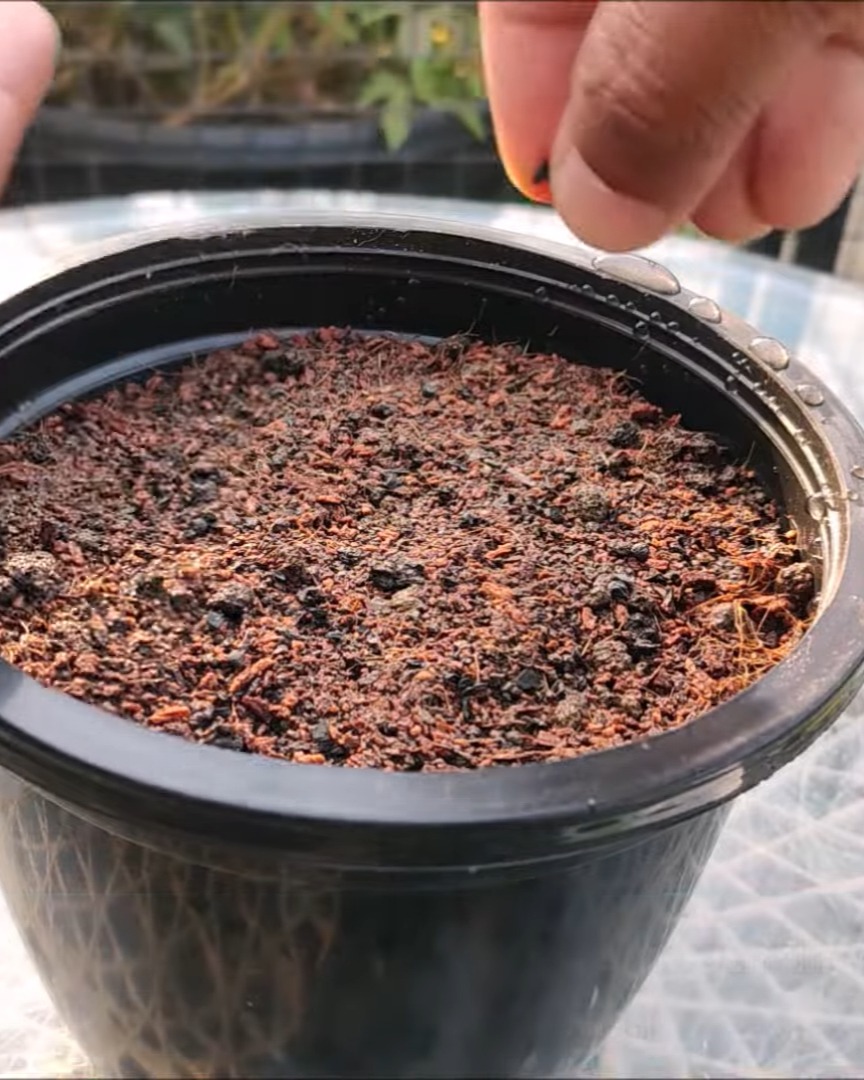
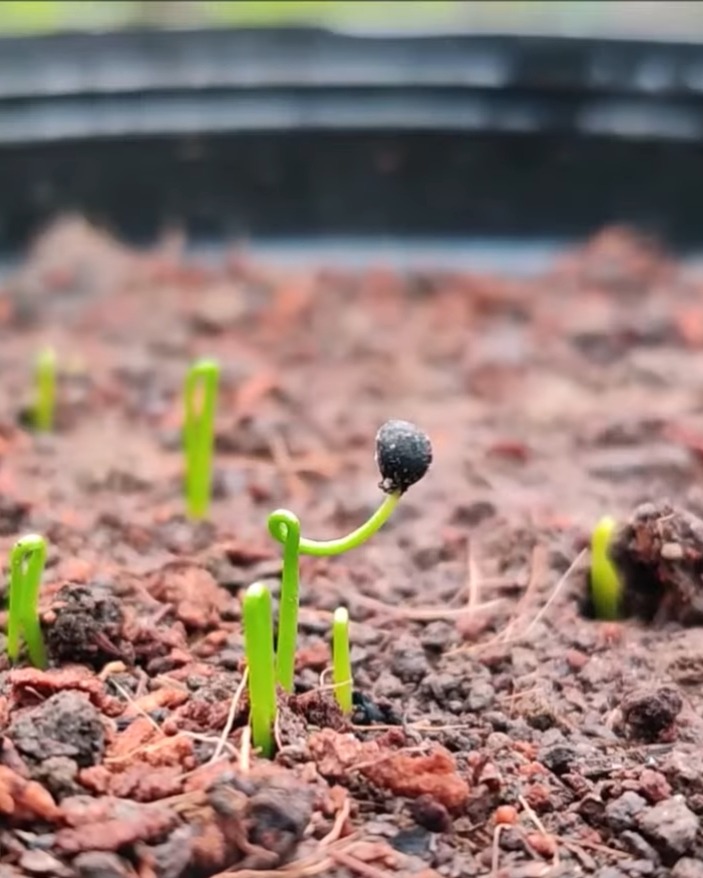
Watering is key here—I use a soft spray so the seeds don’t move. Chives sprout in 7–8 days.
Growing and Harvesting
Day 13:
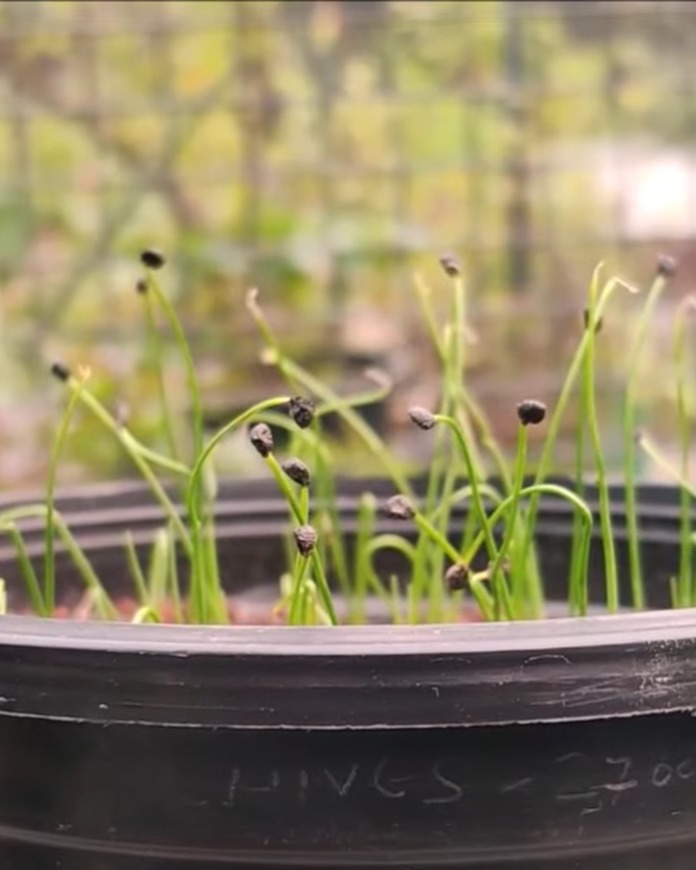
Day 21:
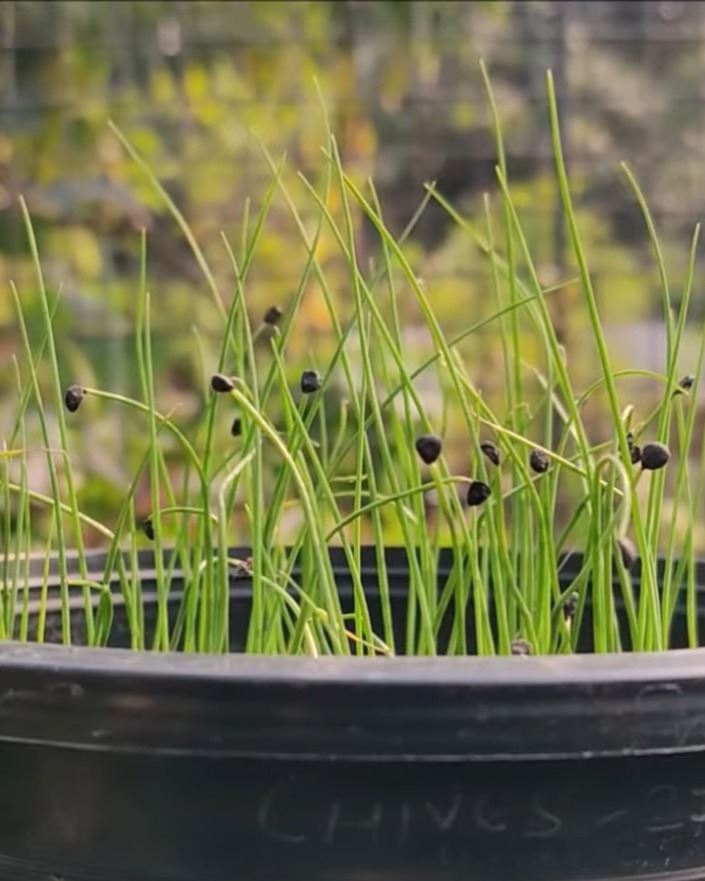
Day 38:
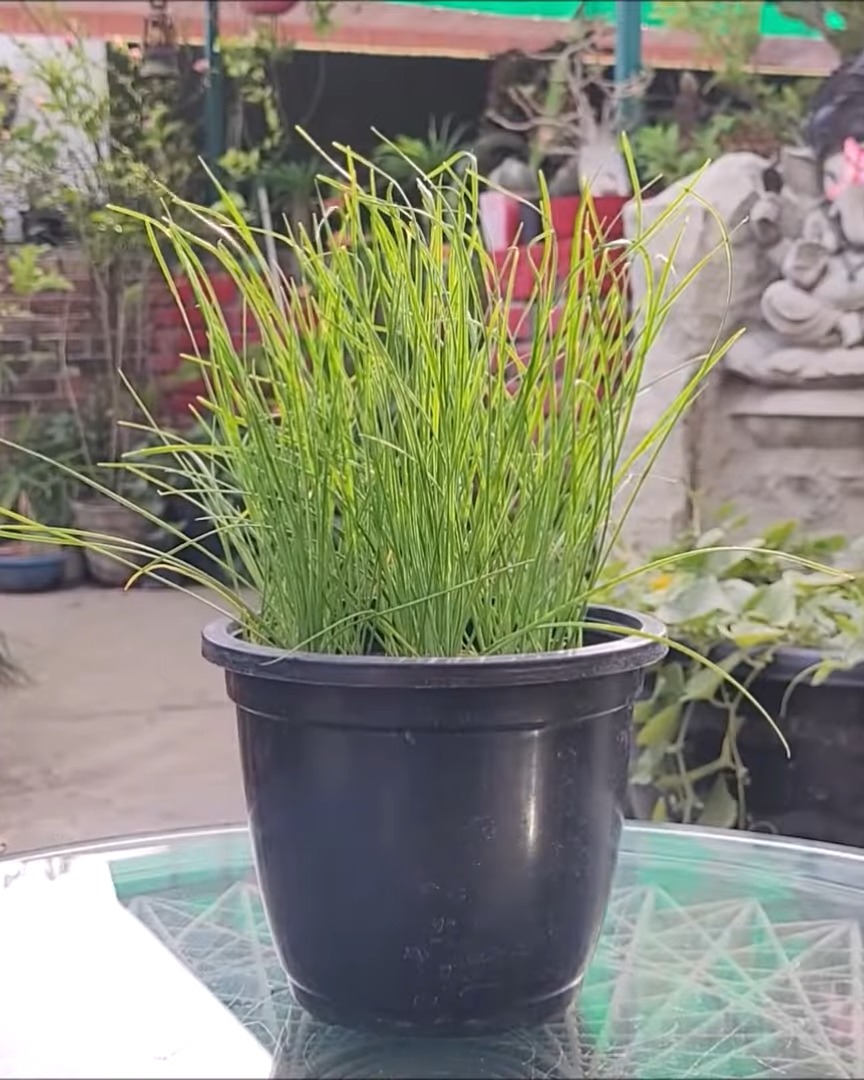
Chives grow in full sun or partial shade. If the summer gets too hot, I give them some afternoon shade.
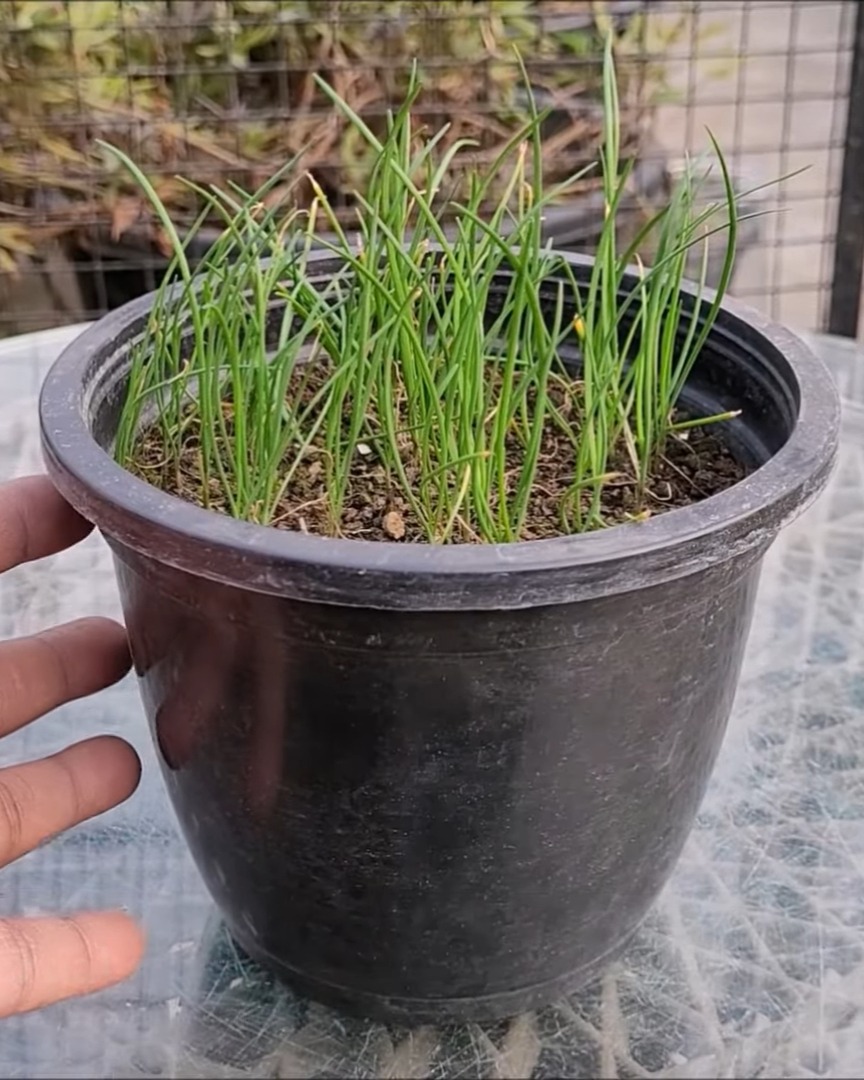
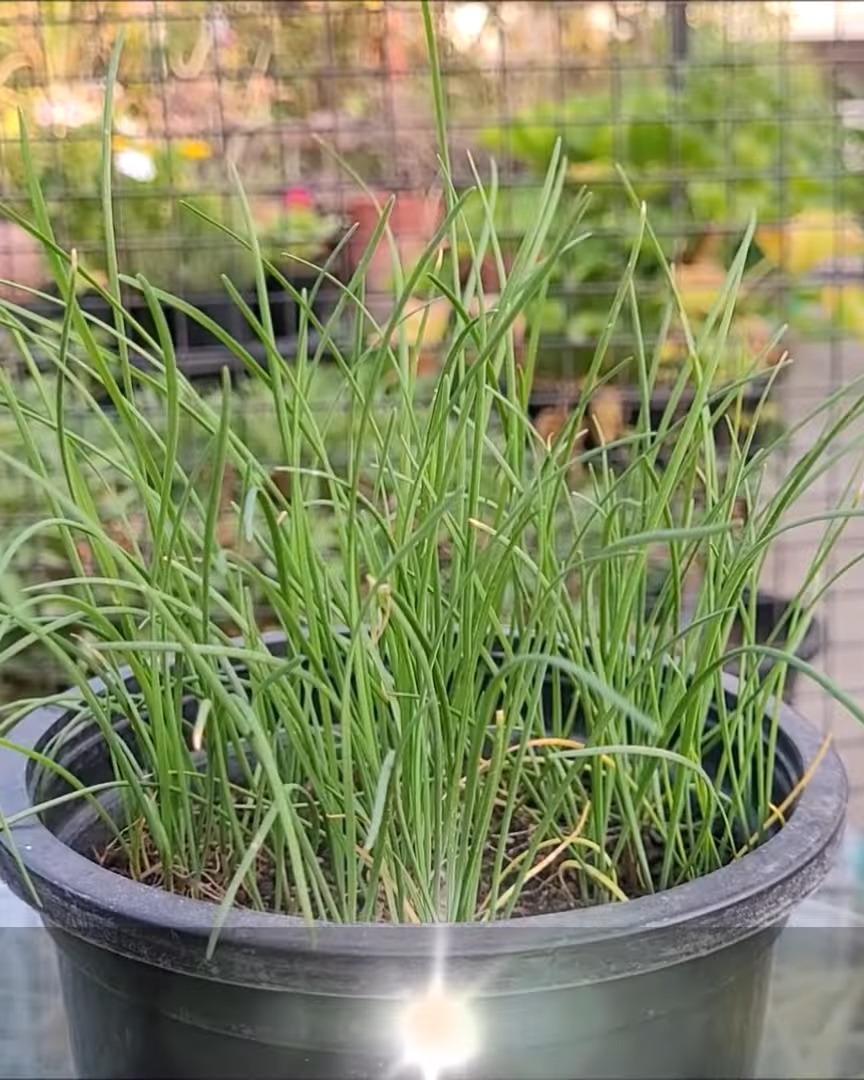
Once the plant is established, it needs little care. I cut the stalks with clean scissors every 60–90 days. The new shoots grow from the center, so I always leave that part untouched.
Day 60:
Day 90:
I add chives to salads, soups, stews, and even baked potatoes—delicious!
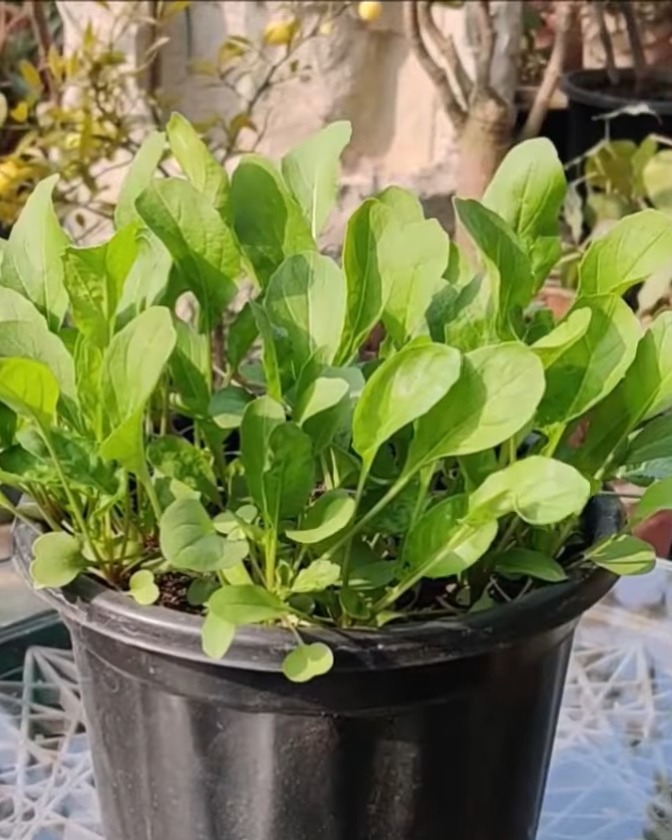
6. Rocket (Arugula)
Rocket grows super fast. No wonder they call it rocket!
Sowing and Soil
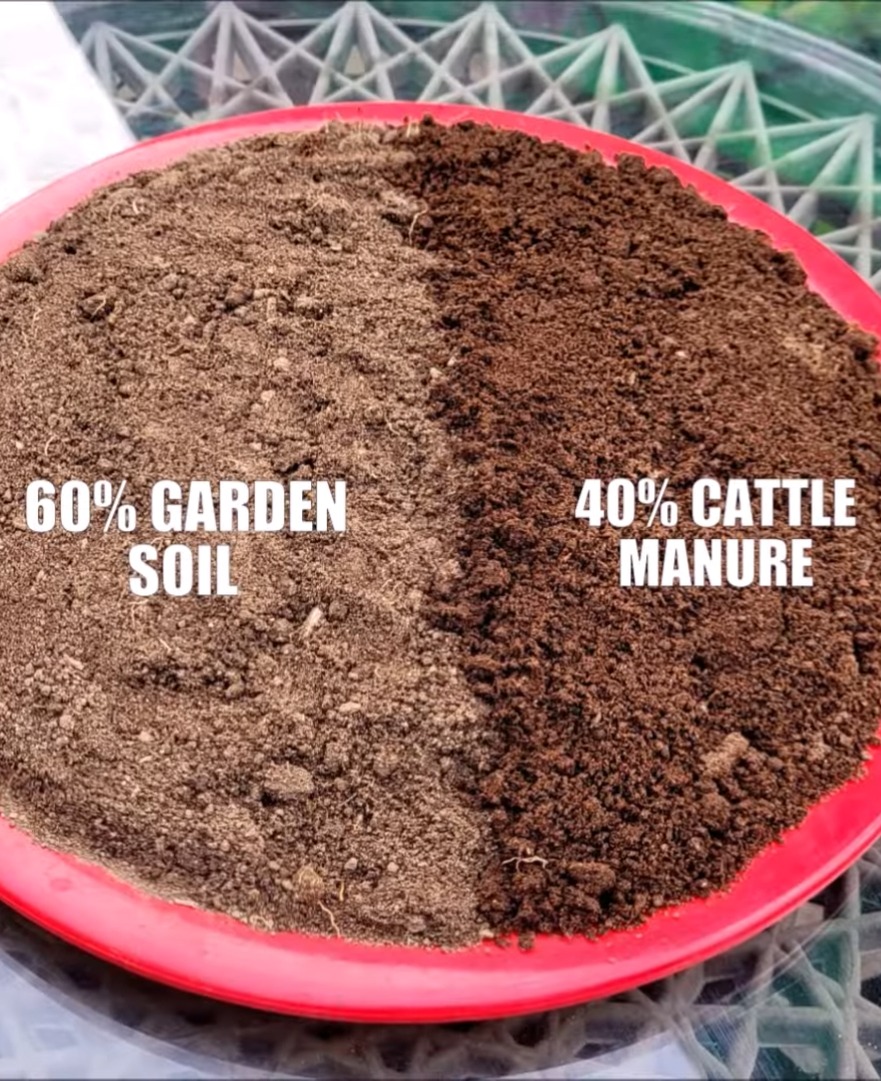
I use:
- 60% garden soil
- 40% cattle manure
Moisten the soil before sprinkling seeds. After sowing, I cover them with a light layer of soil and press gently. Then I water well.
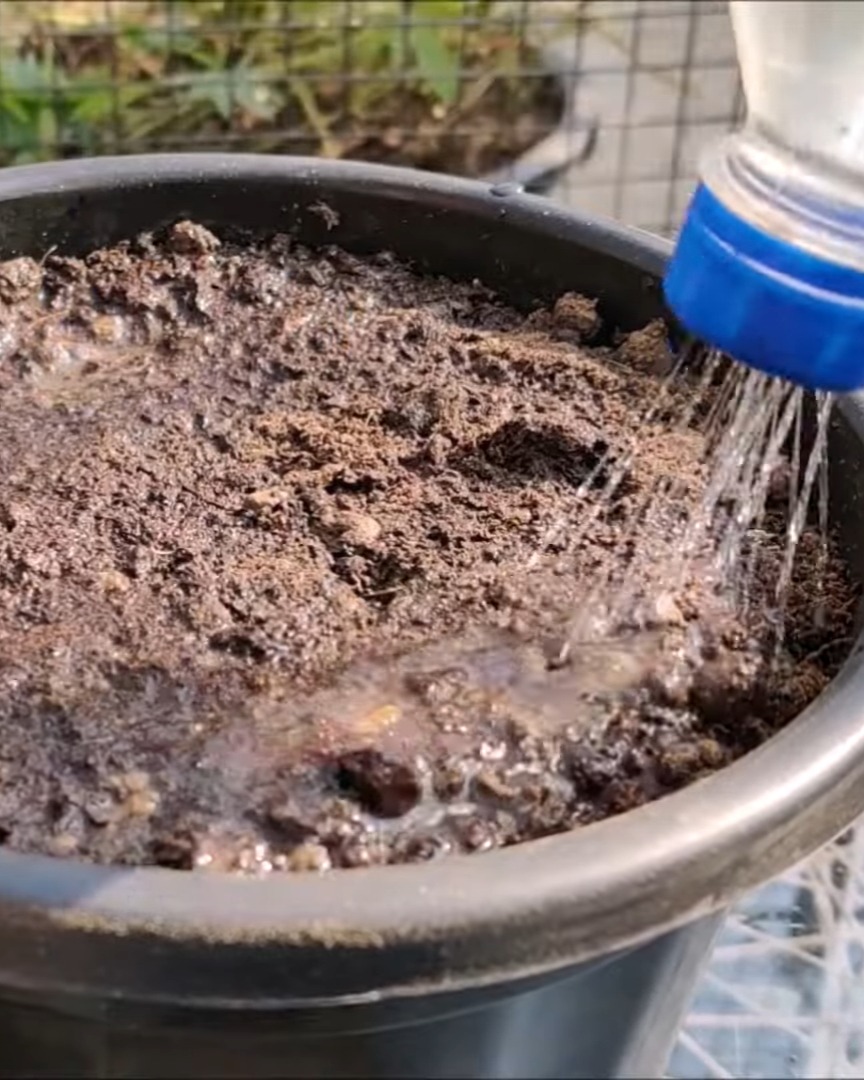
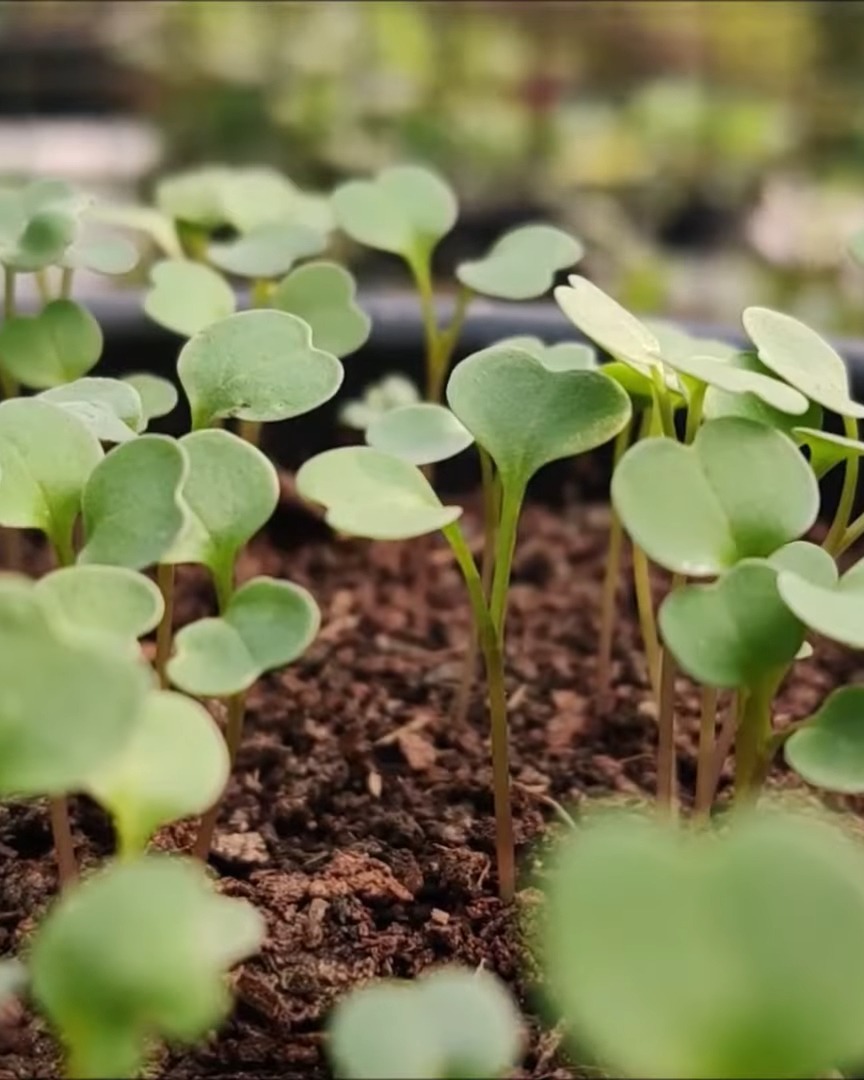
Rocket likes full sun and moist soil. It germinates quickly, and I thin out overcrowded seedlings when they start growing.
Day 8:
Feeding and Picking
Day 12:
Day 30:
I feed with liquid fertilizer every 12–15 days.
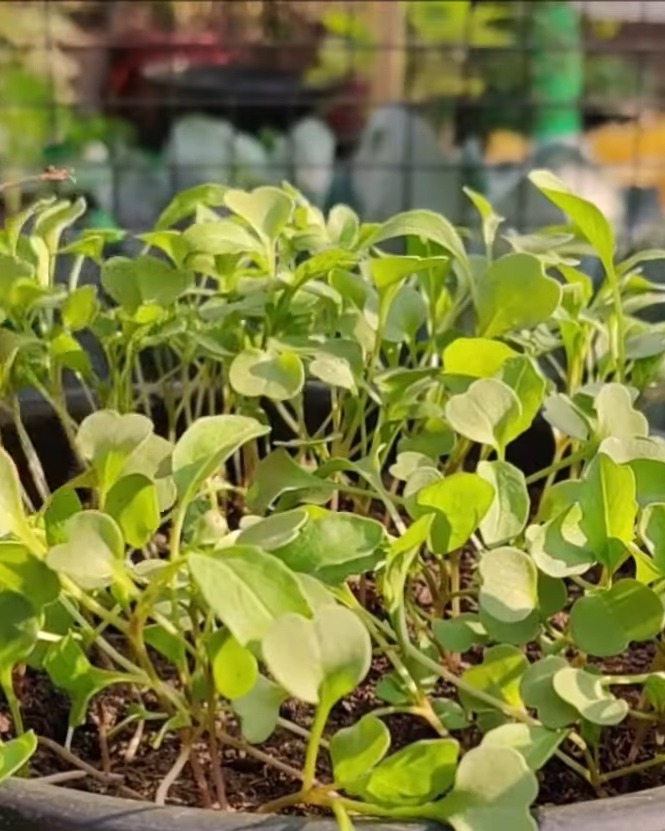
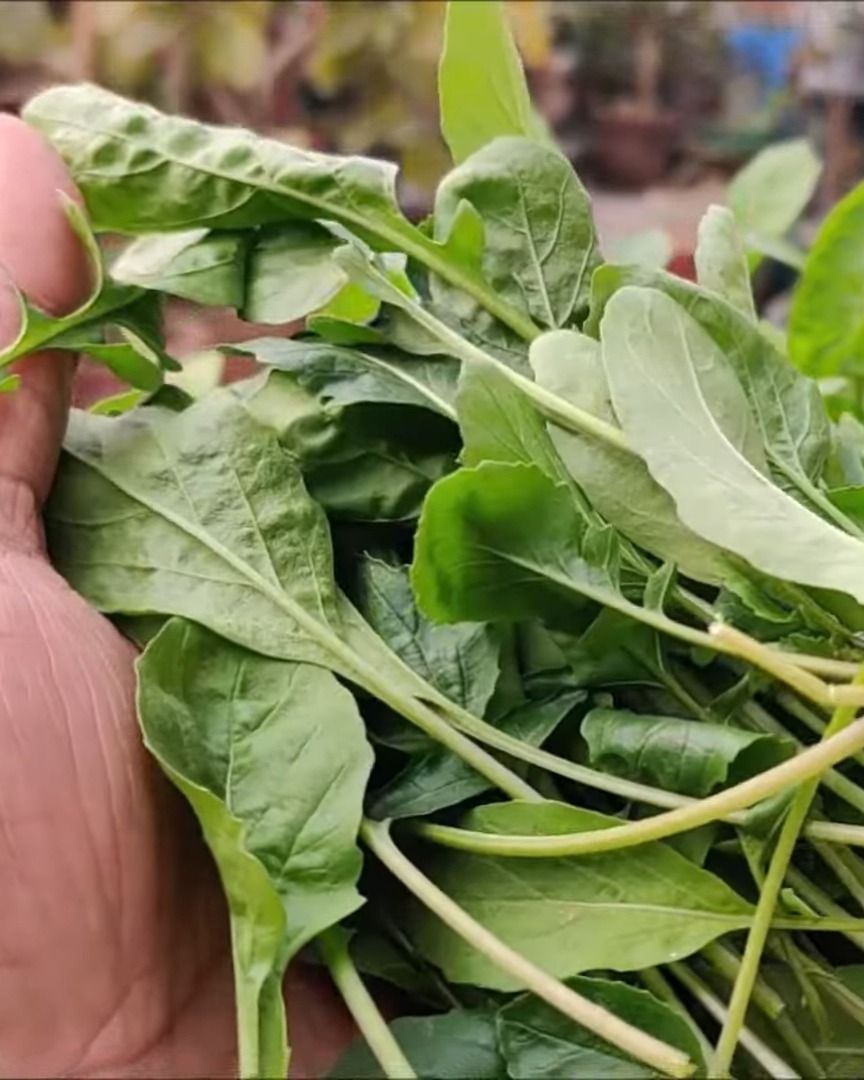
Young leaves (2–4 inches) taste the best—mild and tender!
Day 50:
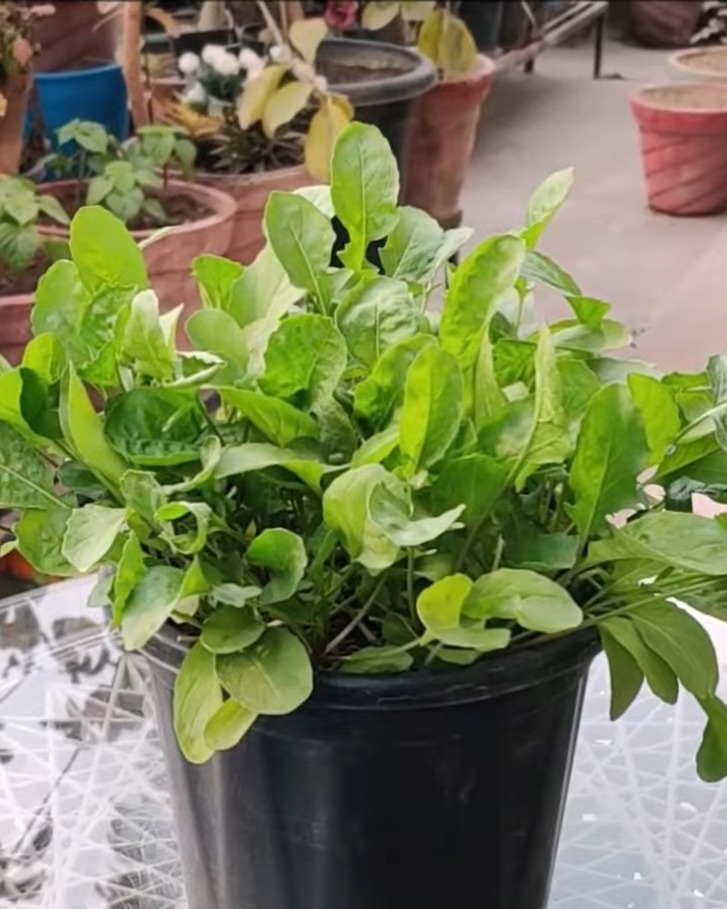
I pick them regularly, and since it’s a cut-and-come-again plant, I get 3–4 harvests per crop. Amazing, right?
7. Mint
Mint is super easy to grow using cuttings!
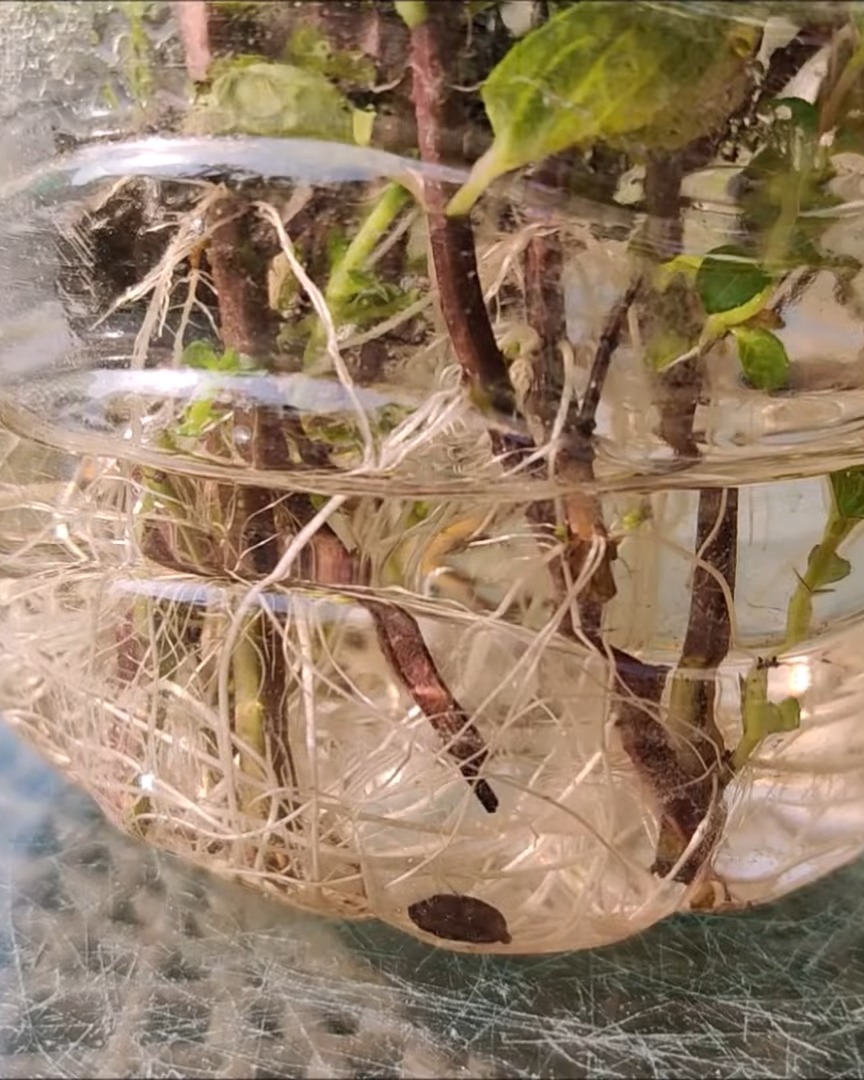
Rooting in Water
I choose 6–8 fresh stems (5–7 inches long) that are green and healthy. I remove the bottom leaves and expose 2–3 nodes.
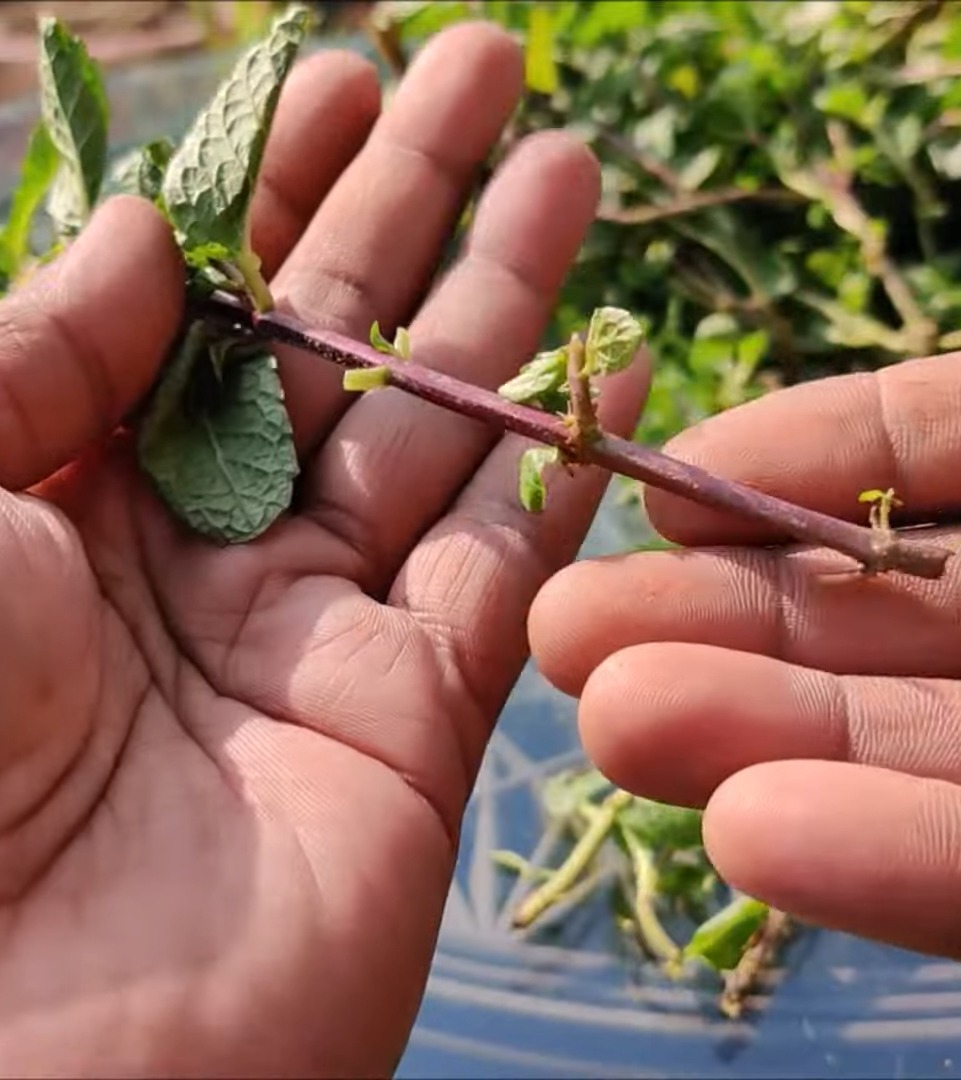
I take a 2-liter soda bottle, cut it in half, and fill the bottom with tap water (about 60–70% full). Then, I place the cuttings inside with the nodes underwater.
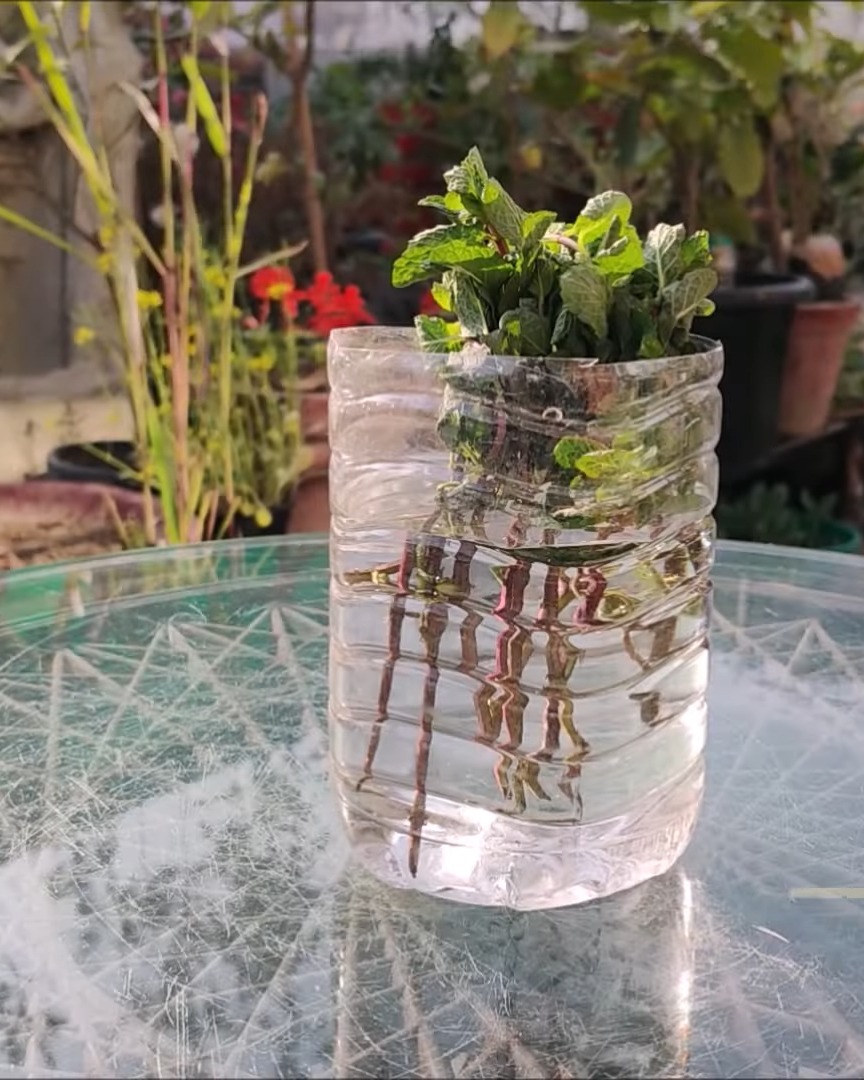
I keep the container in bright, indirect light, not direct sun. I change the water every 5 days. Roots and leaves usually appear in 10–12 days.
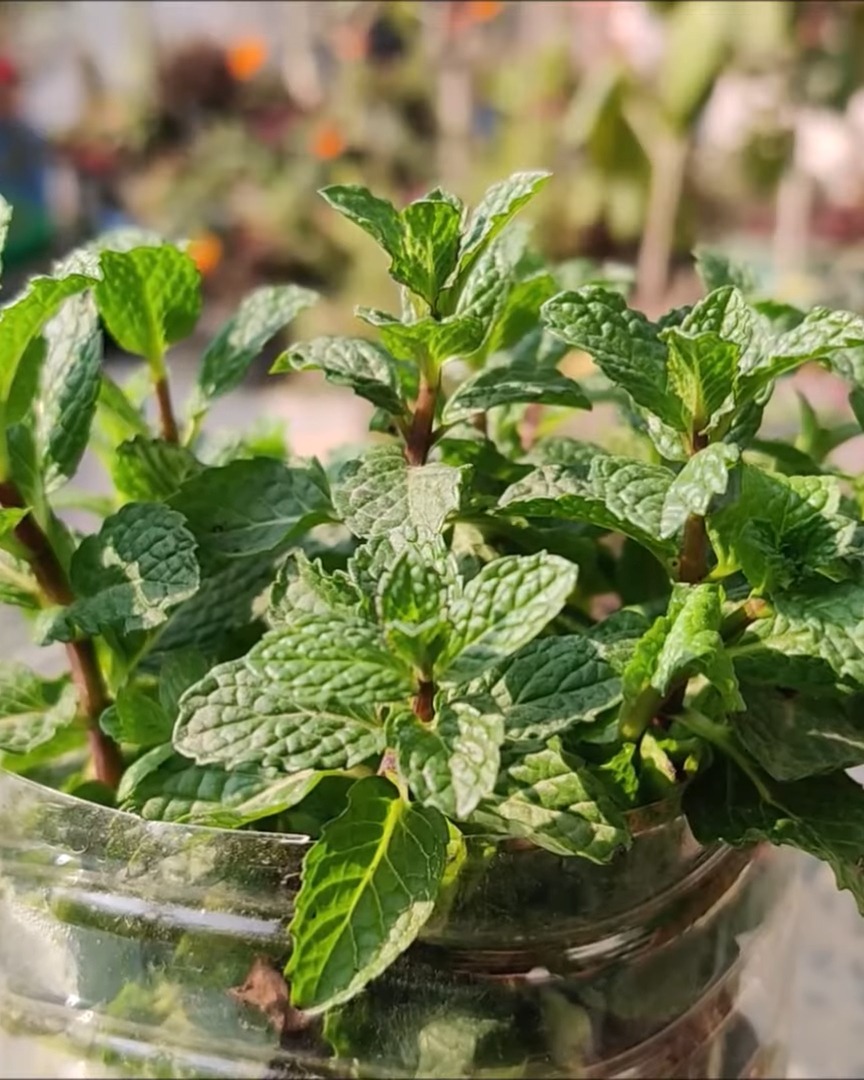
Harvesting Mint
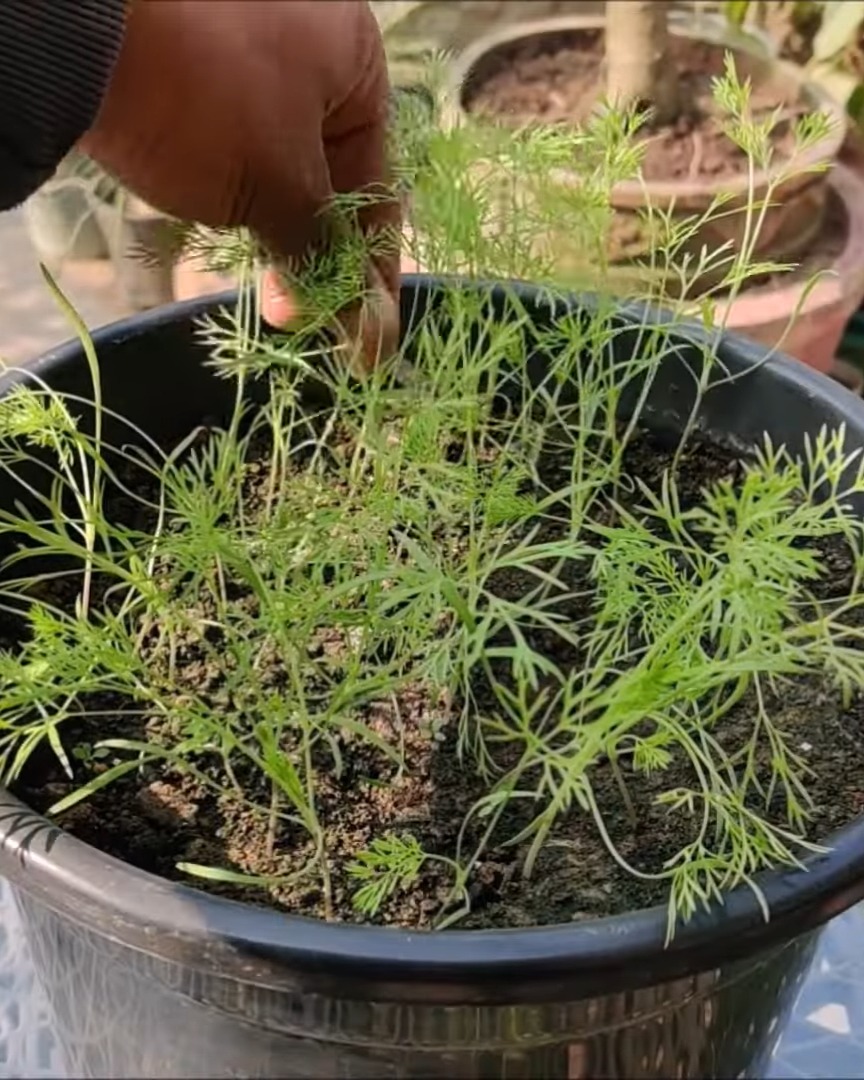
Once rooted, I plant the mint in the soil and pinch the tops regularly. That helps the plant grow bushier and keeps the new leaves flavorful and tender!
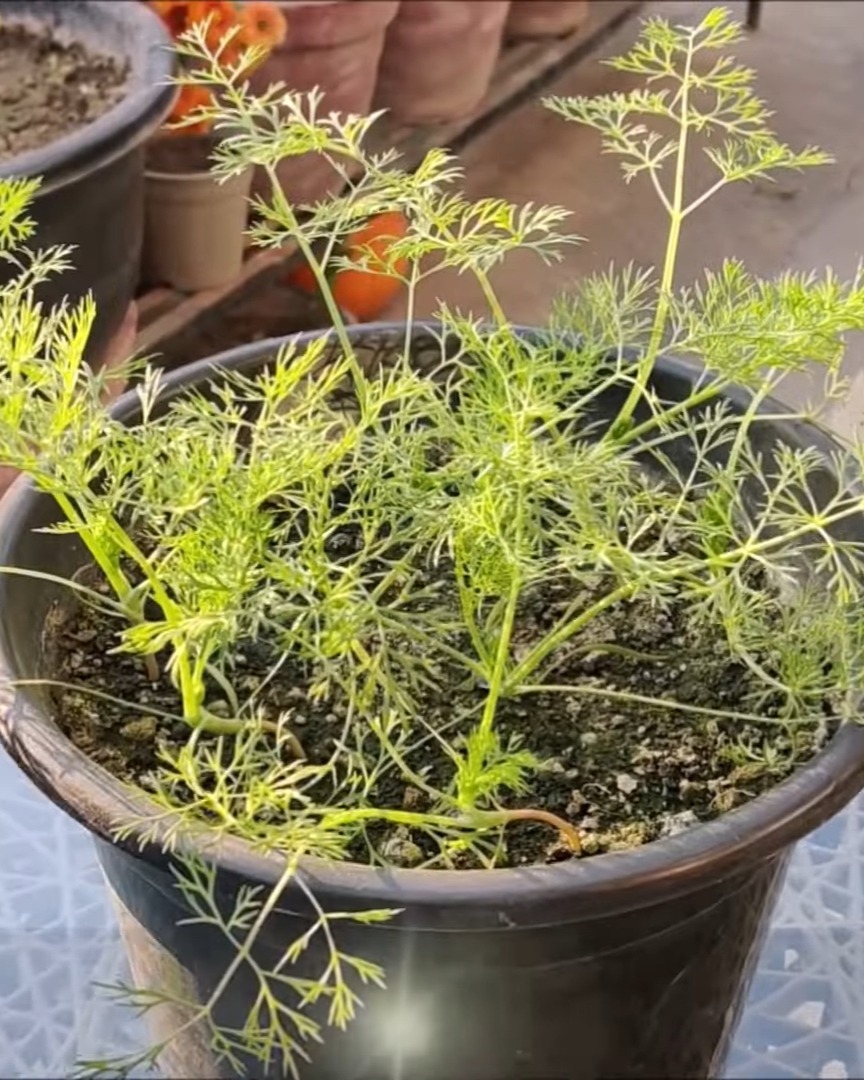
8. Dill
Dill is one of my favorite herbs for its fragrance and taste!
Soil and Planting
I use an 8–10 inch pot and mix:
- 50% garden soil
- 30% cattle manure
- 20% sand
I moisten the soil before scattering the seeds. Then, I smooth the soil lightly over them.
Dill doesn’t like being transplanted, so I plant the seeds directly where I want them to grow.
Care and Spacing
It germinates in 8–12 days. I keep the soil evenly moist.
Day 17:
Day 28: When the seedlings grow to 4–5 inches, I thin them out, leaving about 5–6 inches between the strongest ones. I use the thinnings as microgreens!
Dill doesn’t need much feeding, but I sometimes give it a liquid boost. It loves full sun.
Harvesting
In 40–50 days, I snip off the outer leaves and leave one-third of the plant behind.
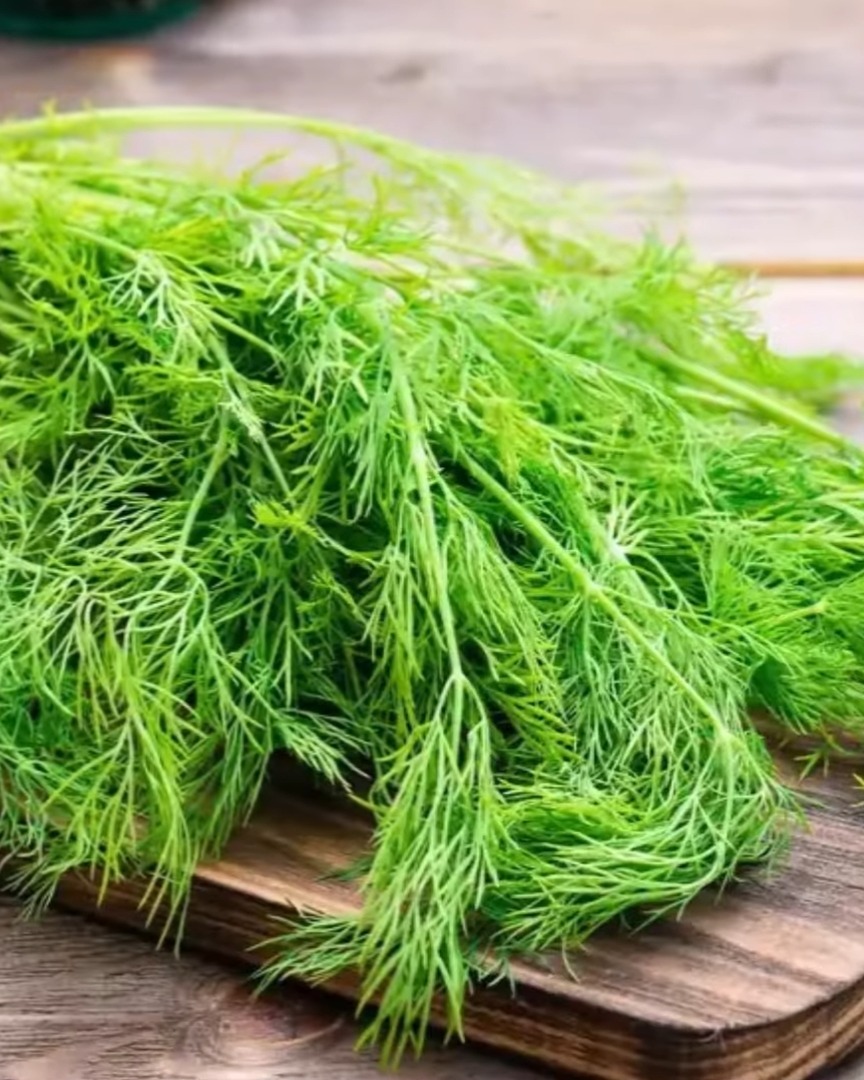
I also collect the seeds when they turn brown in late summer—they’re super flavorful and great in soups and bread!

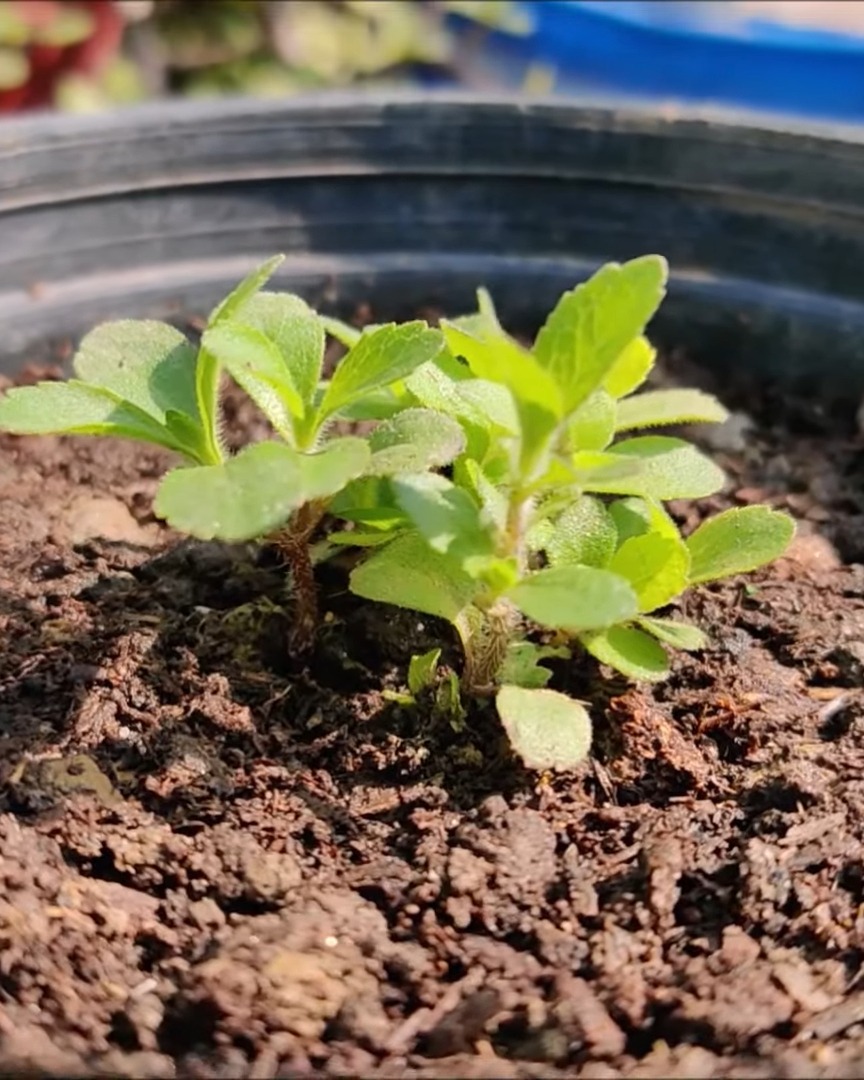
9. Stevia
If you like a sweet twist, stevia is perfect.
Growing from Seed
I pick an 8–10 inch pot and use:
- 60% garden soil
- 40% vermicompost
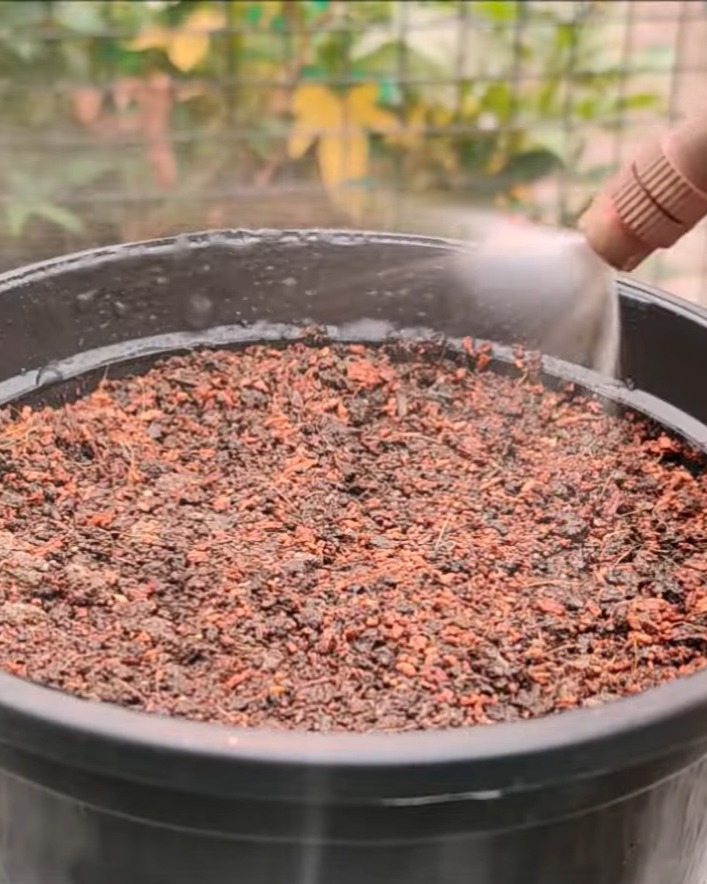
I moisten the soil, sprinkle the seeds, and cover them with a thin layer of dry mix. I gently press the surface and water softly.
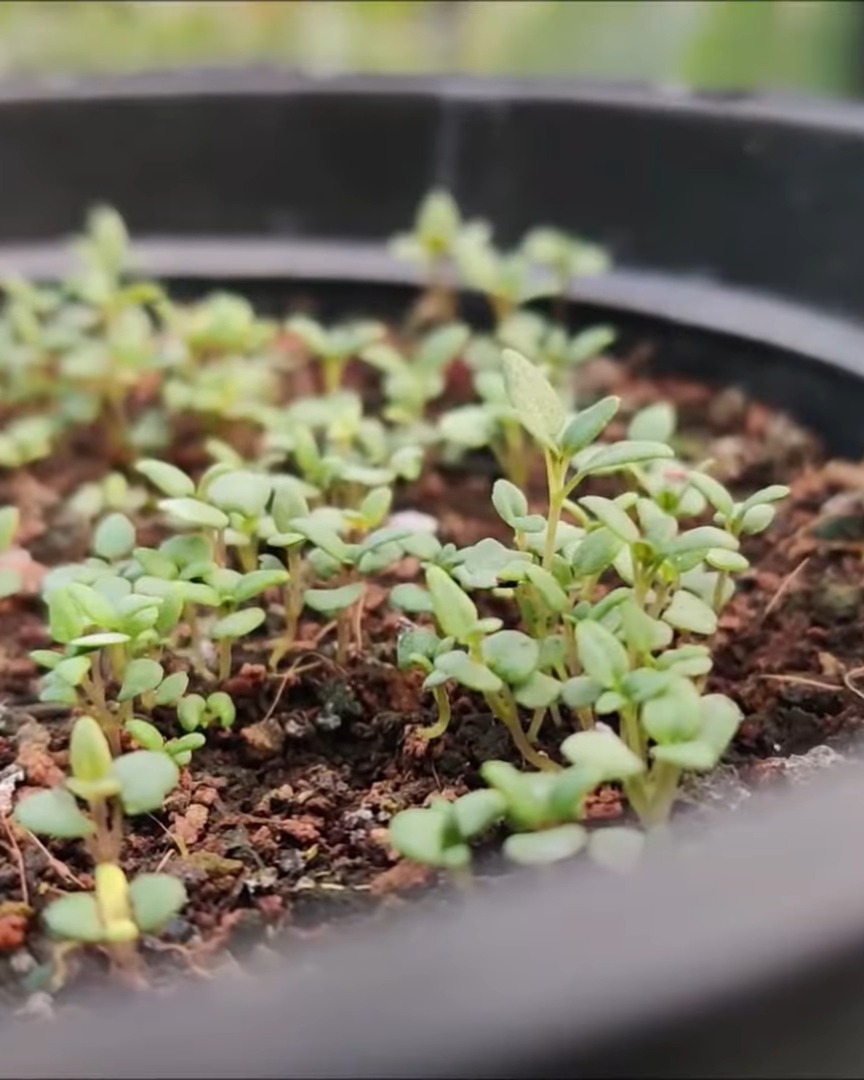
Seeds sprout in 14–18 days if kept warm and moist. Stevia loves sun, but I make sure it gets some afternoon shade.
Plant Care and Harvest
Day 45:

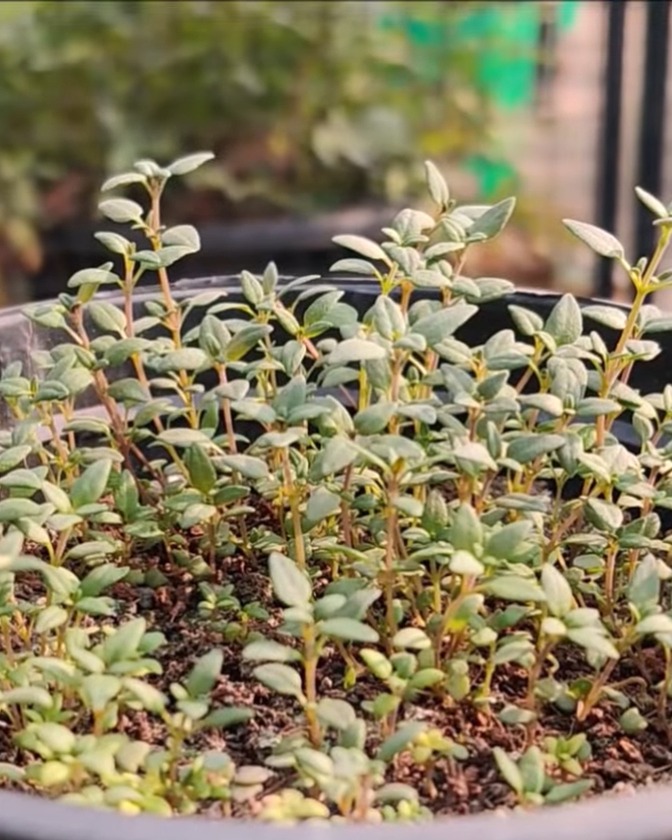
Day 56:
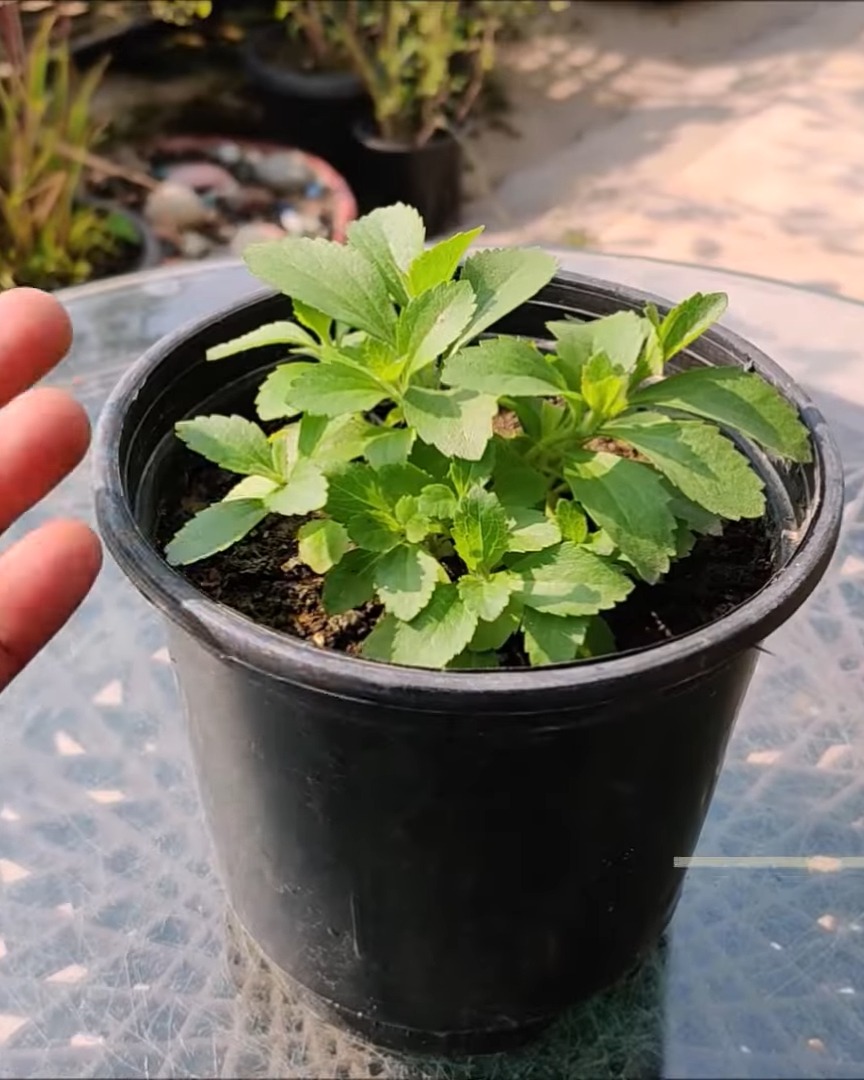
I keep the soil evenly moist. Stevia is perennial, but its growth slows after the first year, so I replant it annually using cuttings.
Day 90:
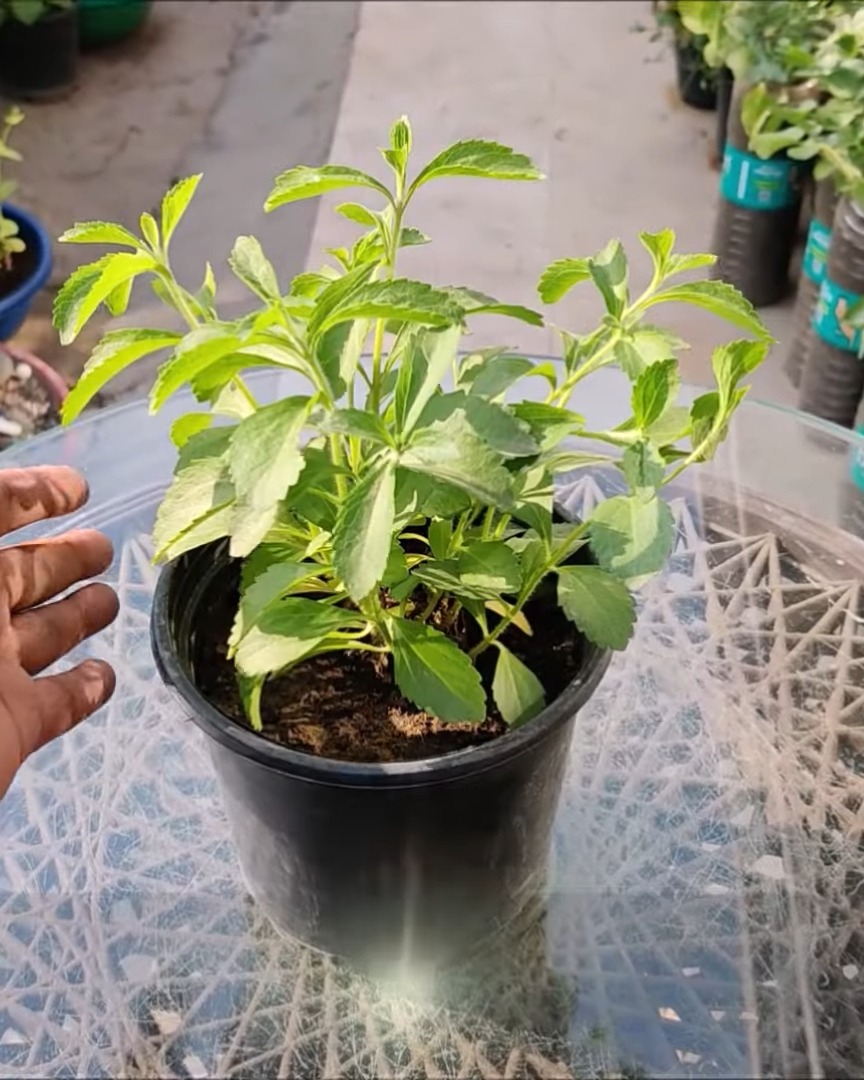
I harvest in the morning, just before it flowers, when the leaves are at their sweetest. You can enjoy them fresh in tea or smoothies!
Day 100:

10. Thai Basil
Thai basil is aromatic and grows well in pots.
Starting from Seeds
I use:
- 50% garden soil
- 30% vermicompost
- 20% cocopeat
After moistening, I sprinkle seeds and cover them lightly. They sprout in about 10 days.
Day 14:
Day 20:
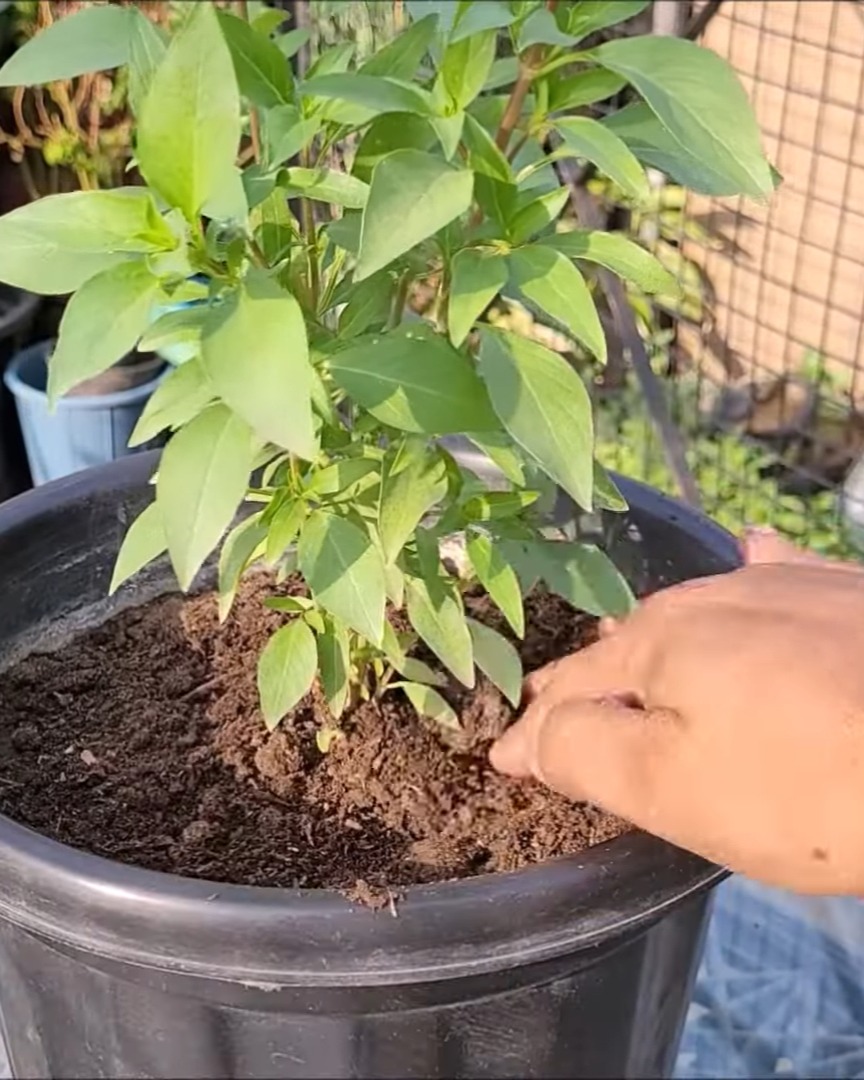
When plants reach 4–6 inches with at least 3–4 true leaves, I transplant them into 12-inch pots.
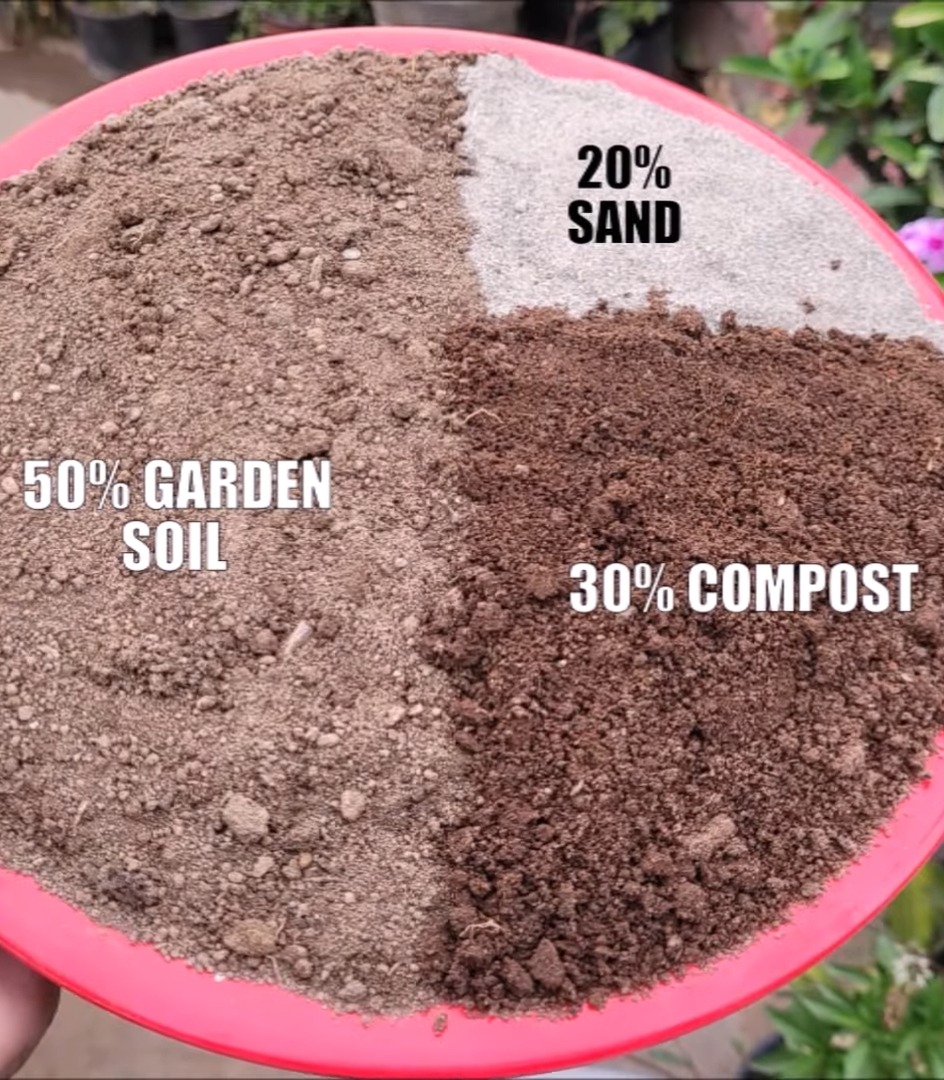
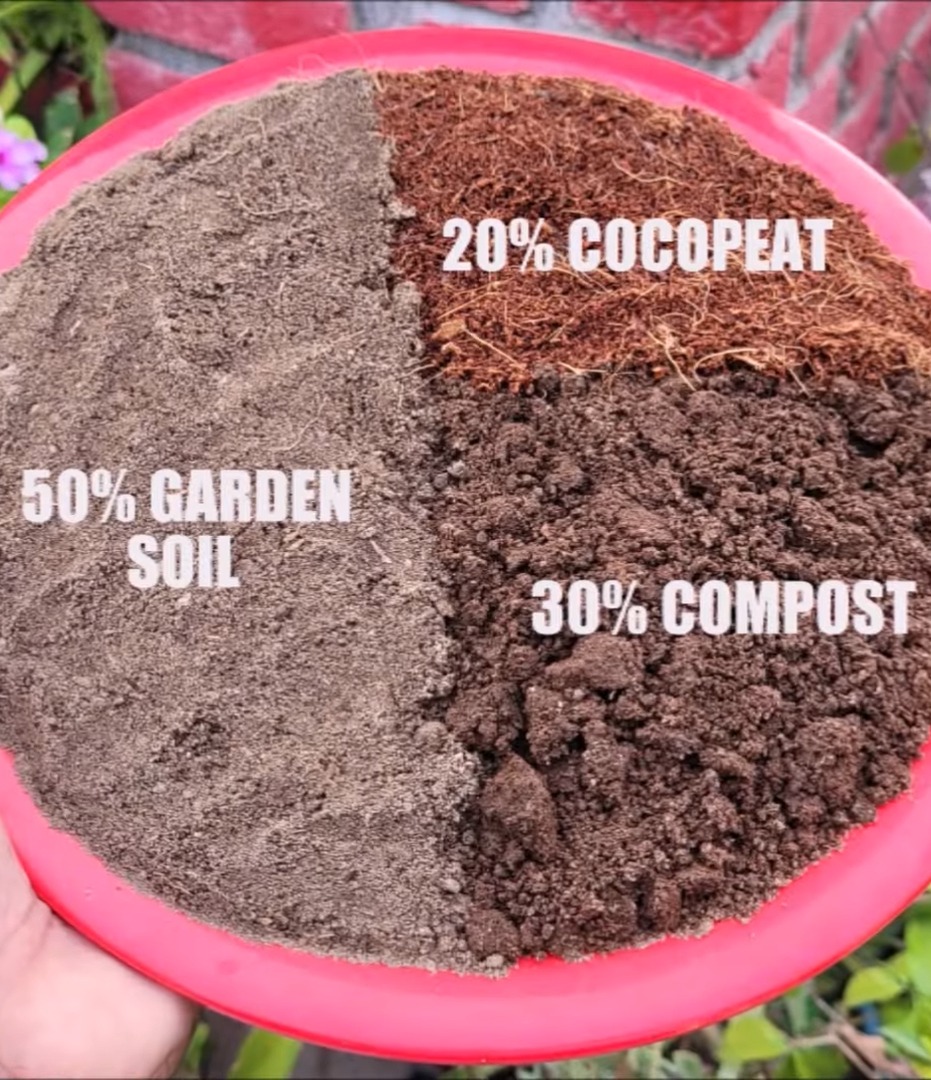
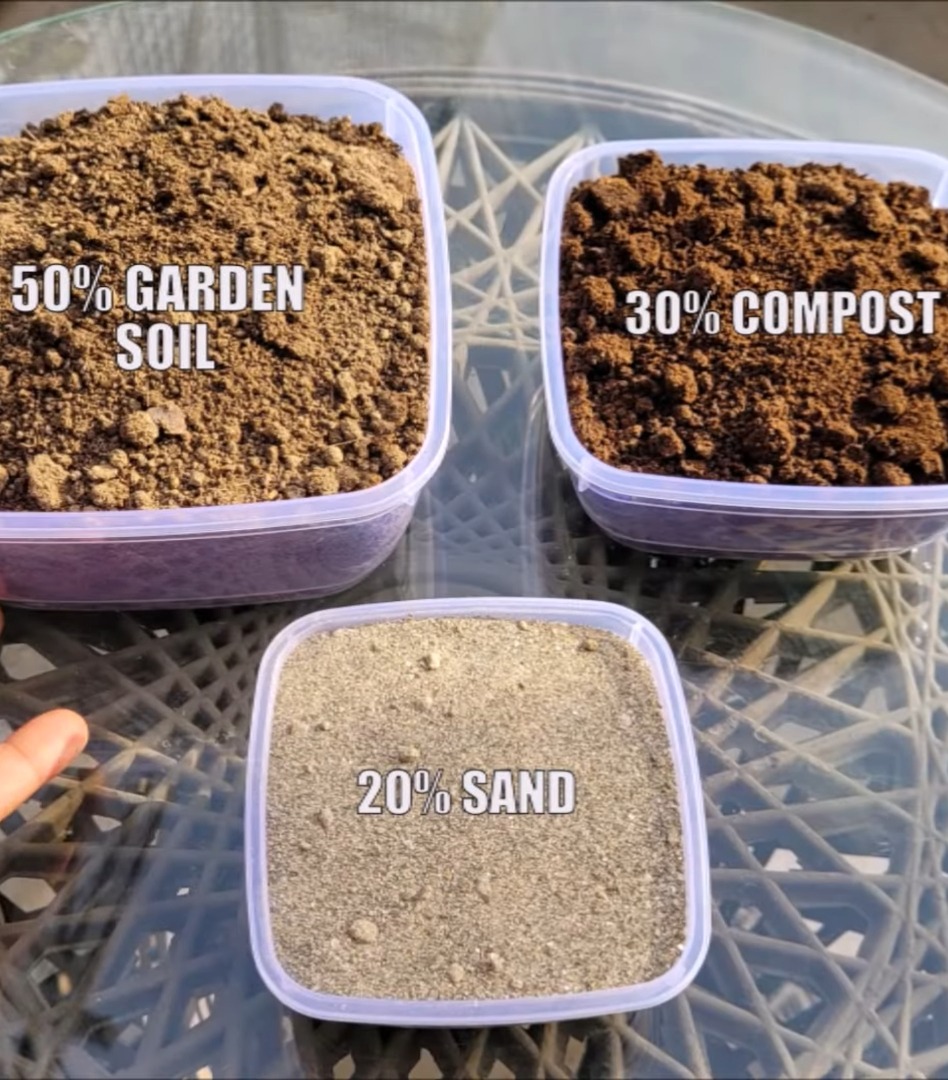
Potting and Fertilizing
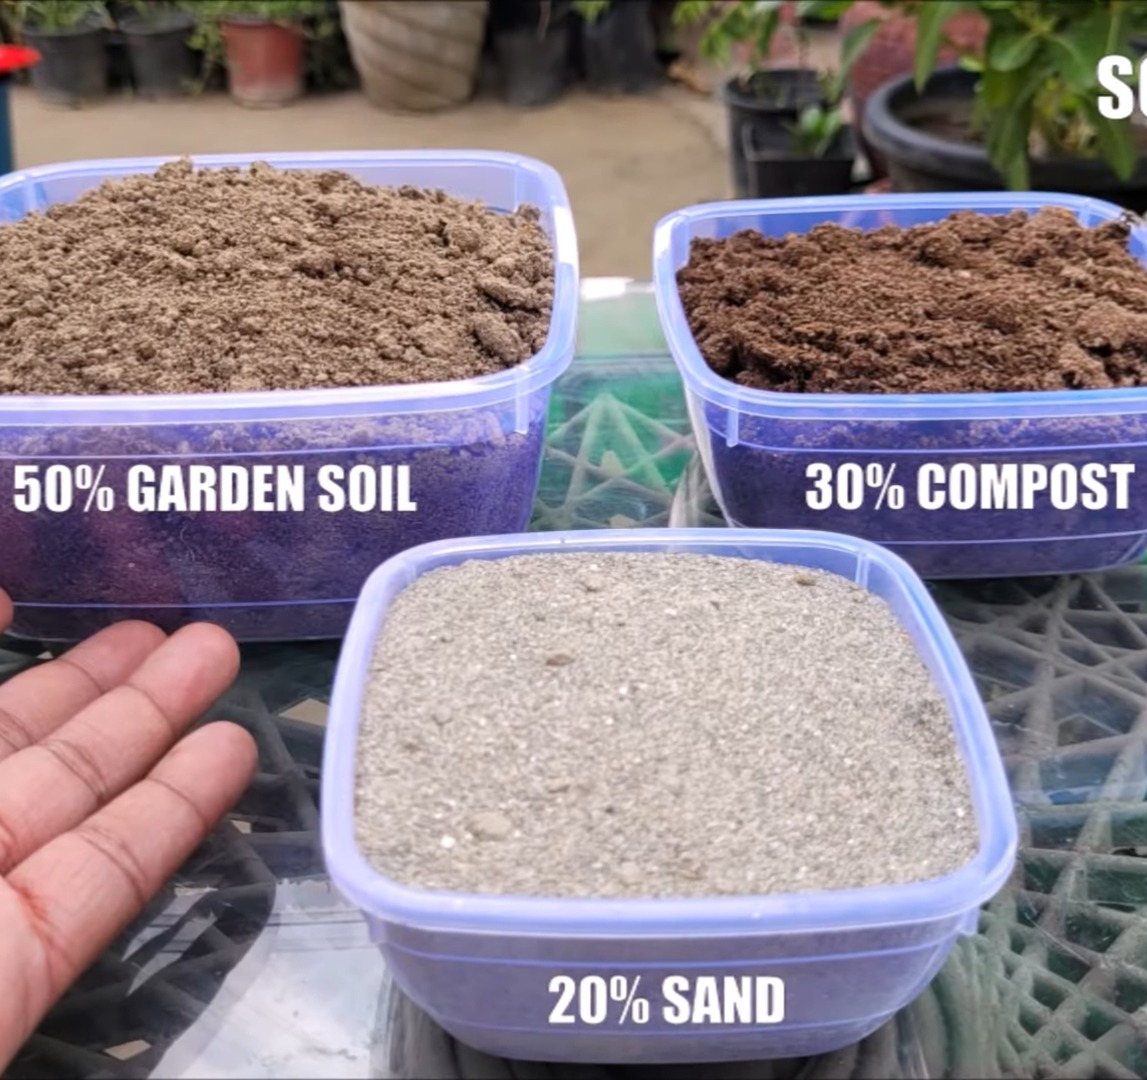
I plant them in:
- 50% garden soil
- 30% compost
- 20% river sand
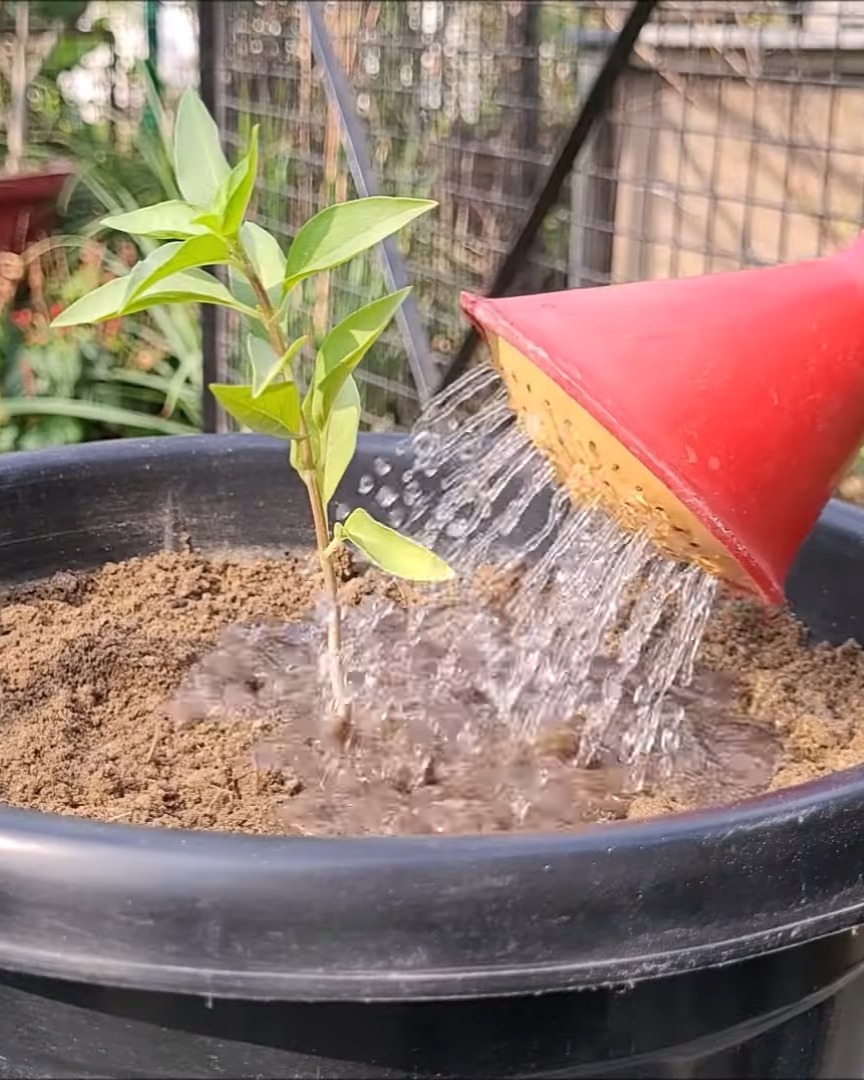
Once transplanted, I gently press the soil around the plant and water well.
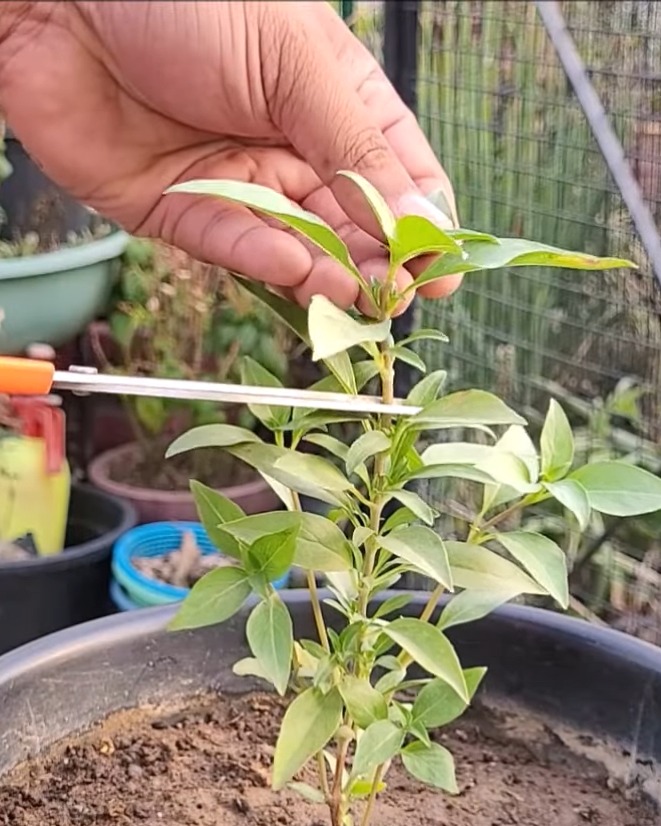
Day 50: When the plant has 6–8 leaf sets, I pinch the top set to promote bushy growth.
Day 62:
Thai basil needs regular fertilizing, especially nitrogen, to grow lush green leaves.
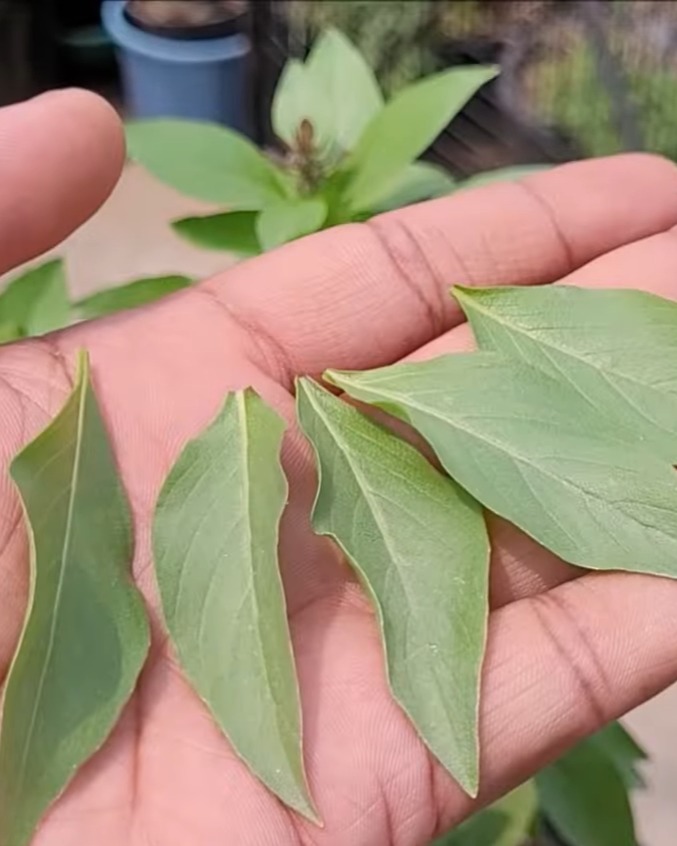
Harvesting Thai Basil
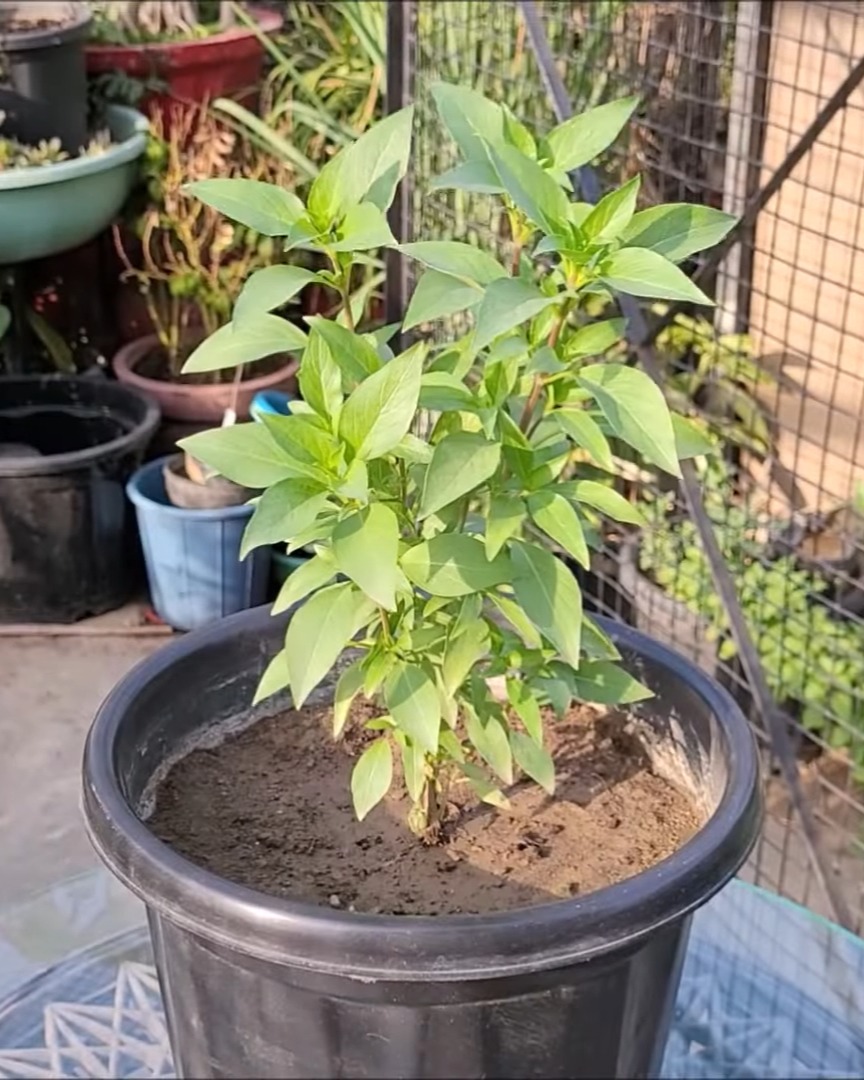
Day 75:
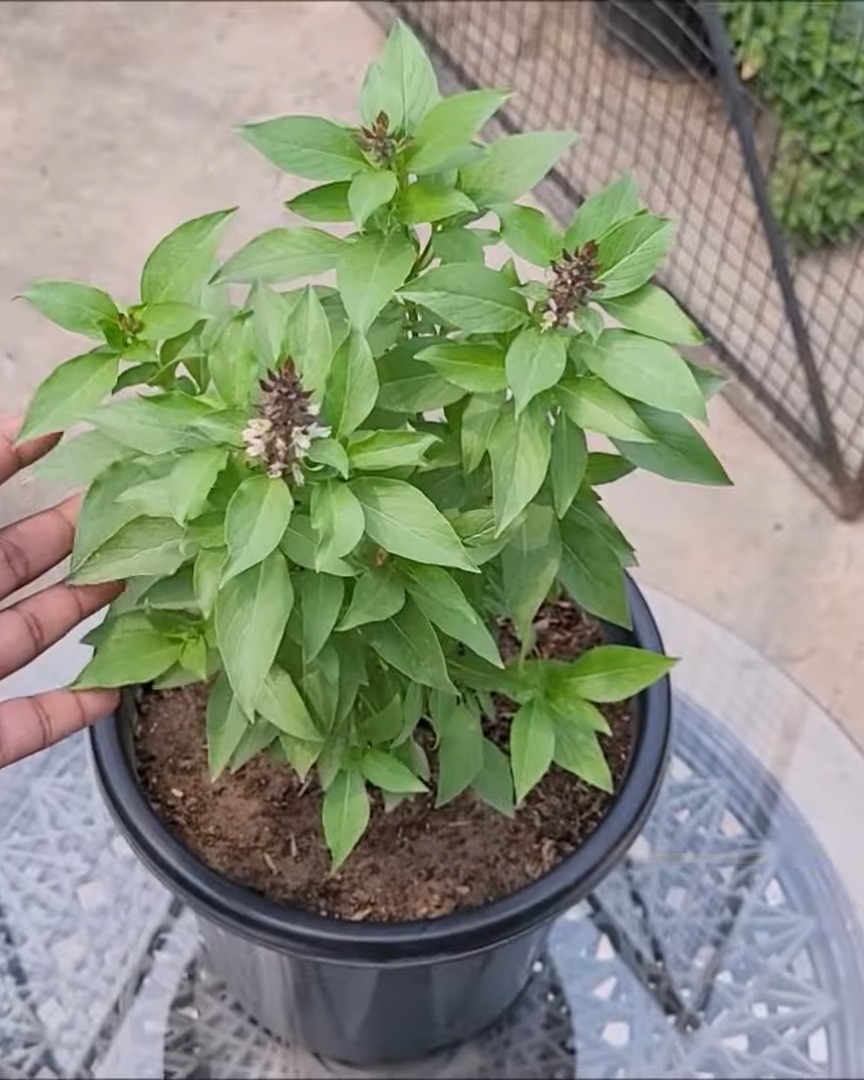
I harvest by picking the upper leaves from each branch. Frequent picking (even every other day) keeps the plant thriving!
Final Thoughts
What an incredible journey from seed to harvest! These ten herbs are beginner-friendly, full of flavor, and easy to grow in small spaces. Which one are you going to plant first? Grab a pot, get your hands dirty, and let the magic of herbs brighten your home and meals!