

Strawberries are one of my favorite fruits to grow at home. They don’t need much space, and I get to enjoy juicy red berries in just a couple of months. In this guide, I’ll walk you through exactly how I grow strawberries in a pot, step by step. It’s easy, fun, and totally doable—even if you’re just getting started with gardening!
Contents
- 1 Step 1: Prepare the Planting Pot
- 2 Step 2: Prepare the Soil Mix
- 3 Step 3: Prepare the Strawberry Plants
- 4 Step 4: Plant the Strawberry Seedlings
- 5 Step 5: Watering After Planting
- 6 Step 6: Growth Phase – Weeks 1 to 6
- 7 Step 7: Flowering and Pollination
- 8 Step 8: Fruit Development – Weeks 6 to 8
- 9 Step 9: Harvest Time – Week 7 to 8
- 10 Watering Tips for Healthy Growth
- 11 The Bottom Line
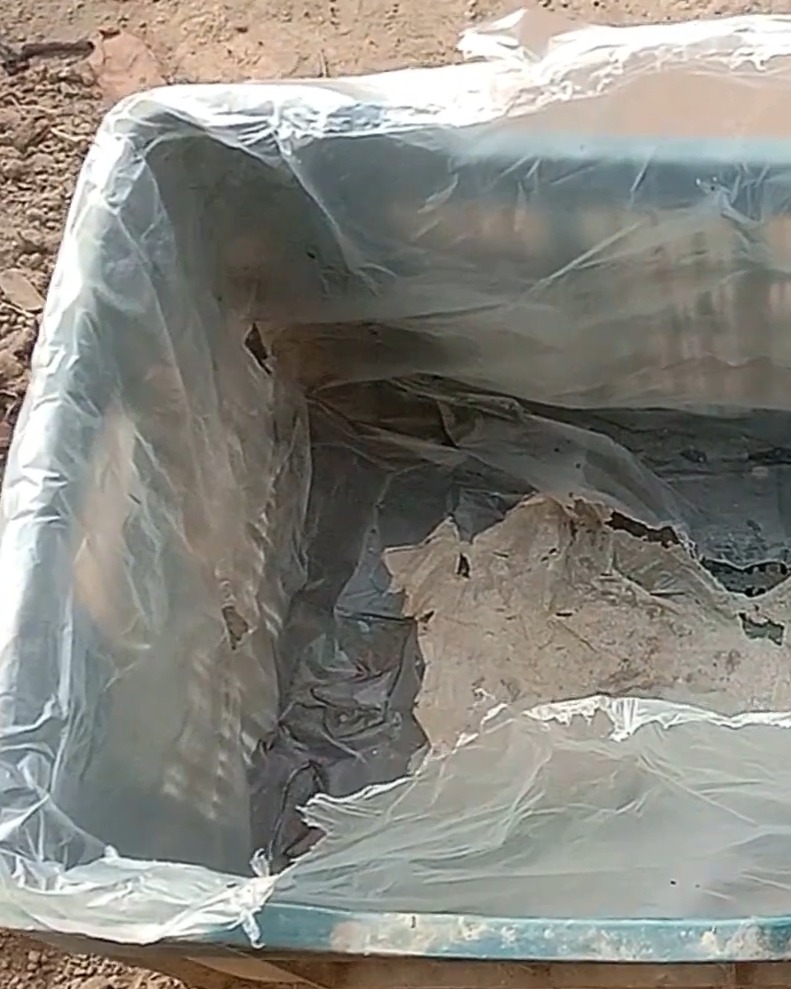
Step 1: Prepare the Planting Pot
Let’s begin with the foundation—your pot. A good start makes all the difference!
I always pick a container that’s big enough and has drainage holes at the bottom. Once I have the right pot, I line the bottom with a plastic bag.
This trick helps keep some moisture in while still letting excess water escape. It’s a small step, but it helps create the right balance for healthy strawberry roots.
Step 2: Prepare the Soil Mix
With the pot ready, it’s time to build a cozy home for the roots.
Layering and Shaping the Soil
I start by pouring garden soil into the pot.
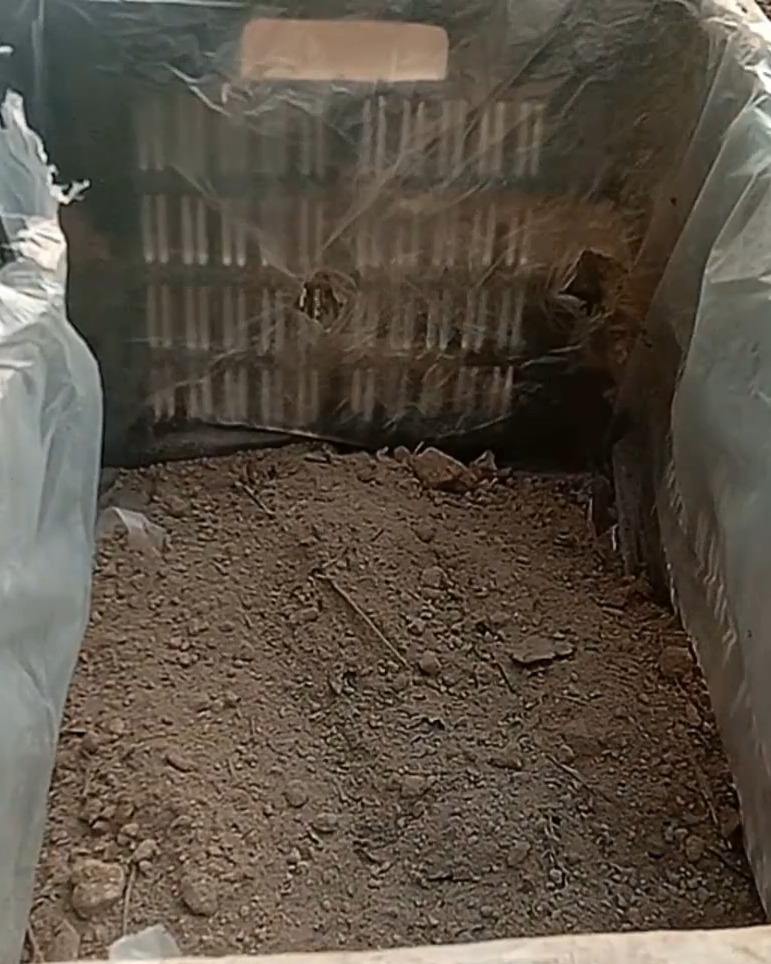
Then, I add a layer of rice husks on top of the soil. These husks help improve drainage and airflow.
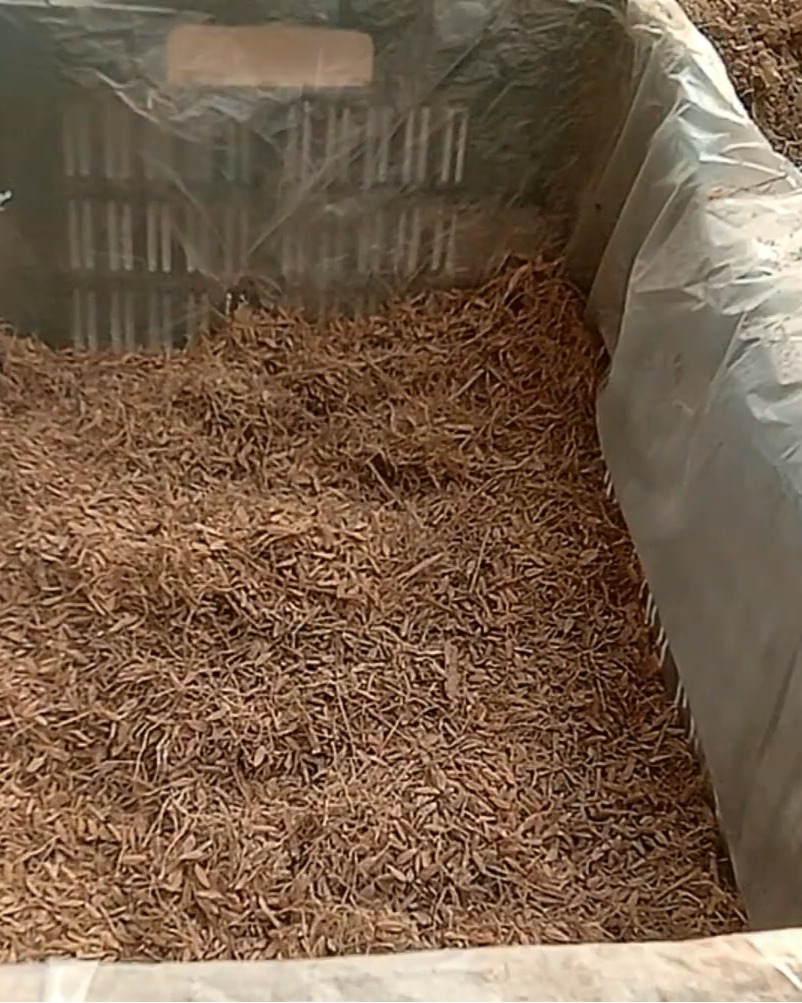
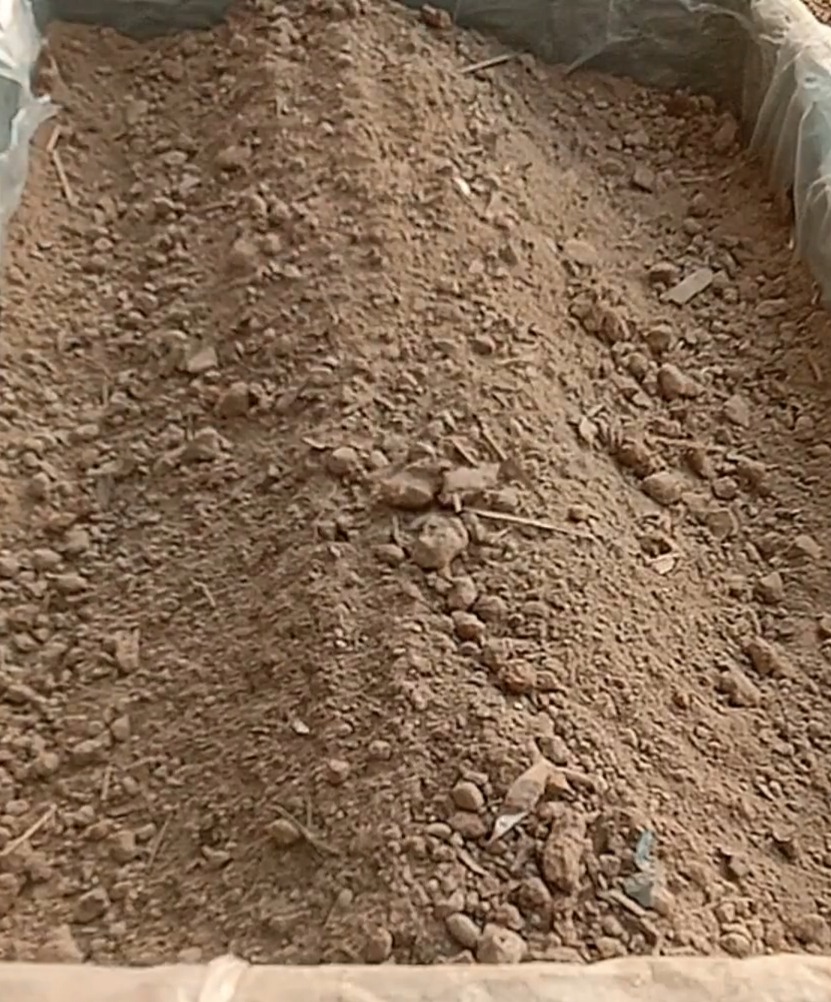
After that, I add another layer of garden soil, covering the rice husks completely. I make sure to fill the pot until it’s about two-thirds full.

Then, I spread the soil evenly, loosen it gently with my hands, and create a small mound in the center. This mound helps support the root ball and improves water flow around the plant.
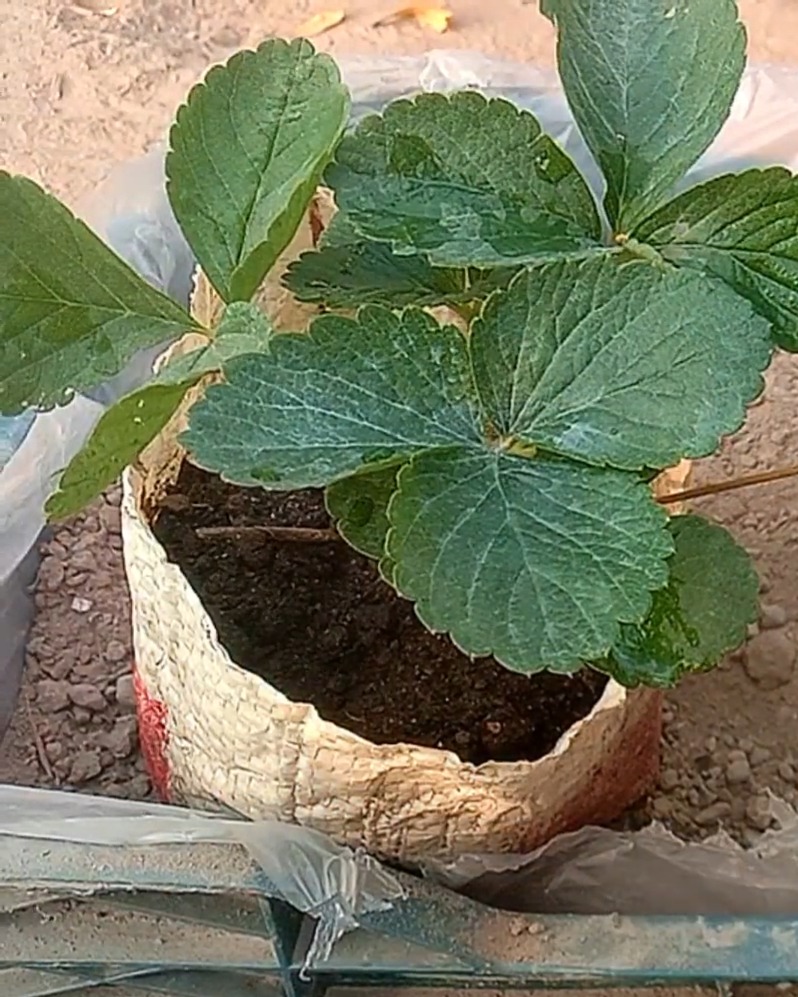
Step 3: Prepare the Strawberry Plants
Now that the pot and soil are set, it’s time to get those plants ready!
Handling the Seedlings with Care
I usually prepare two young strawberry plants already growing in small soil balls.
When I take them out, I carefully remove the outer wrapping of soil around the roots.
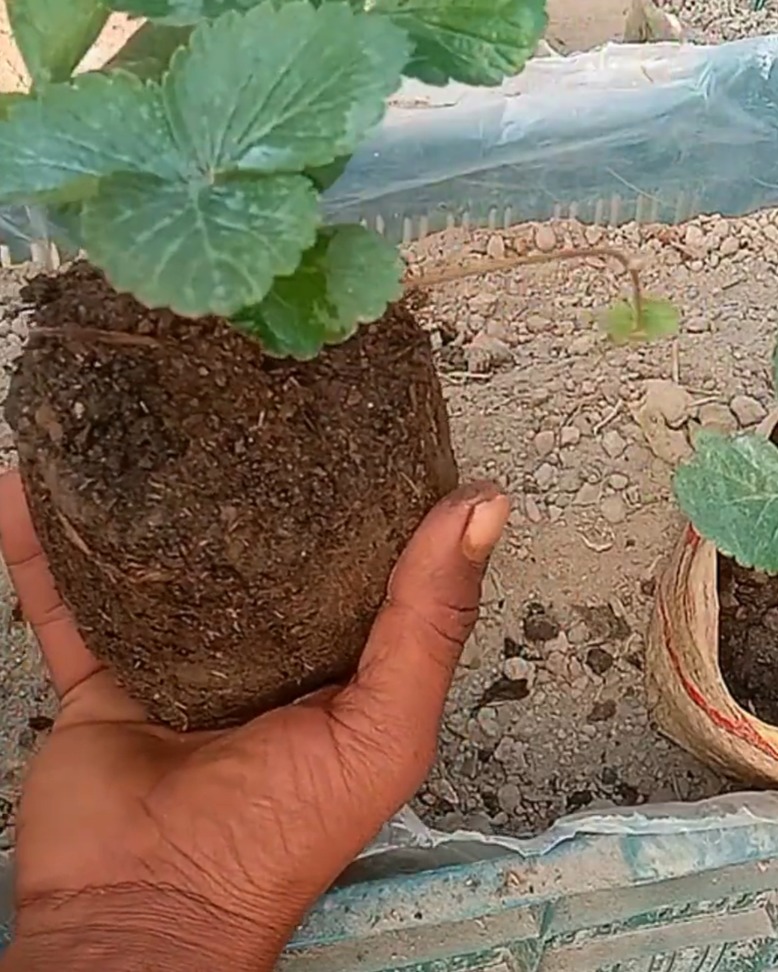
This gives the roots direct contact with the fresh soil, which helps them settle and grow faster. Be gentle during this step—the roots are delicate.
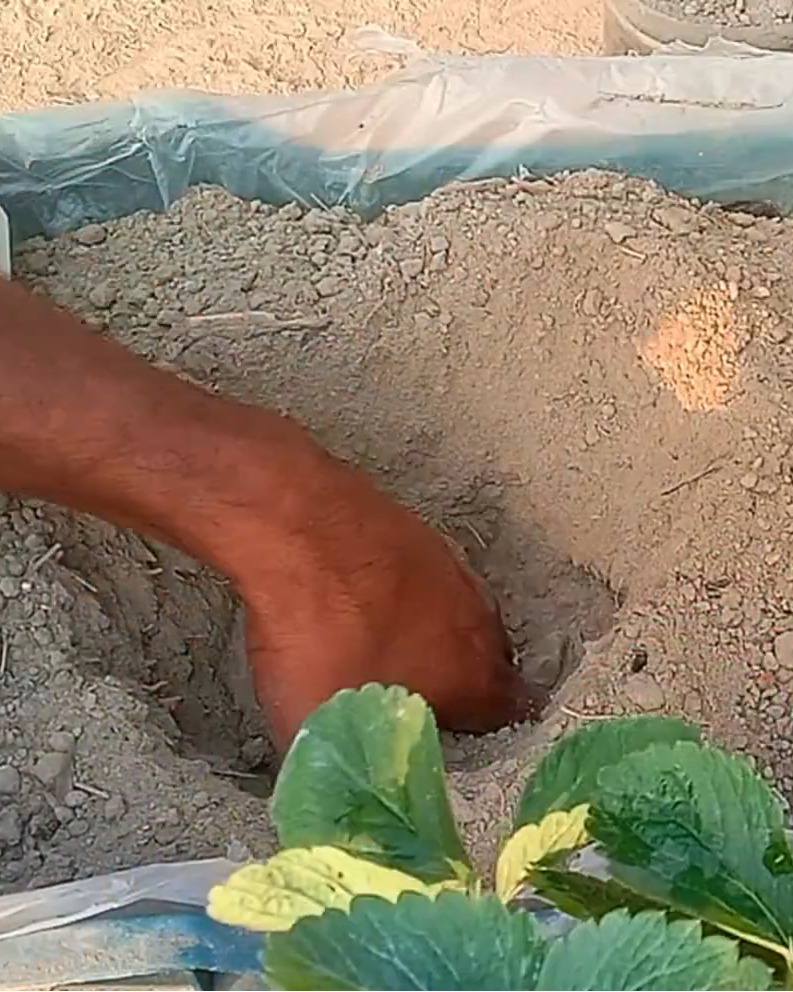
Step 4: Plant the Strawberry Seedlings
With the seedlings prepped, it’s planting time! I dig two holes in the soil mound deep enough to fit the root balls.
Then, I gently place each root ball into a hole.
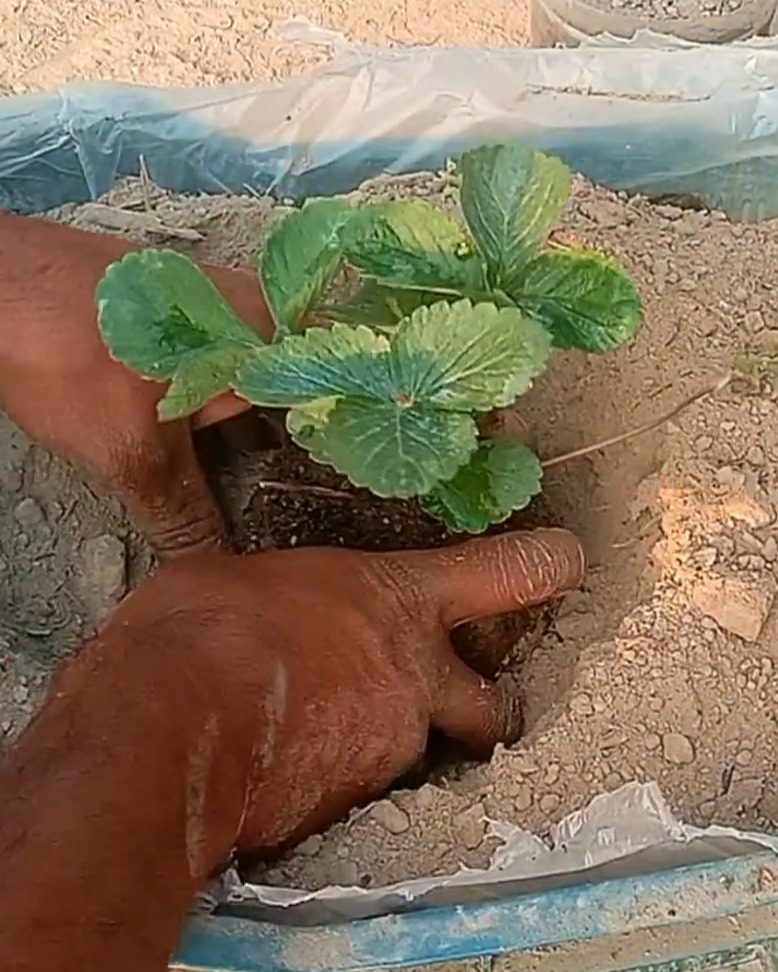
Once they’re in, I cover them completely with soil, pressing lightly to ensure they’re snug and supported. Don’t pack the soil too tightly—just enough to hold the plants steady.
Step 5: Watering After Planting
Watering right after planting is key to helping the strawberries settle in.
Here’s what I always do: I avoid watering directly on the plants. Instead, I create two soil trenches on the sides of the pot and water them into.

This way, the water reaches the roots without splashing on the leaves, which helps prevent disease. It also keeps the soil moist but not soggy—a perfect balance!
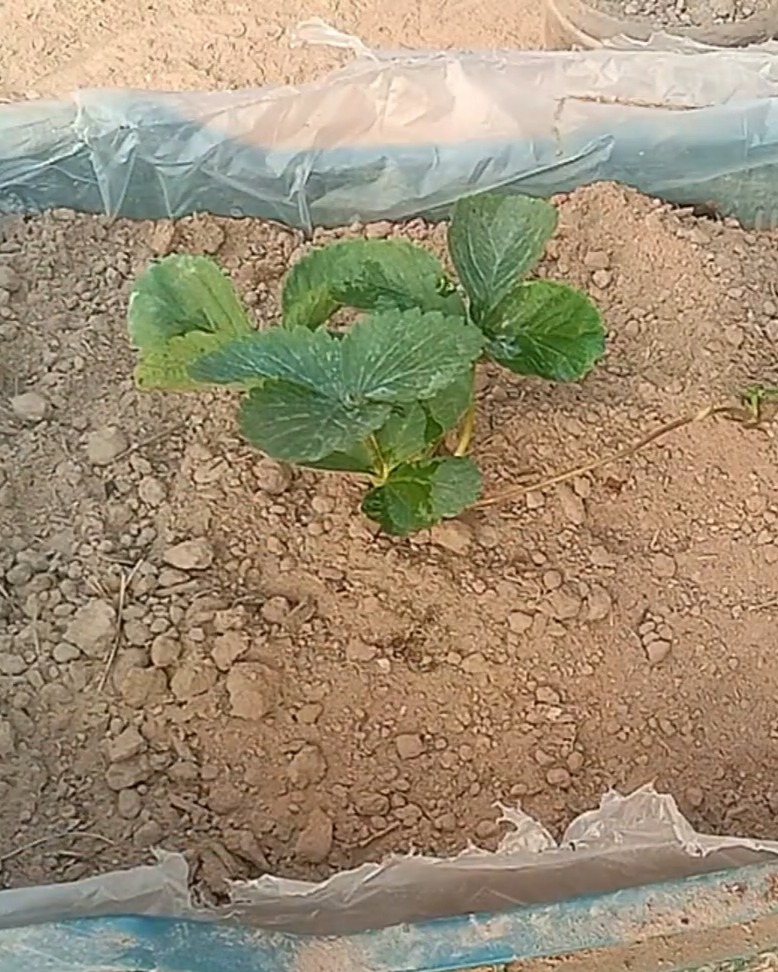
Step 6: Growth Phase – Weeks 1 to 6
Now comes the waiting game—but there’s still a bit of work to do during these first few weeks.
Weed and Watch the Buds Appear
During weeks 4 to 6, I notice the plants getting stronger and greener. This is the exciting part because flower buds begin to form, meaning fruit is on the way!

I also remove any weeds that pop up inside the pot. Weeds steal water and nutrients from the strawberries, so I like to stay on top of it. A few minutes here and there make a big difference!
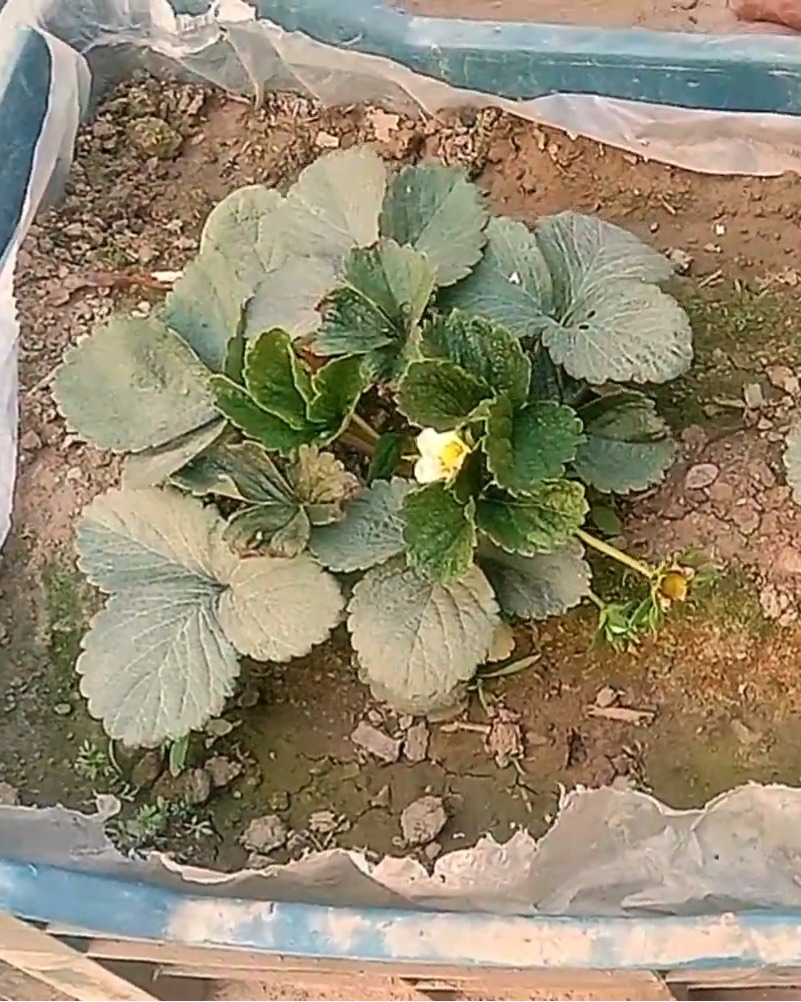
Step 7: Flowering and Pollination
After the buds show up, it doesn’t take long for flowers to bloom.
About a week after the flowers bloom, I see them start to turn into tiny green fruits.
That means pollination has happened naturally, and the strawberries are beginning to grow. It’s fantastic to see the process unfold right before my eyes!
Step 8: Fruit Development – Weeks 6 to 8
This is the most exciting phase—watching the green fruits grow and ripen!
Over the next 2 to 3 weeks, the fruits gradually change from green to red. They also get bigger day by day.
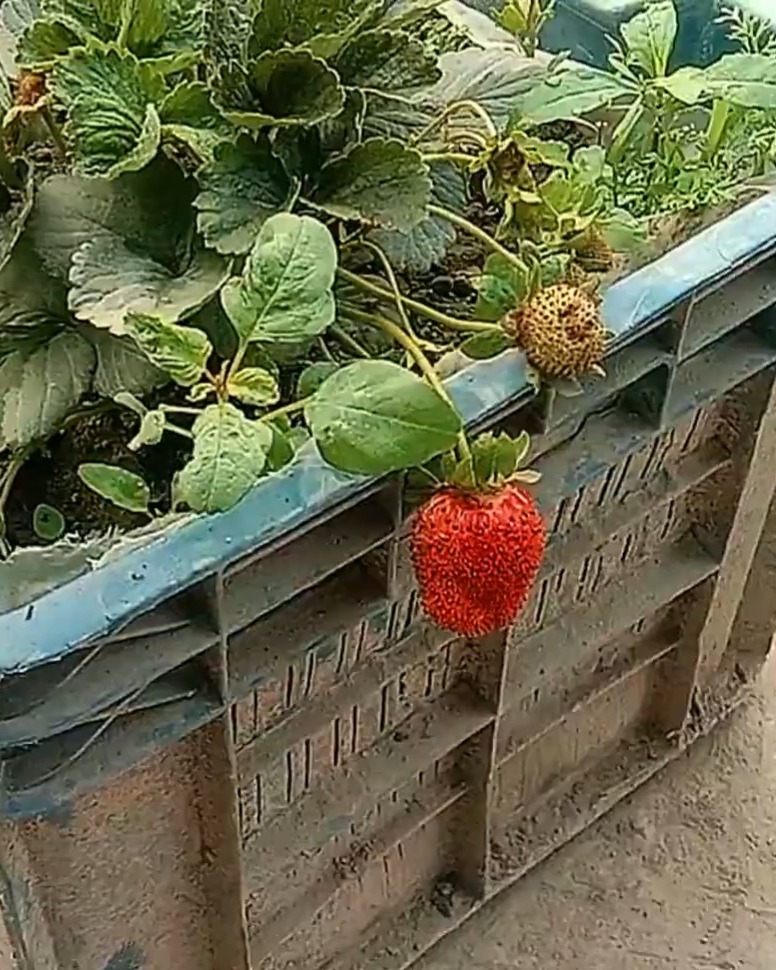
I always keep an eye out and remove any new weeds that might compete with the growing fruits. At this point, everything is focused on feeding the strawberries and helping them ripen fully.
Step 9: Harvest Time – Week 7 to 8
The wait is over, and it’s time to taste the results of your care!
Seven to eight weeks after planting, my strawberries are usually ready to harvest. They are bright red, juicy, and full of flavor. That first bite is always the best!
I make sure to pick them gently to avoid hurting the plant. And just like that, I have sweet strawberries grown right at home—so rewarding!

Watering Tips for Healthy Growth
Throughout the growing period, how and when you water matters more than you might think.
Keep Soil Moist, Not Wet
Strawberries love slightly moist soil. I always aim to keep it damp but not soggy. Letting it dry out or get too wet can slow growth or even cause disease.
Best Time to Water
I water either early in the morning or late in the afternoon. This helps reduce evaporation and prevents fungal problems, which are more likely if you water in the heat of the day.
How to Water Properly
One important thing: I never spray water on the leaves or fruits. That can cause rot. I prefer using a light mist or watering directly at the base of the plant. It keeps the plants healthy and the fruits clean.
The Bottom Line
I’m excited every time I pluck a homegrown strawberry—nothing beats that burst of flavor. Now, you hold the same clear map that guides me from pot to plate. Ready to set a pot by your window and watch red gems appear? Grab soil and seedlings, and start today. Fresh, sweet rewards are only eight weeks away!