
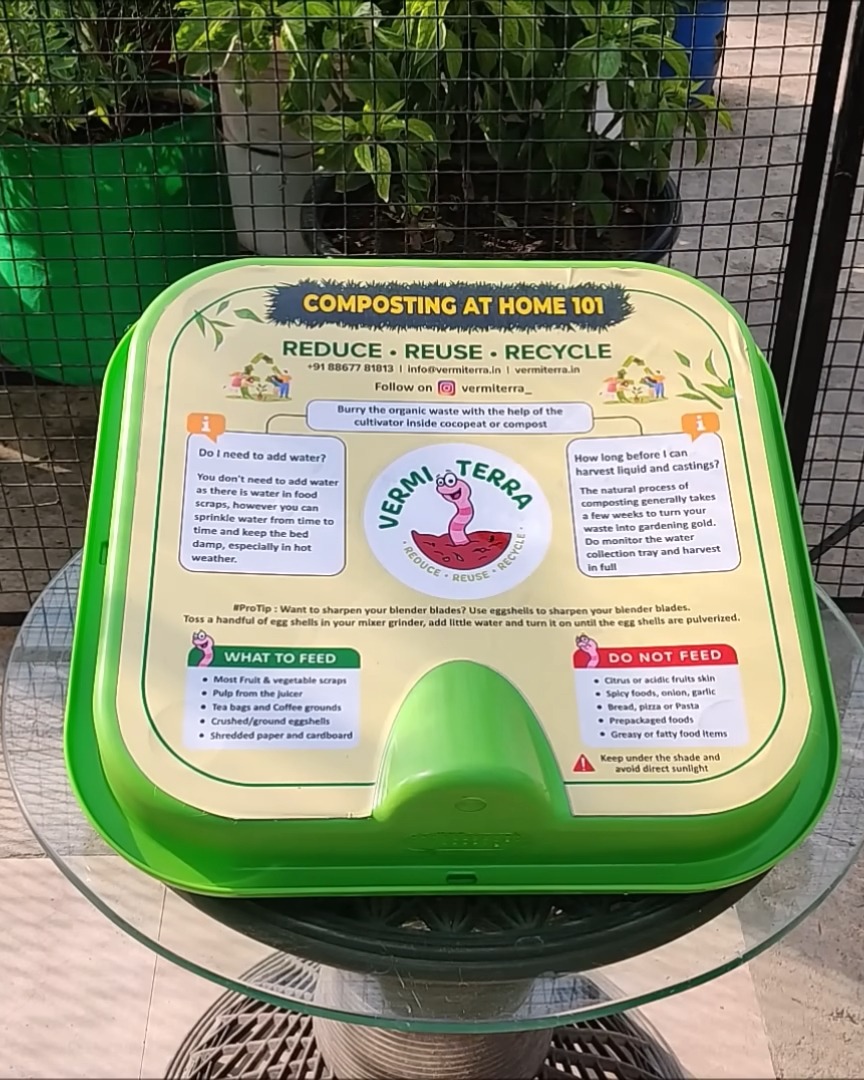
I love turning kitchen waste into something useful! Making compost at home is one of the easiest ways I live more sustainably. It takes me just a few minutes a day, and in about 10 to 15 days, I get rich compost that makes my garden thrive. Let me show you how I do it step by step—using a worm bin that works like magic!
Contents
- 1 Step 1: Setting Up the Worm Bin
- 2 Step 2: Preparing the Bedding
- 3 Step 3: Adding Earthworms and Helping Them Settle
- 4 Step 4: Feeding the Worms
- 5 Step 5: Keeping the Conditions Just Right
- 6 Step 6: Watching the Composting Magic Happen
- 7 Step 7: Harvesting Compost Tea or Vermi Wash
- 8 Step 8: Harvesting the Final Compost
- 9 Step 9: Keep the Cycle Going!
- 10 Closing Words
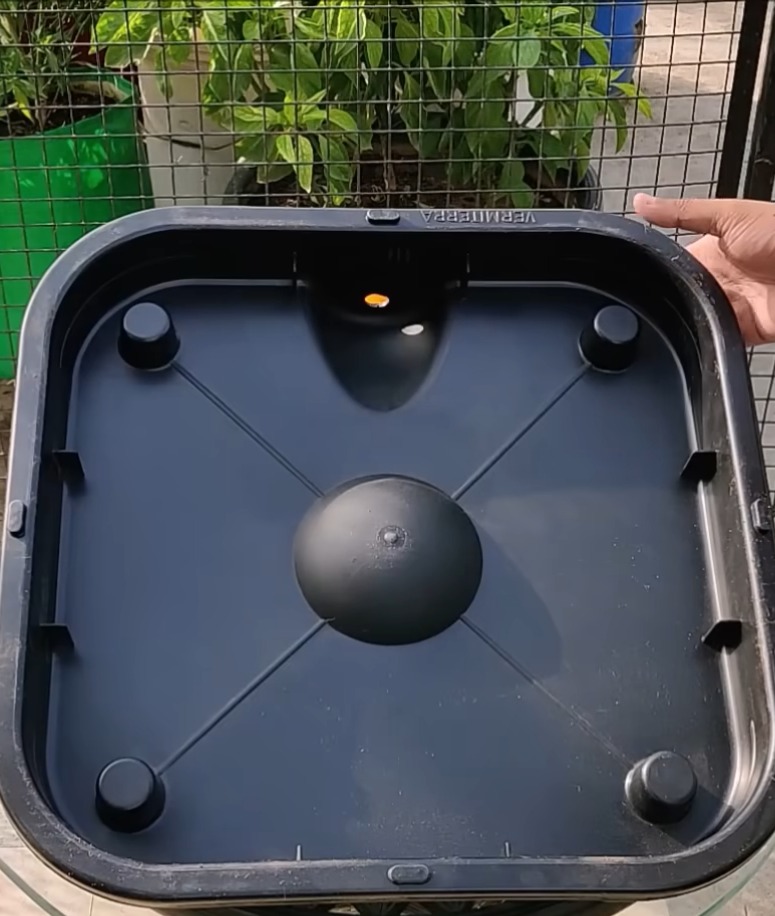
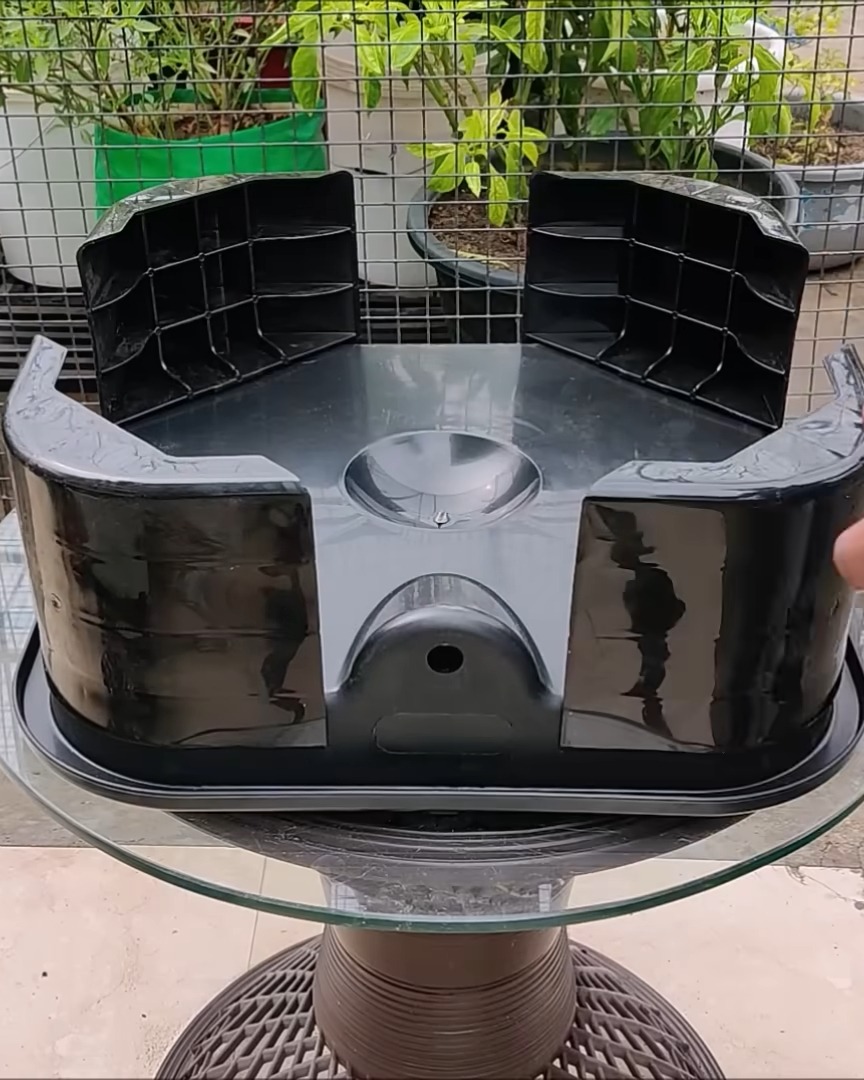
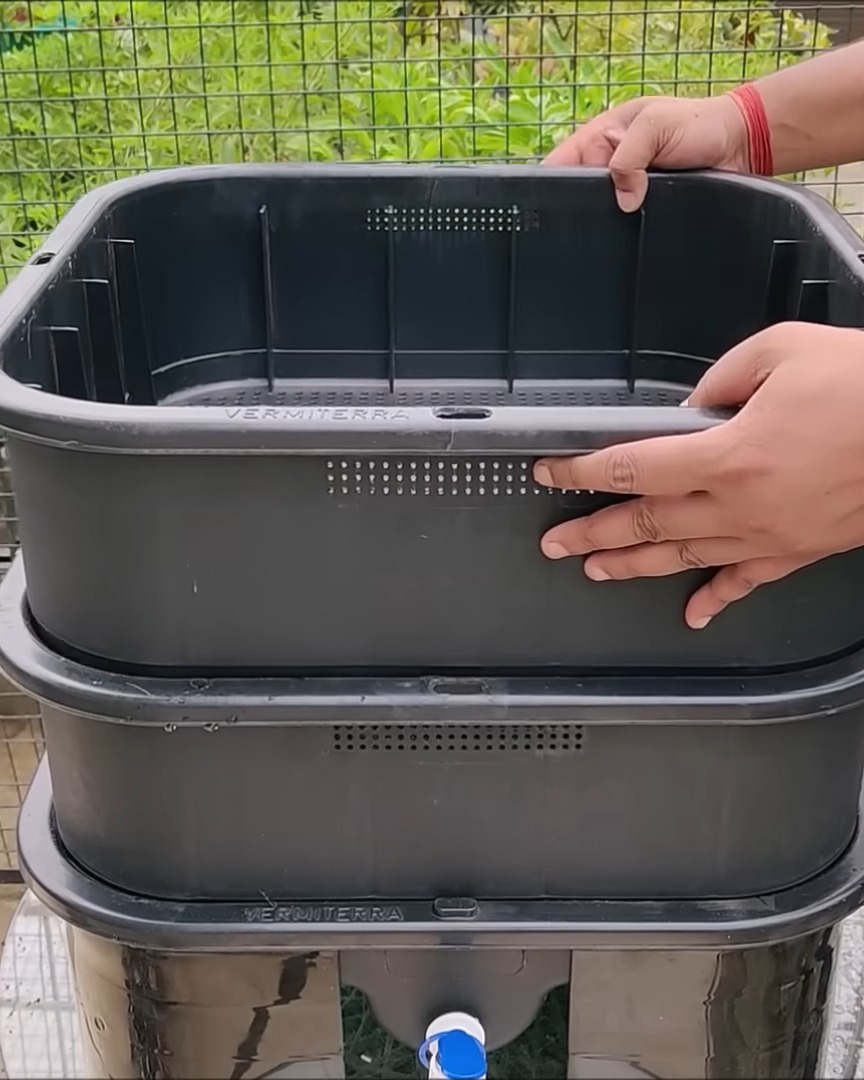
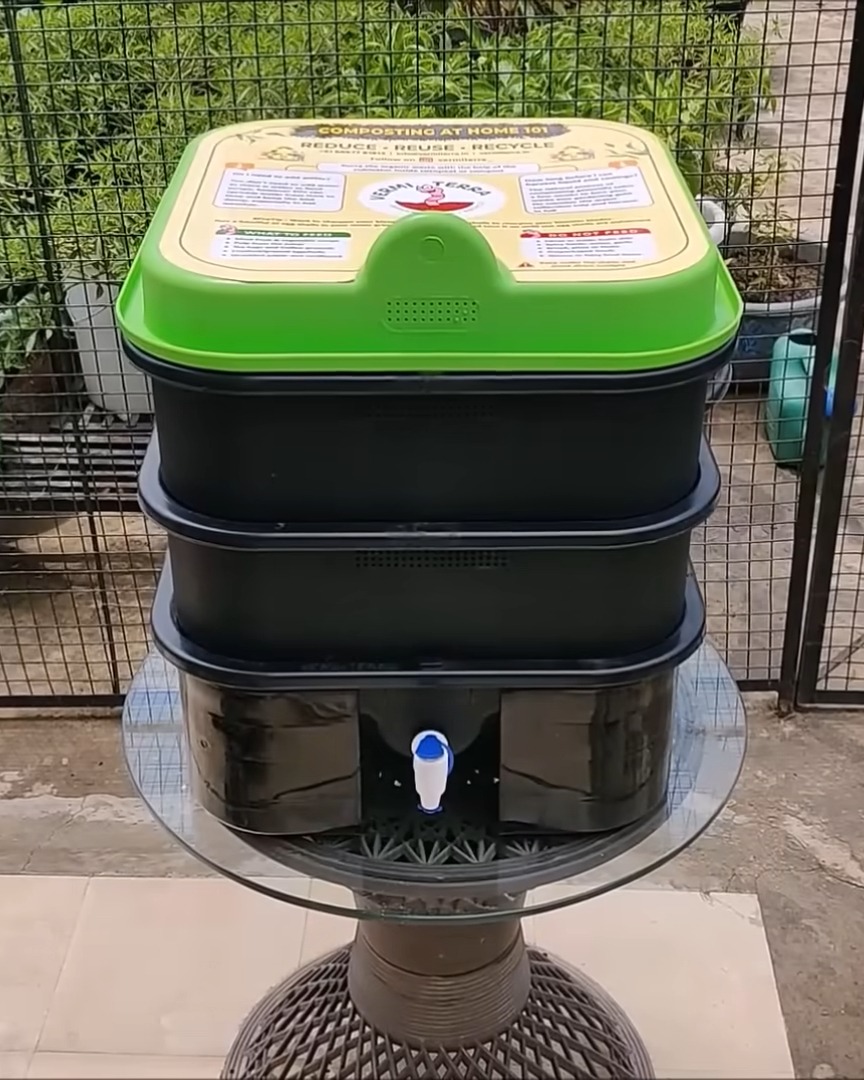
Step 1: Setting Up the Worm Bin
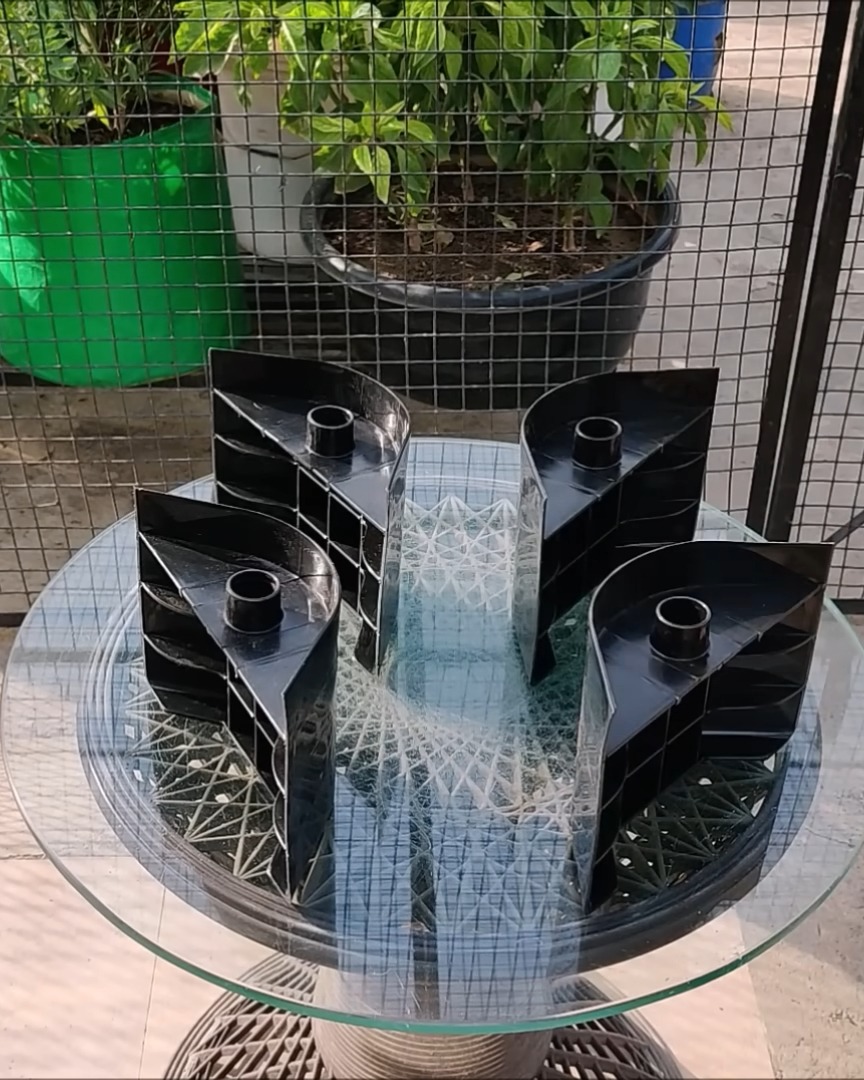
Starting is simple and only takes around 15 to 20 minutes. I use a ready-made kit that includes everything I need.
- Two composting trays with holes
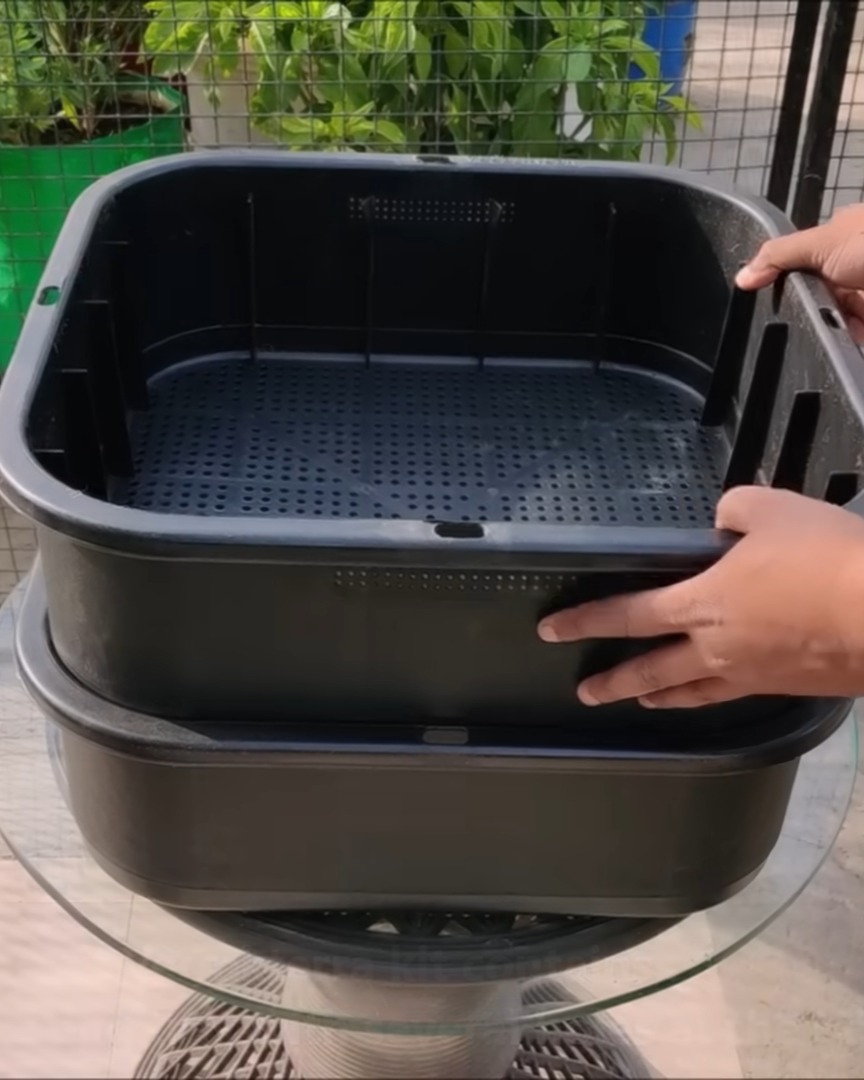
- Four legs
- One top lid
- Compost tea collection tray
- 250g of dolomite powder (conditioner)
- One coco peat brick for bedding
- One worm blanket
- One worm teacup
- A pair of gloves, a cultivator, and a user manual
- A tap
- Live earthworms
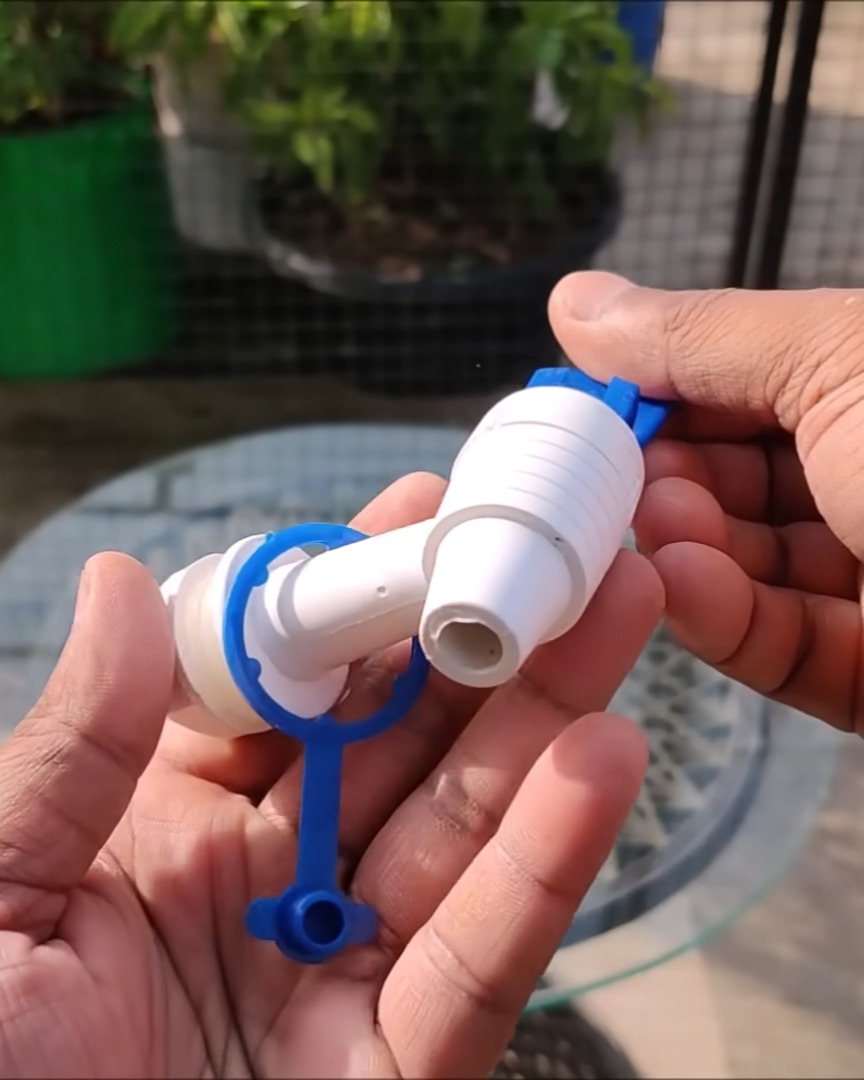
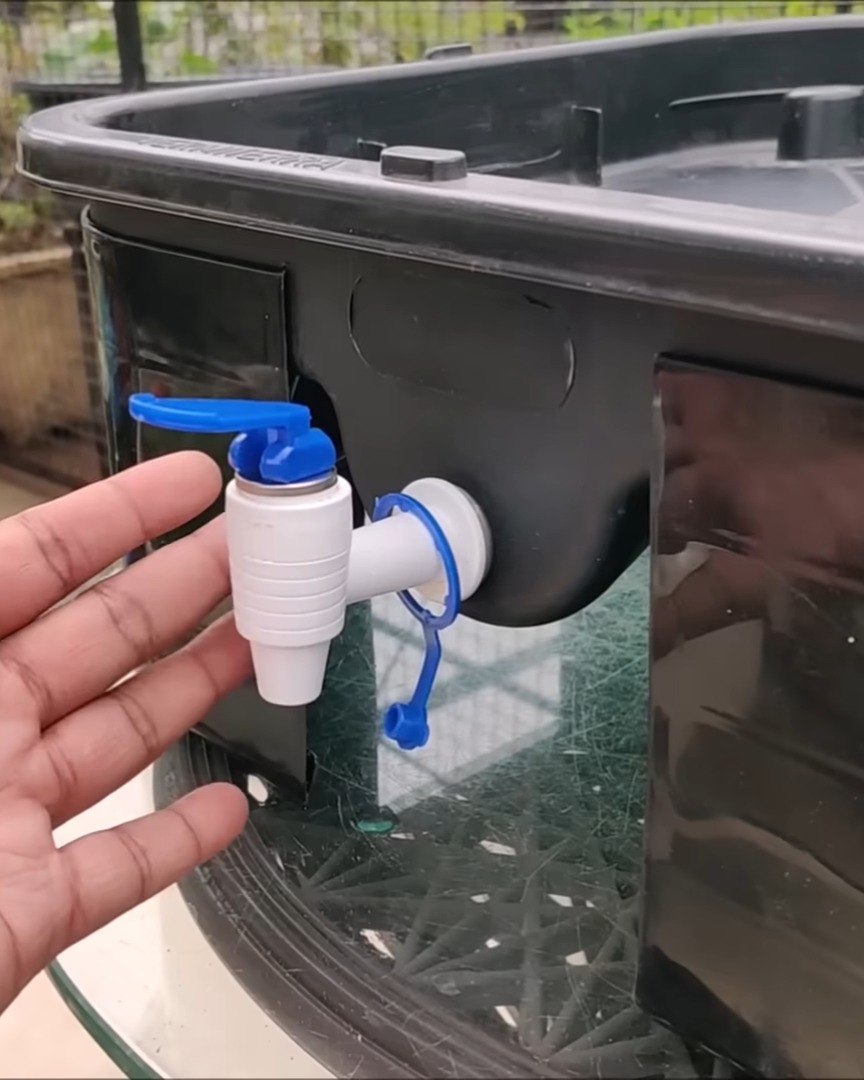
I first assemble the legs to the water collection tray.
Then I fix the tap to the tray so I can collect compost tea later.
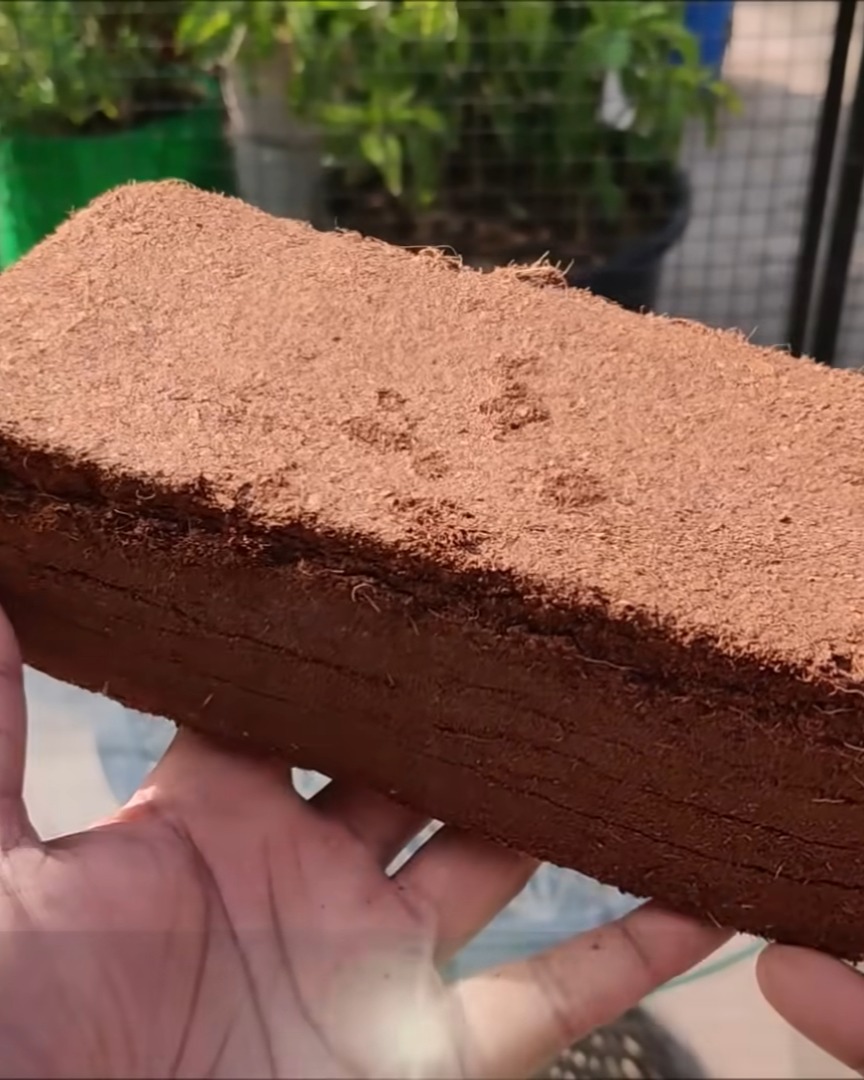
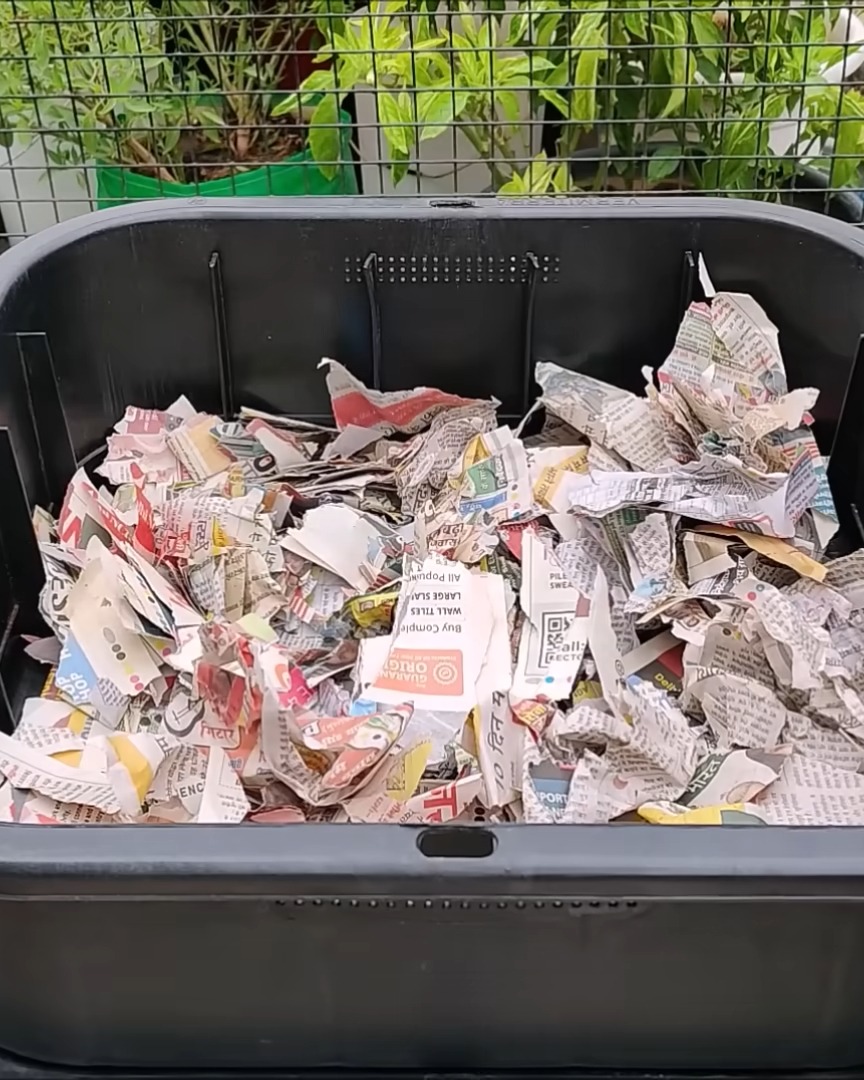
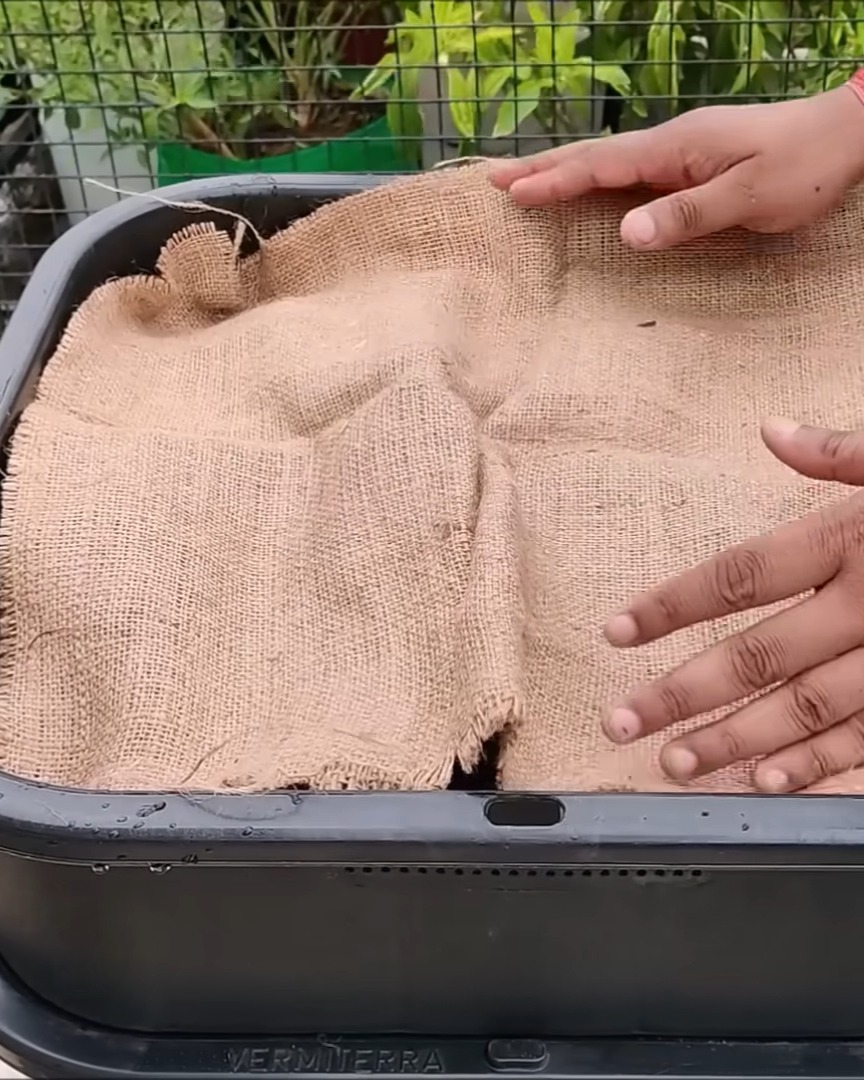
Step 2: Preparing the Bedding
Now, it’s time to create a cozy home for the worms. Bedding is super important!
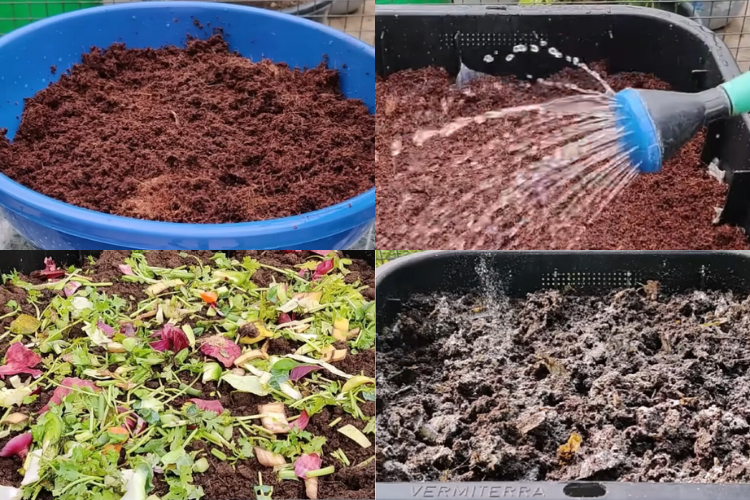
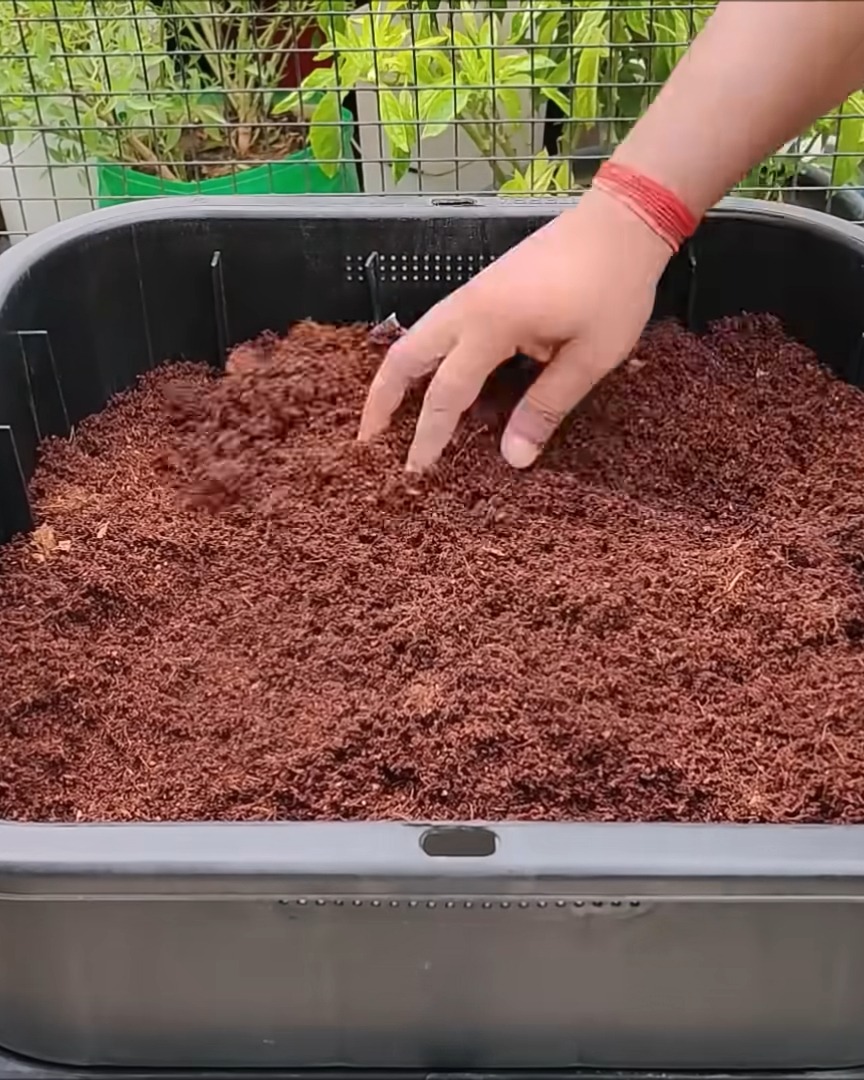
I soak the coco peat brick in 7 to 8 liters of water. After about 5 to 10 minutes, it expands and becomes soft and fluffy. That’s the base.
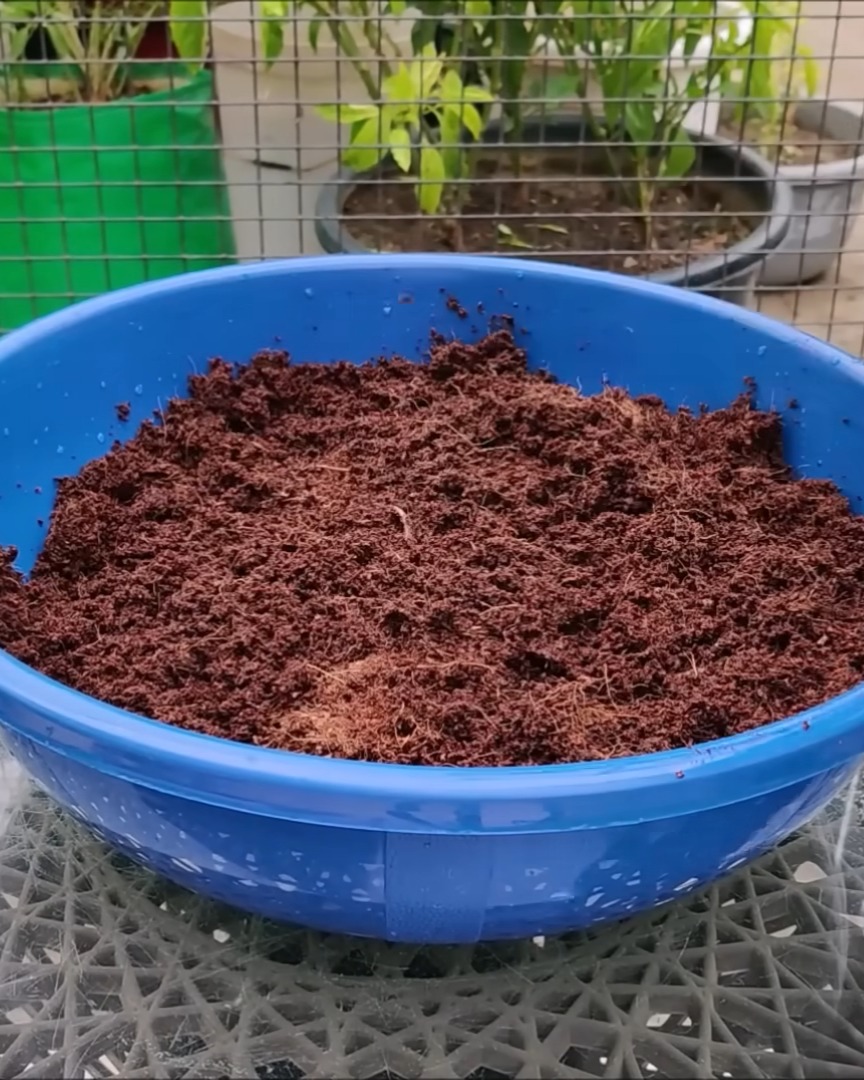
I also lay down old newspaper sheets in the tray.
Then, I add shredded newspaper and cardboard pieces. I fill the bin about 3 to 5 inches high with this mix. Worms love bedding that holds moisture well, so paper and cardboard are perfect!
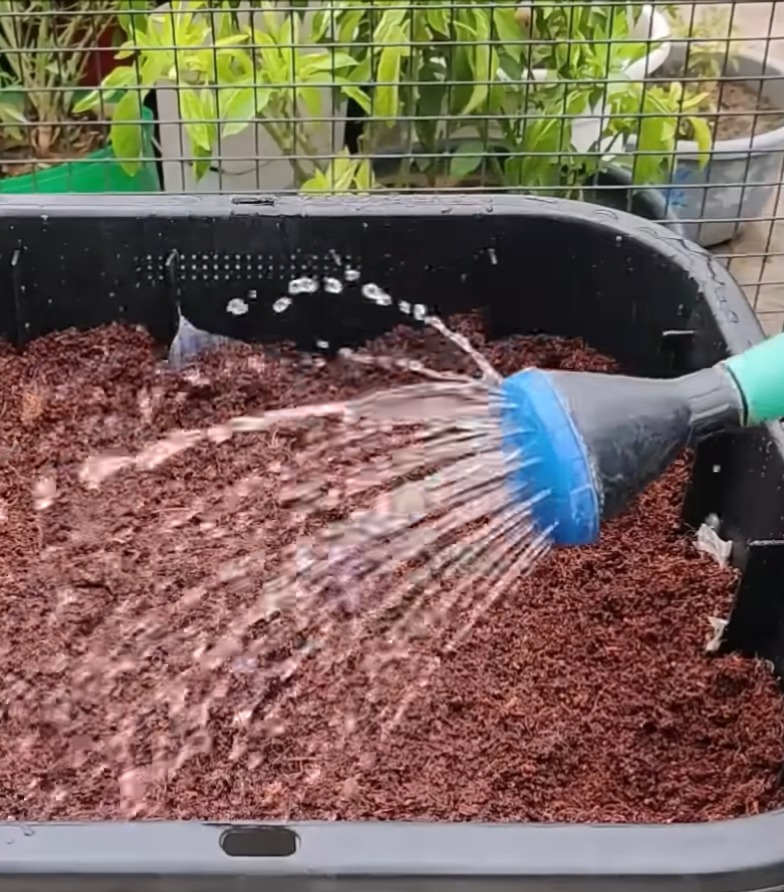
Next, I add the expanded coco peat and sprinkle water to maintain 50–60% moisture. If it gets too wet, I toss some dry shredded paper or dry leaves.
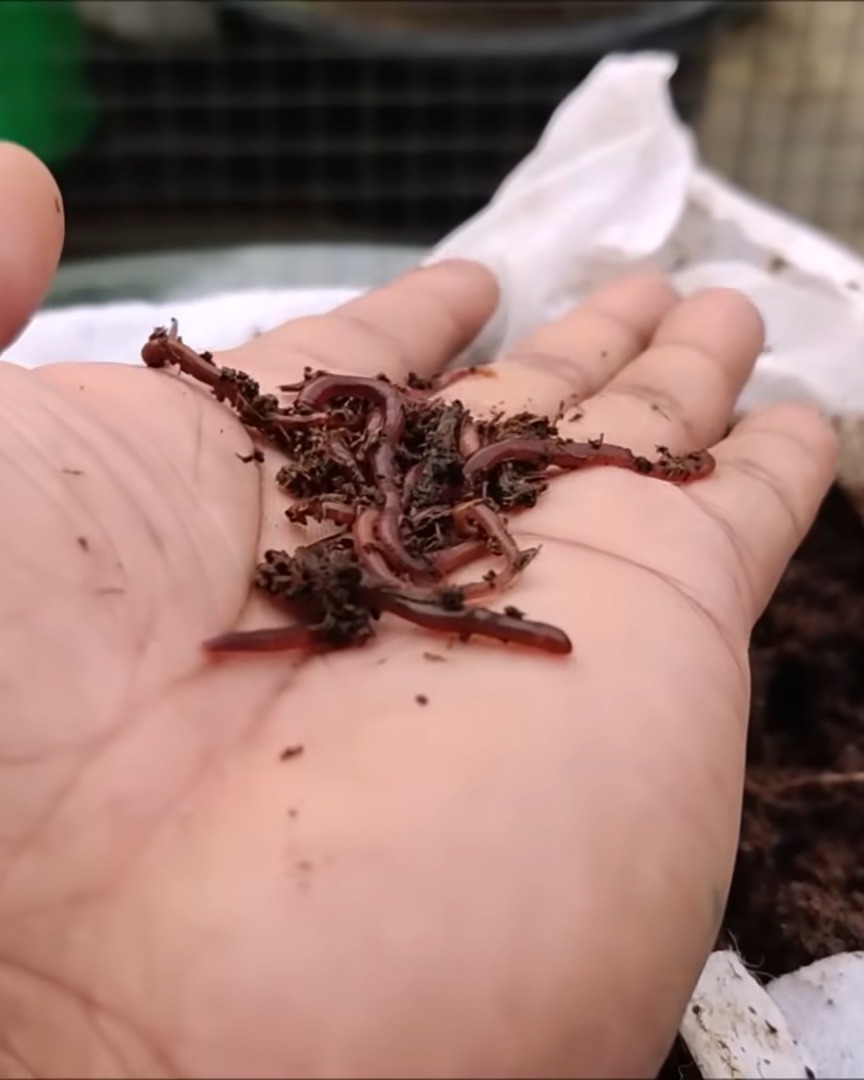
Step 3: Adding Earthworms and Helping Them Settle
Now comes the fun part—adding the worms! But they need time to adjust.

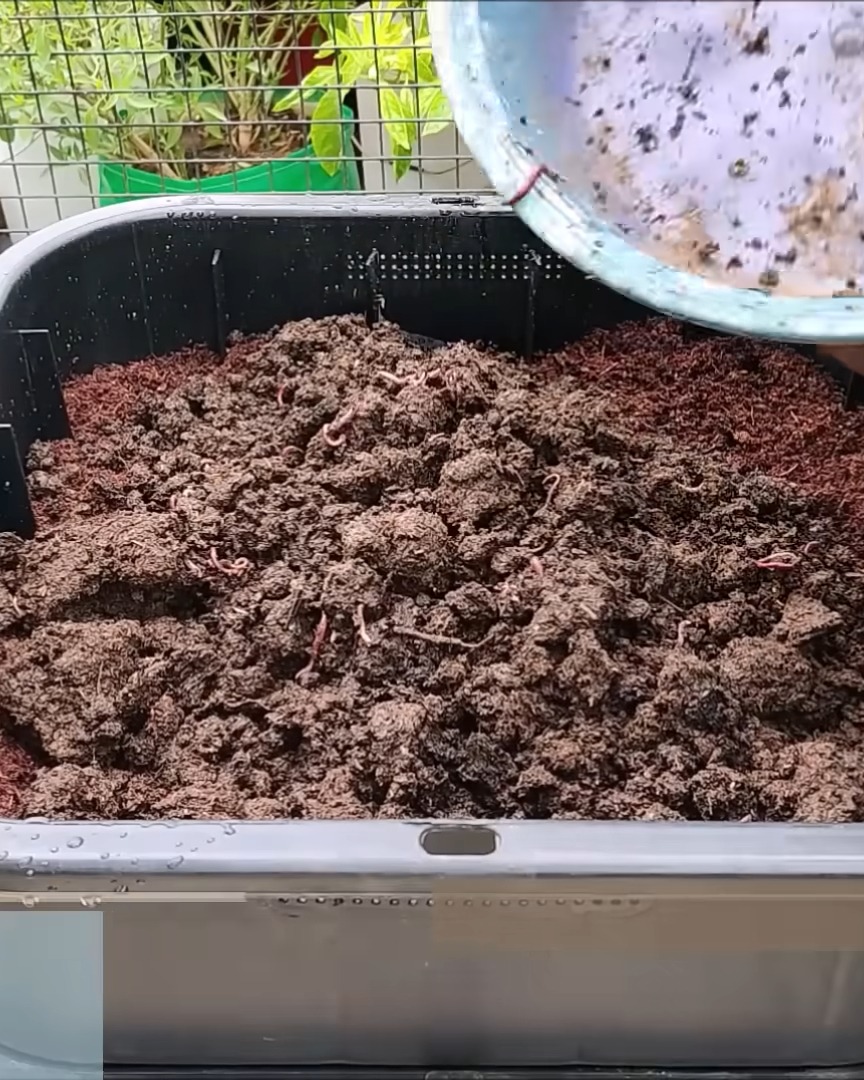
I gently place the earthworms into the tray. Then, I leave them undisturbed for about 2 to 3 days. This helps them settle into their new environment.
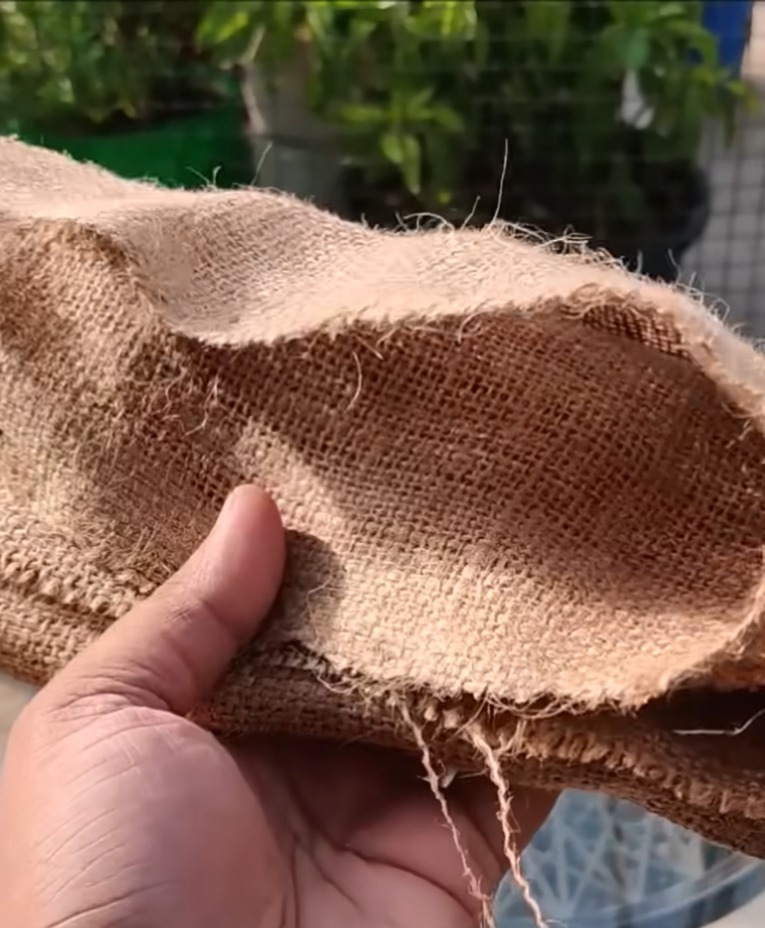
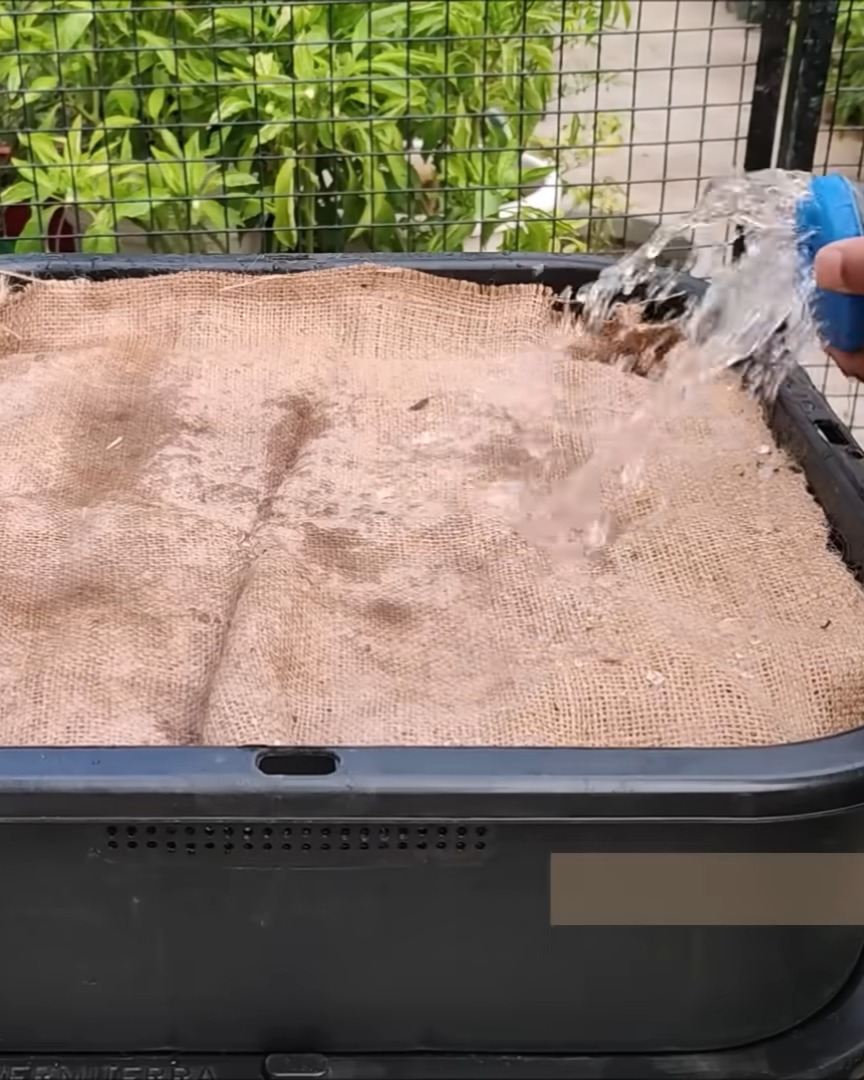
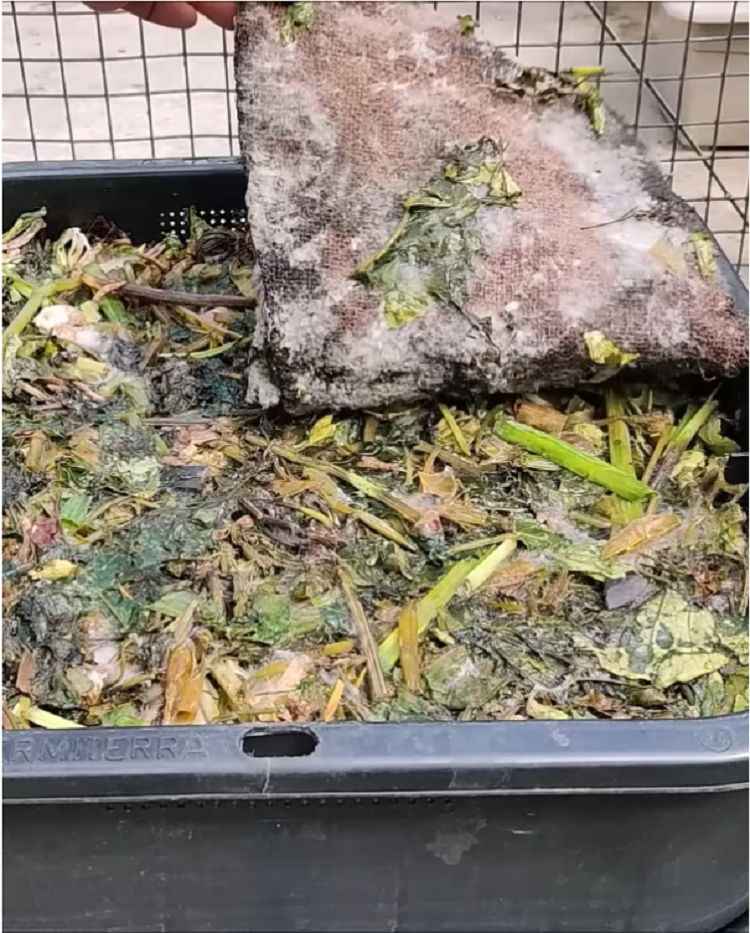
I place the worm blanket (included in the kit) on top.
Then, I close the lid to create a cool and dark space.
Worms thrive best in the shade, so I keep the bin under a tree, a green net, or indoors, like in a laundry room or closet.
Step 4: Feeding the Worms
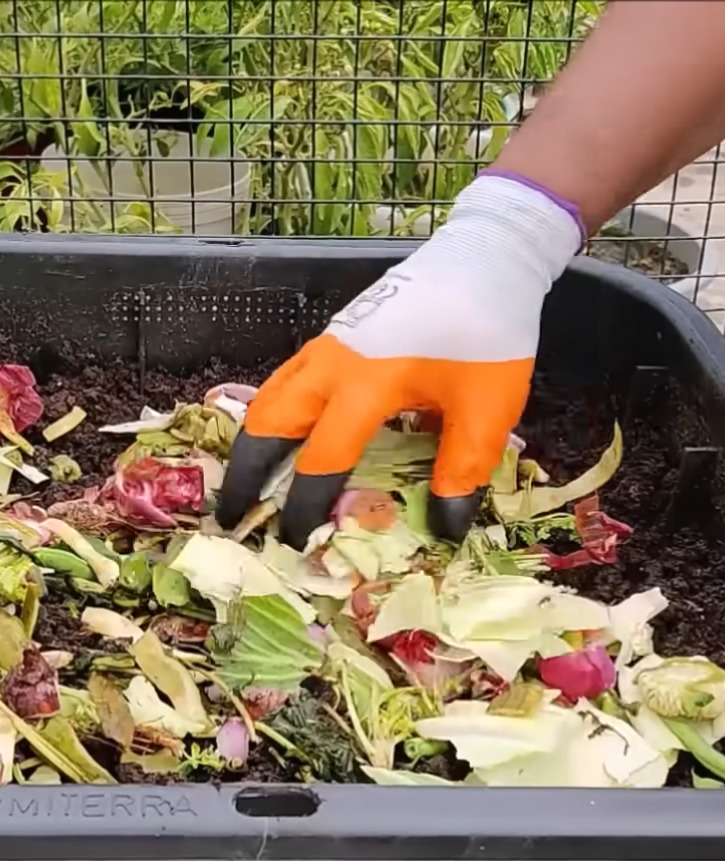
Day 3: Once the worms are comfy, I start feeding them my kitchen waste. Here’s how I do it.
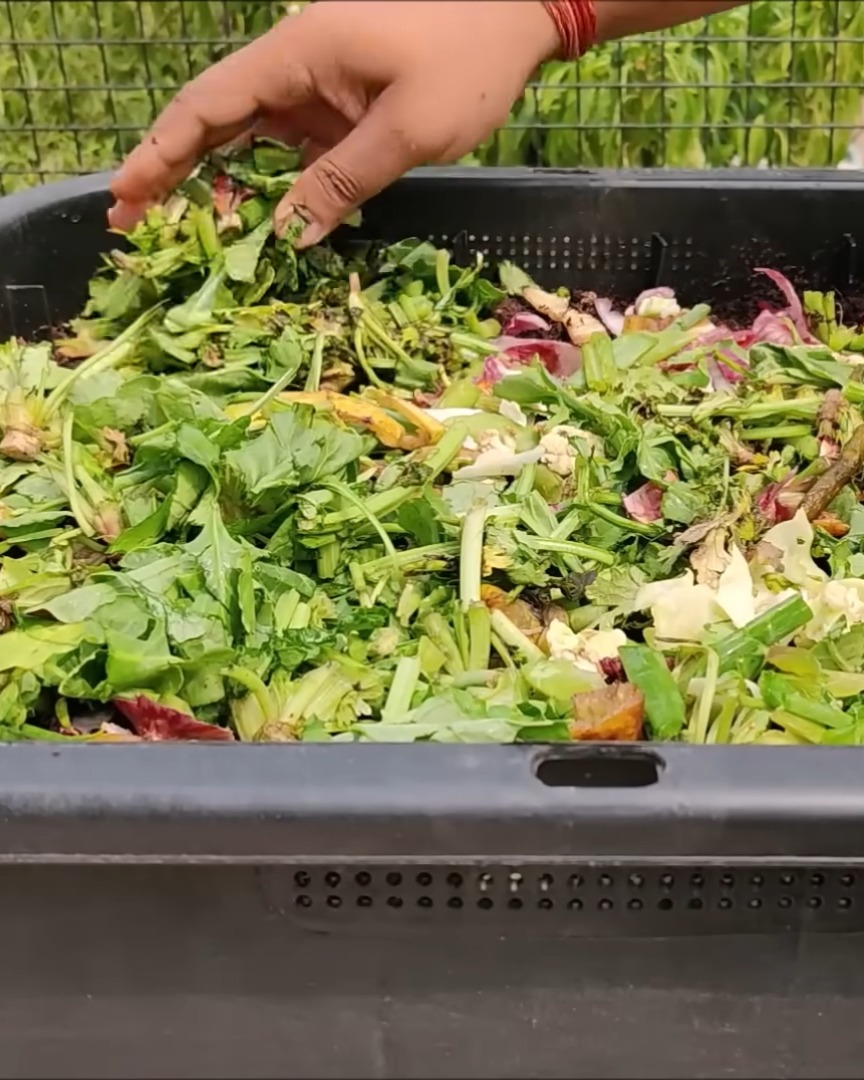
I chop my food waste into small pieces to help it decompose faster. I use:
- Fruit and veggie peels, cores, and leaves
- Crushed eggshells
- Used tea bags and coffee grounds

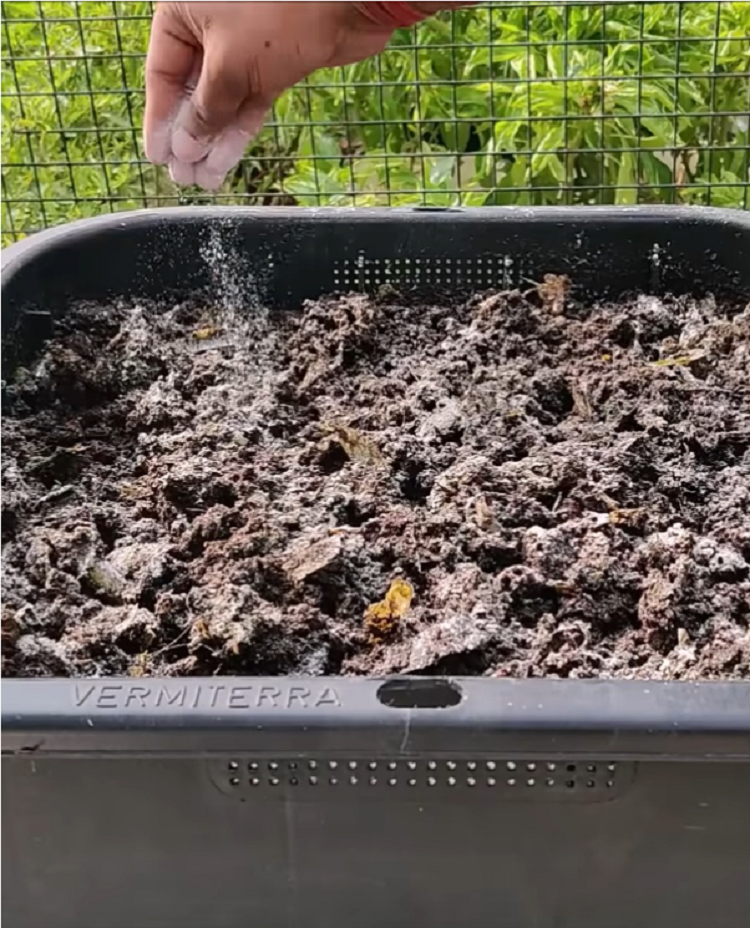
I never add meat, bones, dairy, or bread. I also avoid too much citrus or onions. A little bit is okay, but I sprinkle some conditioner (dolomite powder) to balance the acidity if I add it.
I start slow—about 250g of food per day. Once I see the worms multiplying and the system working well, I increase the quantity to around 500–800g daily.
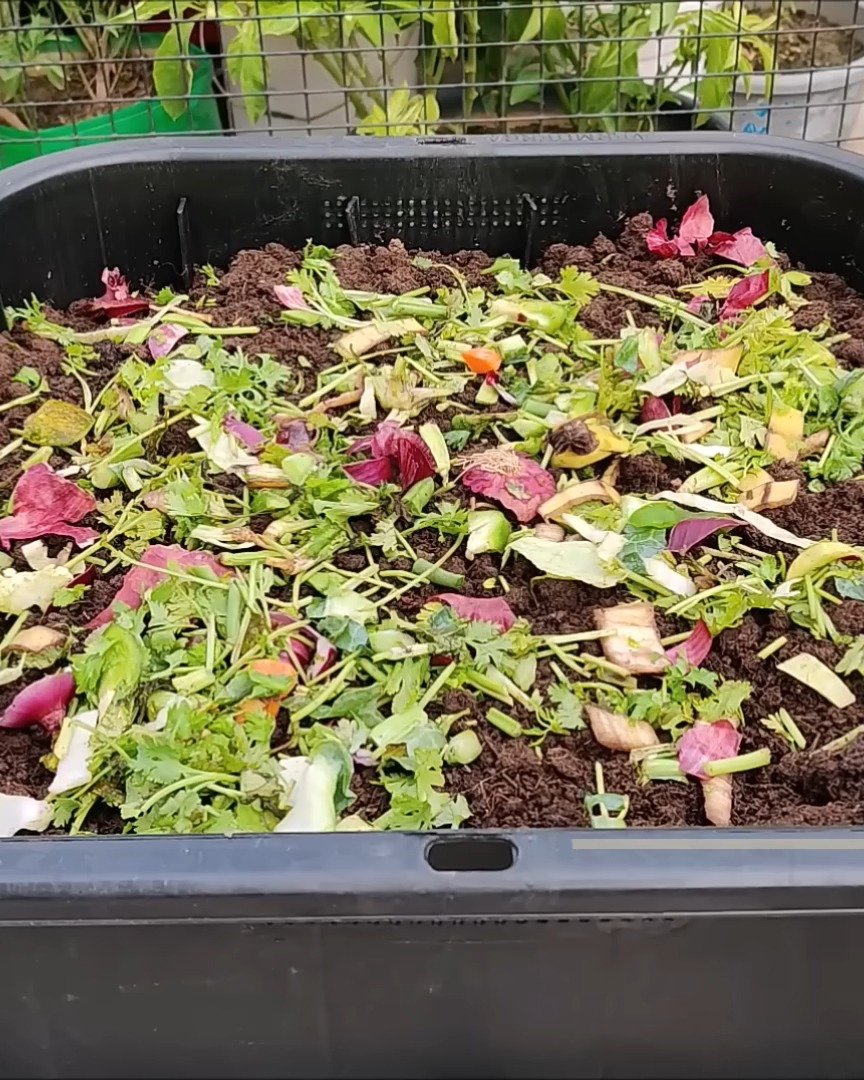
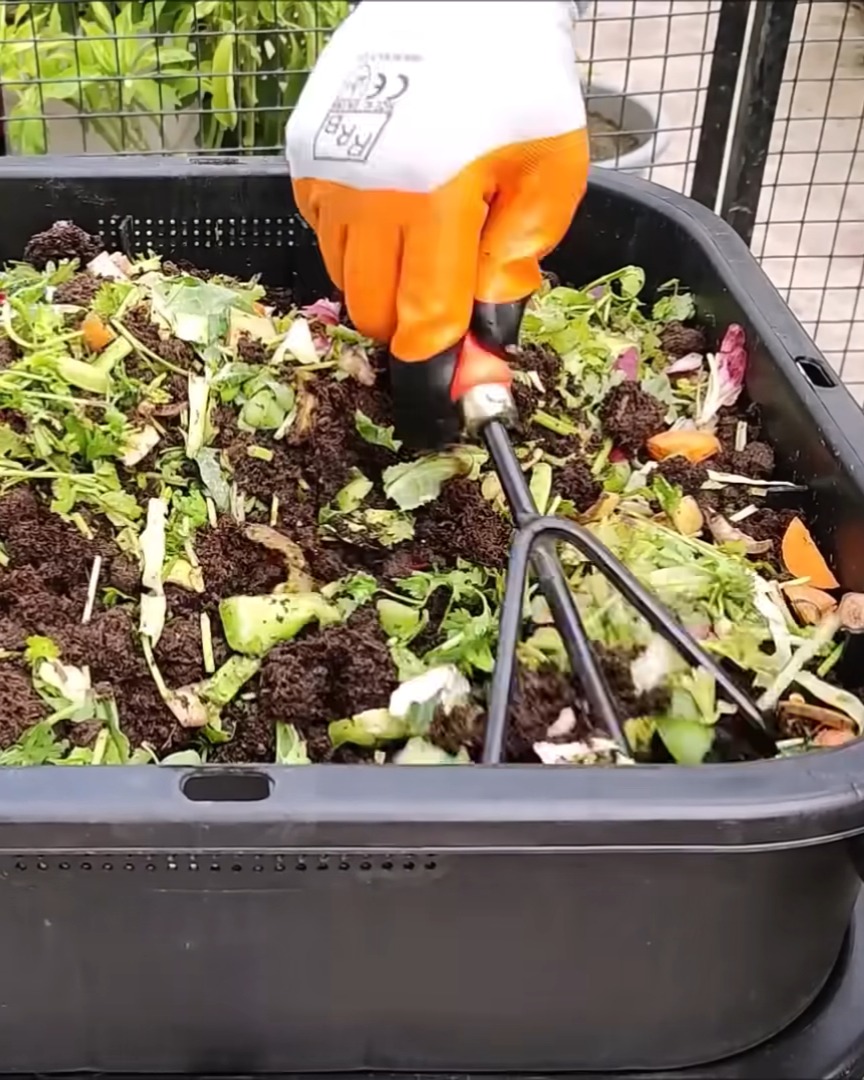
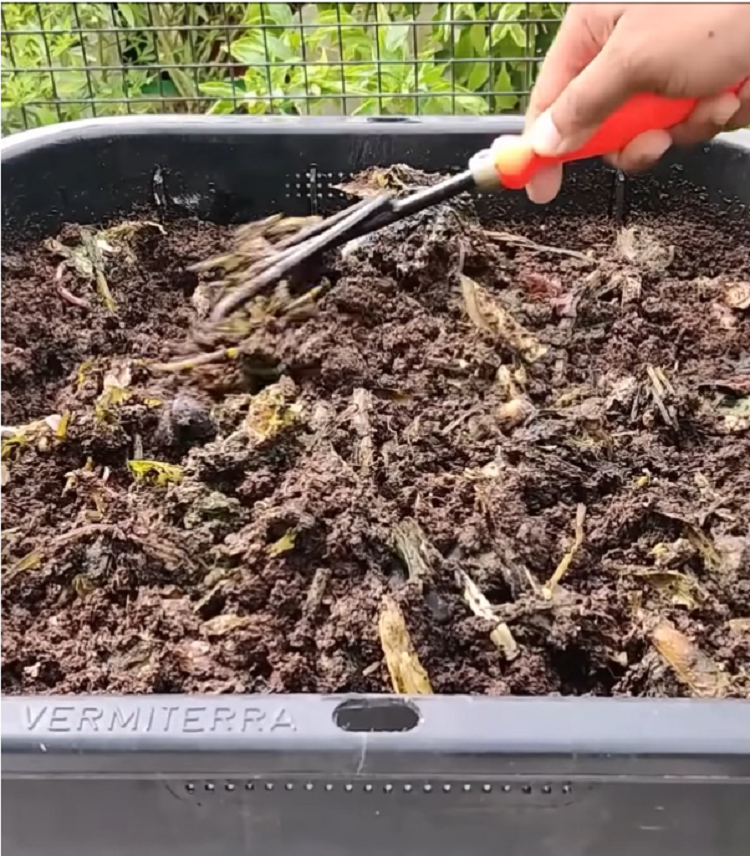
I bury the food into the bedding and use the cultivator to mix it.
Then I cover it with the worm blanket again and sprinkle some water.
Step 5: Keeping the Conditions Just Right
It’s super important to keep the worm bin moist and odor-free. A healthy bin makes happy worms!
I always keep the worm blanket moist. This helps hold moisture, trap any smell, and keep pests away. After adding food, I pour a little water over the blanket.
I throw food scraps into the bin and make sure everything’s breaking down well.
Step 6: Watching the Composting Magic Happen
This is the exciting part—watching the waste turn into compost!
After 10 to 13 days, I start noticing the transformation. There’s less food and more compost in the bin.
Sometimes, I see white fungus in the bin. That’s actinomycetes, and it’s great! It helps break down the food even faster, and the worms love it.
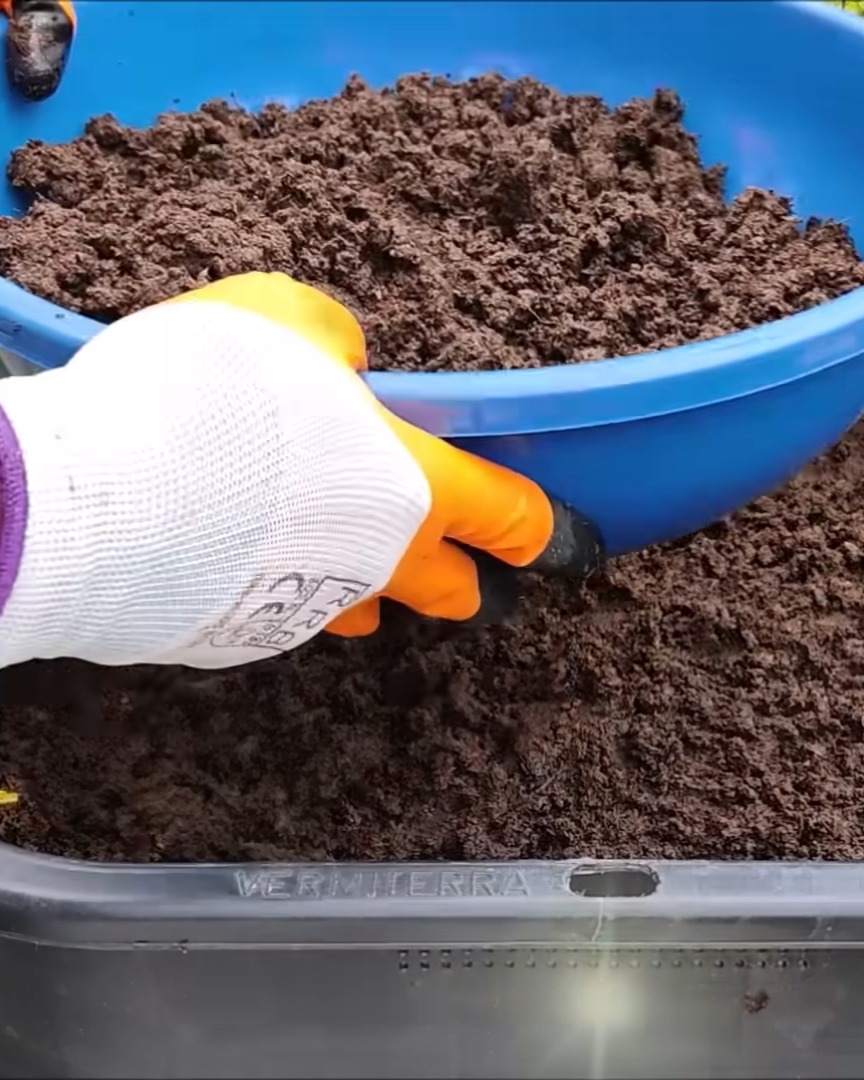
I check the bin every 2 to 3 days. I use the cultivator to stir the bedding and make sure everything’s breaking down well.
Day 15:
If I notice the bin feels too acidic or see food left uneaten, I sprinkle 1–2 tablespoons of conditioner and mix it well.
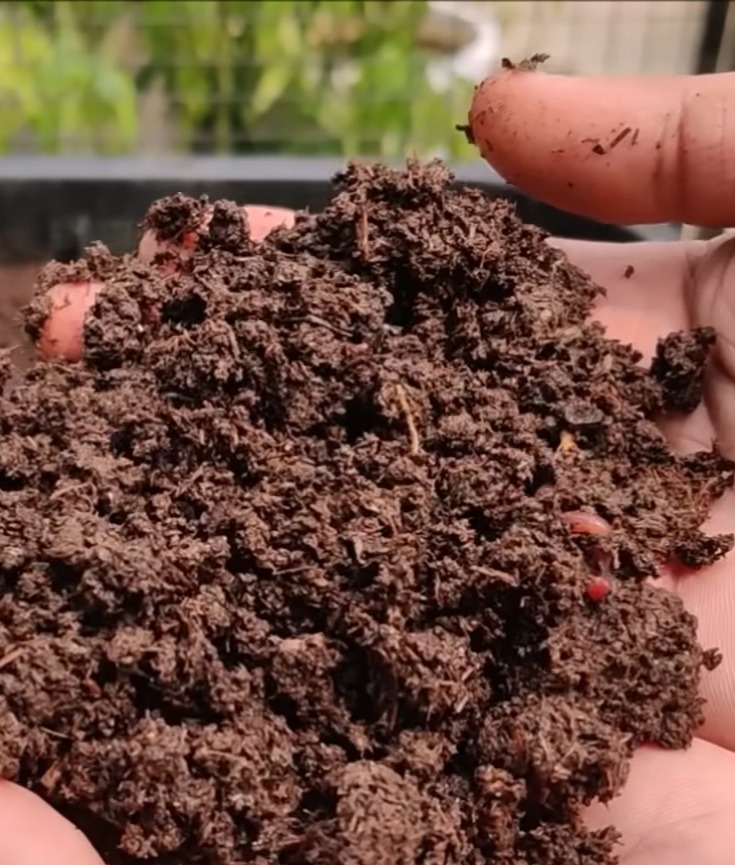
What’s amazing is that whatever comes out of the worms is way more nutritious than what goes in! That’s what we call worm castings.
Step 7: Harvesting Compost Tea or Vermi Wash
Once the composting starts working, I also get liquid gold—vermi wash!
After every 8 to 10 days, I drain the water collection tray.
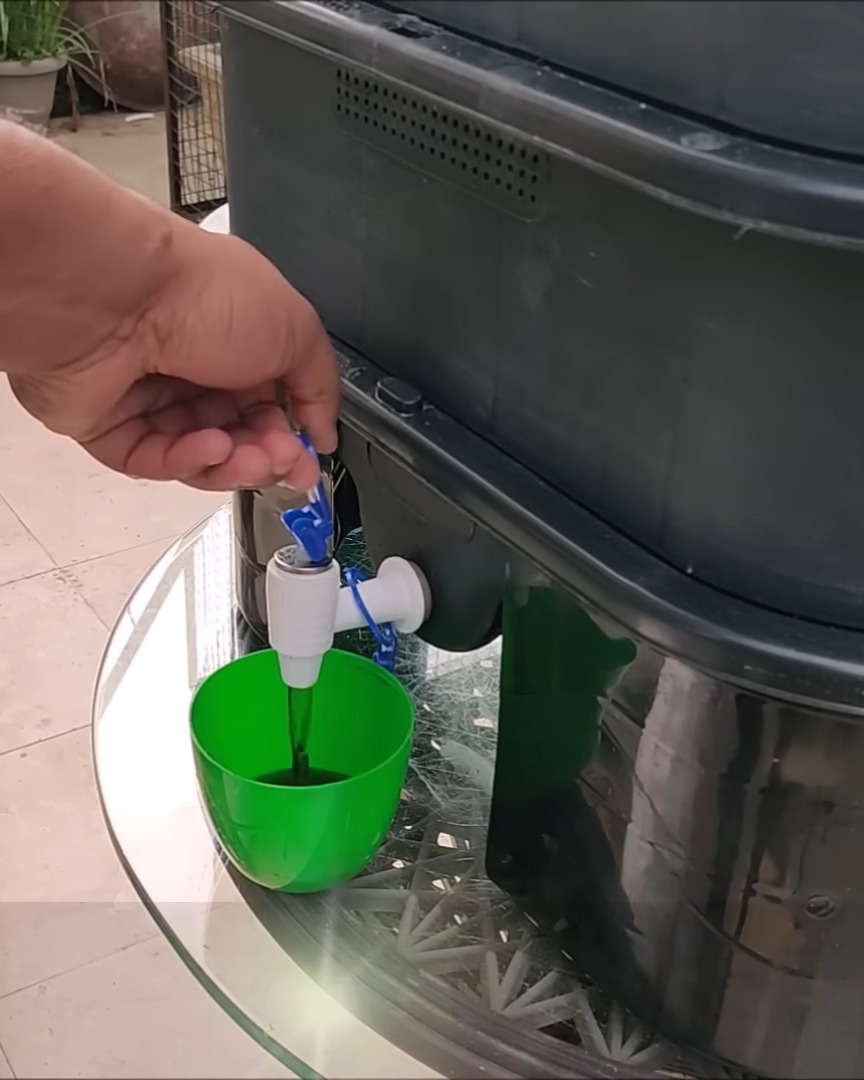
This tea carries nutrients that seep down from the compost. I mix 200 ml of compost tea with 1 liter of water and use it as a natural fertilizer.
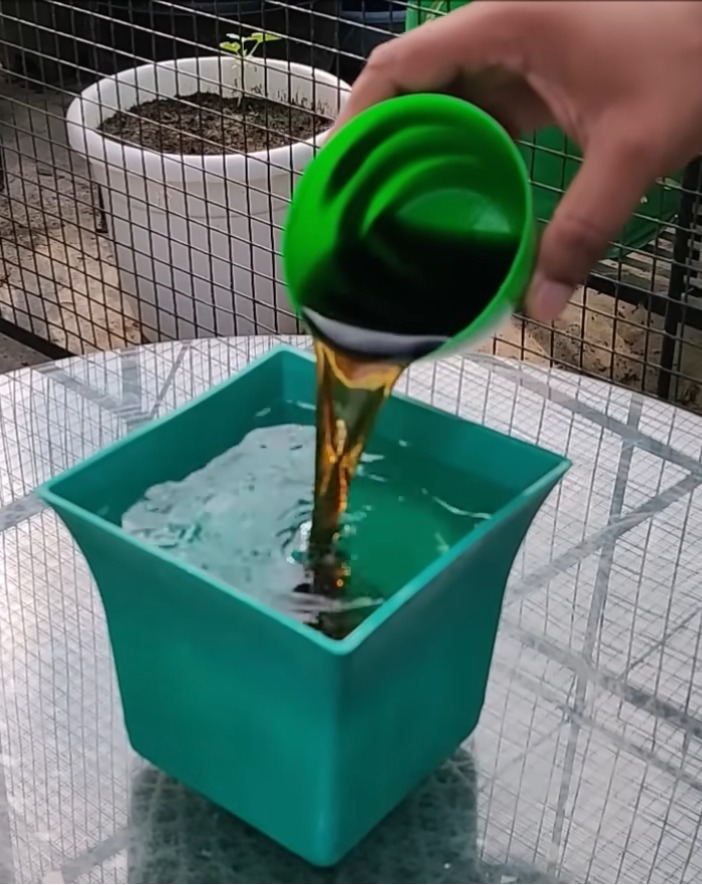
The vermi wash is rich in plant nutrients, enzymes, hormones, and helpful microbes. I use it on my garden soil and even spray it on leaves. It’s safe and super effective!
Step 8: Harvesting the Final Compost
When all the food scraps are gone, it’s time to collect the compost.
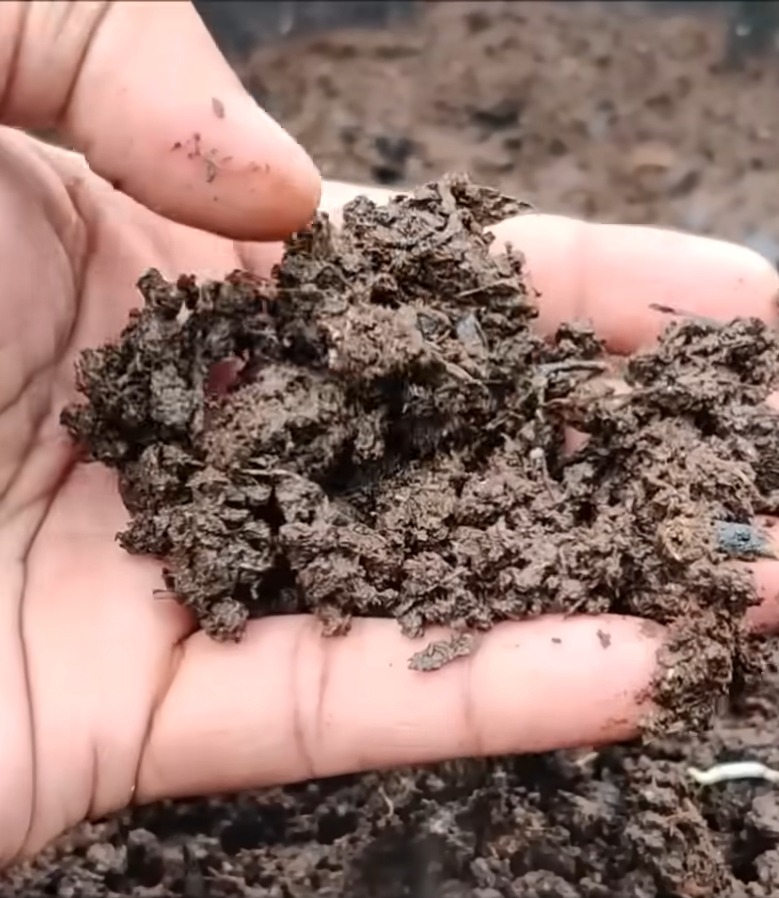
Before I harvest, I leave the bin in the sunlight for about 5 to 10 minutes. The worms crawl down to the bottom to escape the light.
Then, I scoop out the top 3 to 5 inches of compost gently.
I leave the bottom layer in the tray because it still has the earthworms. I either use the compost right away or store it for later use.
Step 9: Keep the Cycle Going!
The best part? This process never stops! I just keep feeding the worms and harvesting the compost.
I continue feeding 250 to 500g of kitchen scraps every day. I only give what the worms can eat. Overfeeding slows everything down, so I stay consistent.
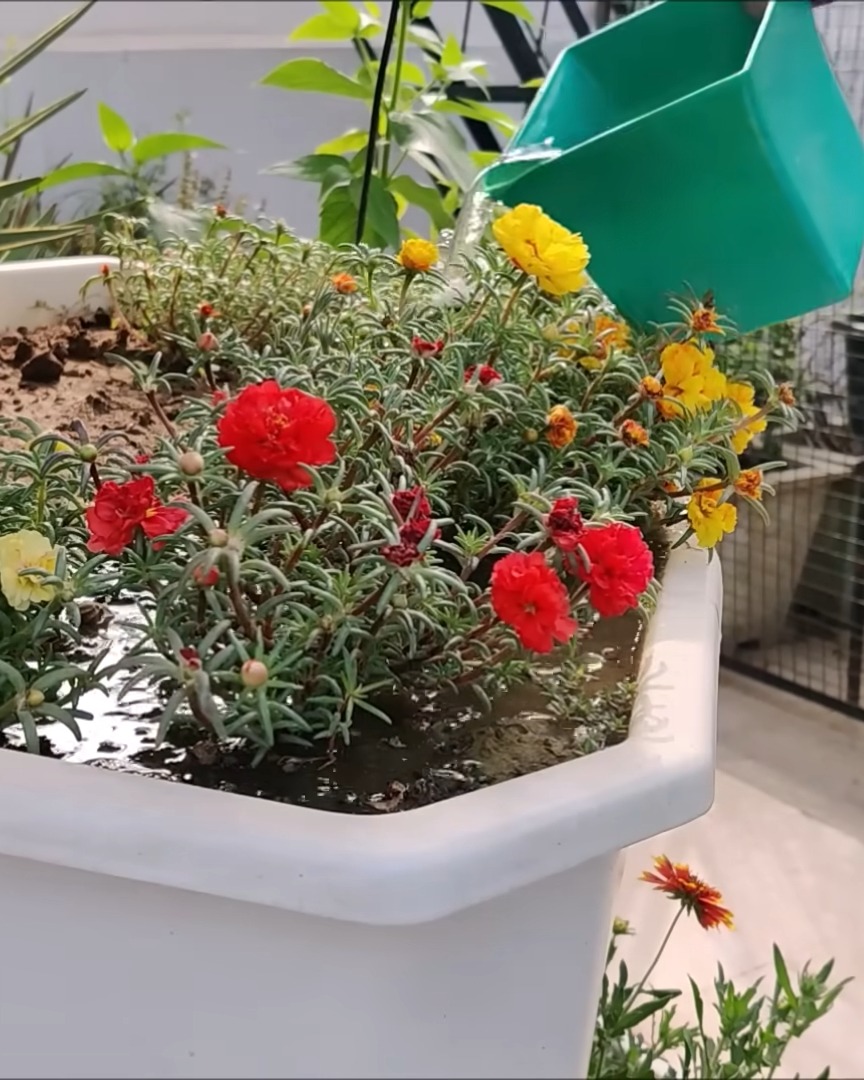
Every 15 to 18 days, I collect about 5 to 6 liters of compost tea. I store it in a cool, dry place and use it as a natural pesticide or fertilizer by diluting it to 10–20%.
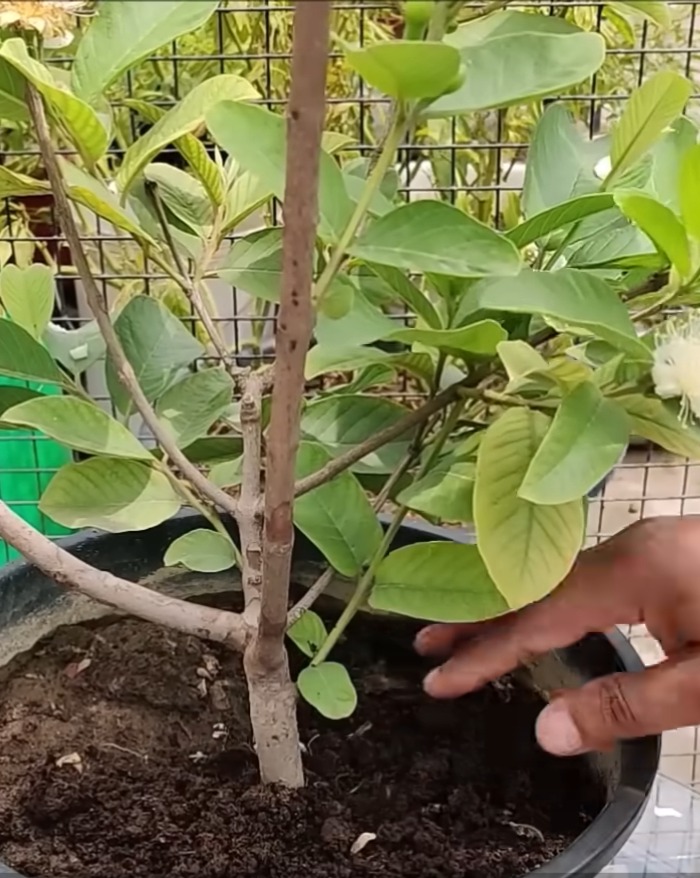
I mix the compost directly into my potting soil or sprinkle it on top of my plants. My indoor and outdoor plants love it!
Closing Words
Making compost in just 10 days is real—and it works wonders for my garden! All I do is feed my worms, keep things moist, and wait. The result? Rich, natural compost and liquid fertilizer that keeps my plants thriving. Are you ready to turn your kitchen waste into garden gold, too? Let’s compost together!