
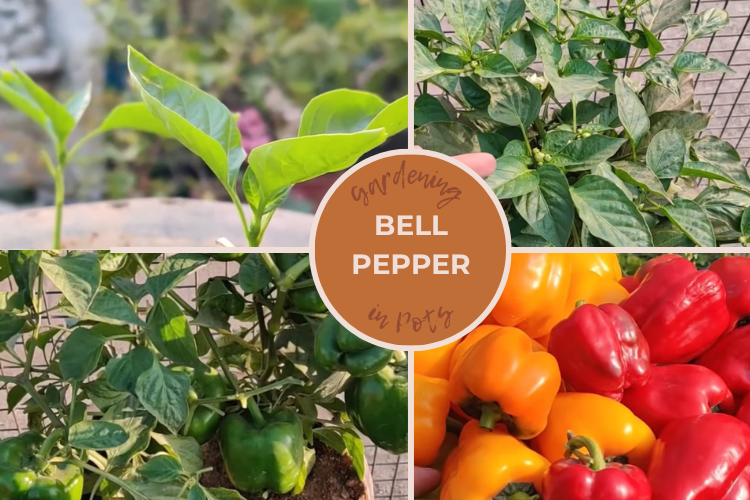
Growing bell peppers in pots is one of the easiest and most rewarding things I do in my home garden! Whether it’s on the terrace or just a sunny corner near the kitchen, bell peppers thrive with the proper care. Let me walk you through every step — from sowing the seeds to harvesting colorful, delicious peppers. If I can do it, so can you!
Contents
- 1 Why Grow Bell Peppers in Containers?
- 2 Starting with the Right Seeds
- 3 Preparing the Pot and Soil Mix
- 4 Sowing Capsicum Seeds Properly
- 5 Transplanting Seedlings to Larger Containers
- 6 Caring for Your Growing Capsicum Plants
- 7 Preventing and Managing Common Diseases
- 8 Flowering, Pollination, and Fruit Formation
- 9 When and How to Harvest Bell Peppers
- 10 Tips for Maximizing Yield and Quality
- 11 Post-Harvest Handling and Storage
- 12 The Bottom Line
Why Grow Bell Peppers in Containers?
Growing bell peppers in pots gives me control over space, soil, and sunlight — and it’s ideal for small gardens!
Ideal for Small Spaces and Beginners
I find bell peppers to be one of the most beginner-friendly vegetables. They don’t need much space, and growing them in containers lets me move them around for the best sun exposure.
Whether you’re on a terrace or balcony, this setup works beautifully.
Easy to Grow in Terrace or Kitchen Gardens
I started with just a few pots on my terrace, and the results were amazing. A sunny spot and some care — that’s really all it takes.
These plants are also perfect for kitchen gardens because they don’t require much space or special tools.
Key Growing Conditions: Sunlight and Moisture
Here’s what I always keep in mind:
- Full sun exposure
- Consistent watering
- Well-draining, airy soil
Sunlight and moisture are key! If either is missing, the plants struggle. So, I always make sure my pots get plenty of both.
Starting with the Right Seeds
Before I plant anything, I make sure I’ve got quality seeds — because strong plants start with strong seeds.
I’ve had the best results with high-quality, imported seeds. This time, I use seeds from Syngenta, a trusted brand known for its performance. They germinate fast and give me healthy, productive plants.
Preparing the Pot and Soil Mix
The right mix and pot setup helps me get healthy seedlings right from the start.
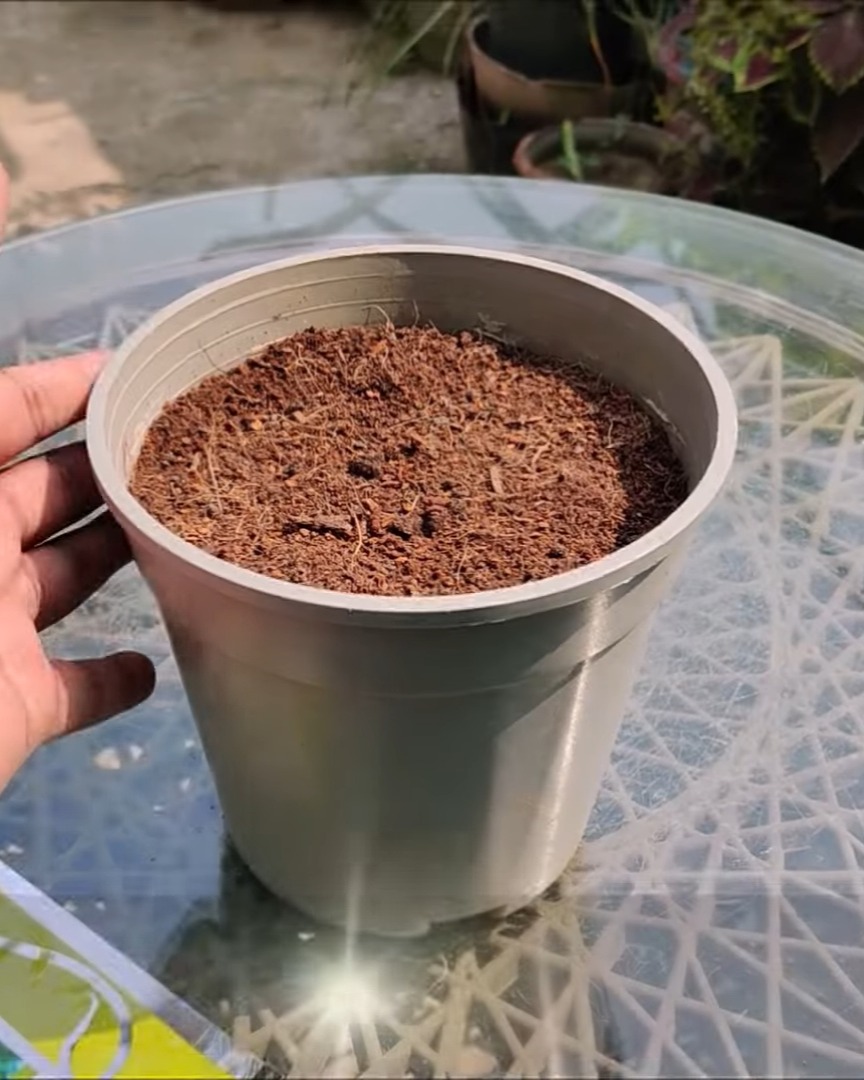
Choosing the Right Pot for Seed Starting
I begin with a small pot. Something compact is easier to manage when I’m just germinating seeds.
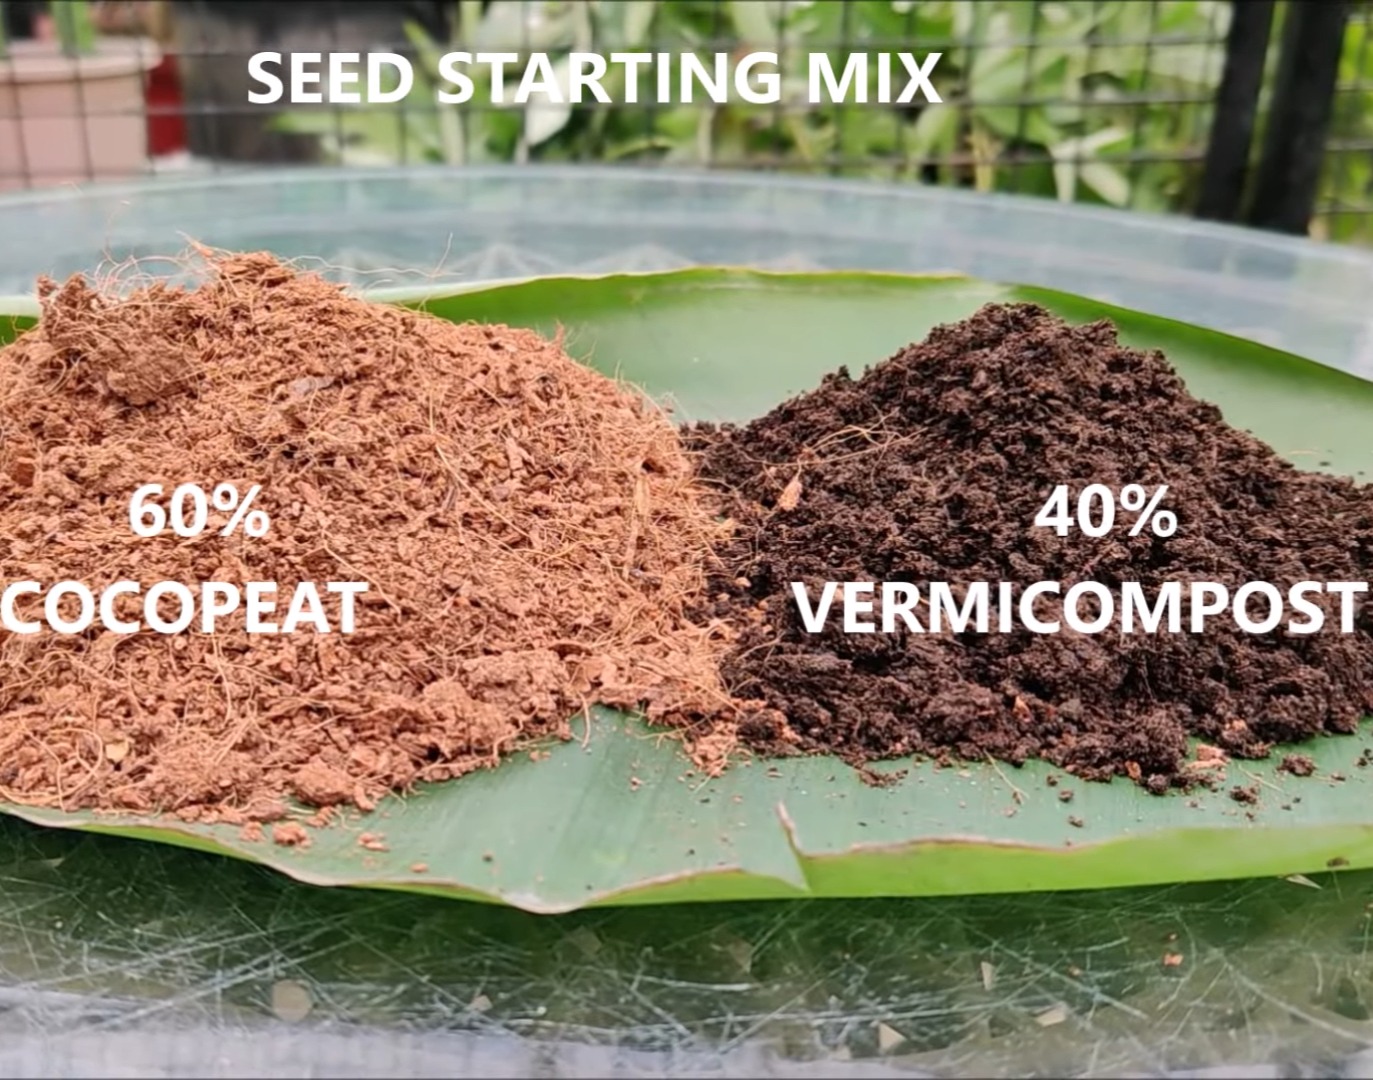
Making the Ideal Seed Starting Mix
Here’s my go-to mix:
- 60% coco peat
- 40% vermicompost or leaf mold
I mix it well until it’s fluffy and uniform. This gives me a light, breathable base for the seeds.
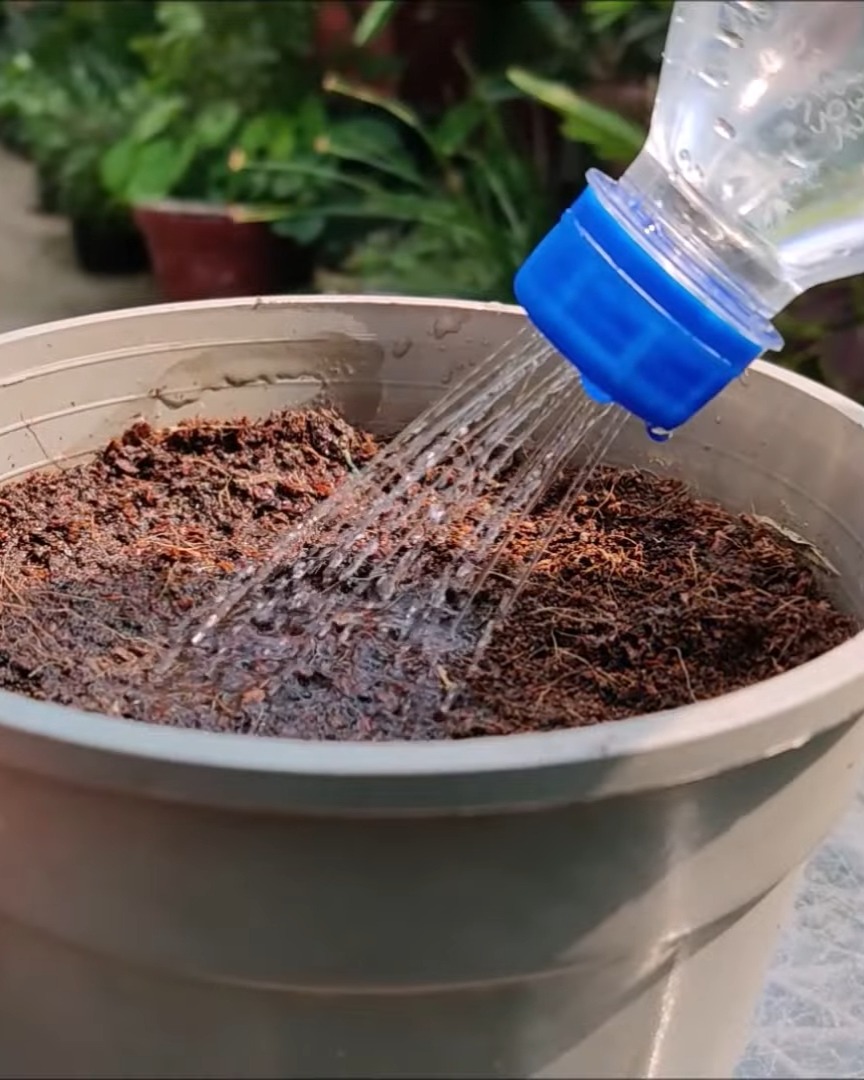
Moistening the Soil Before Sowing
Before I sow the seeds, I water the mix thoroughly. It’s not too soggy — just damp enough to help the seeds settle in nicely.
Sowing Capsicum Seeds Properly
Now it’s time to plant! This part sets the stage for healthy growth.
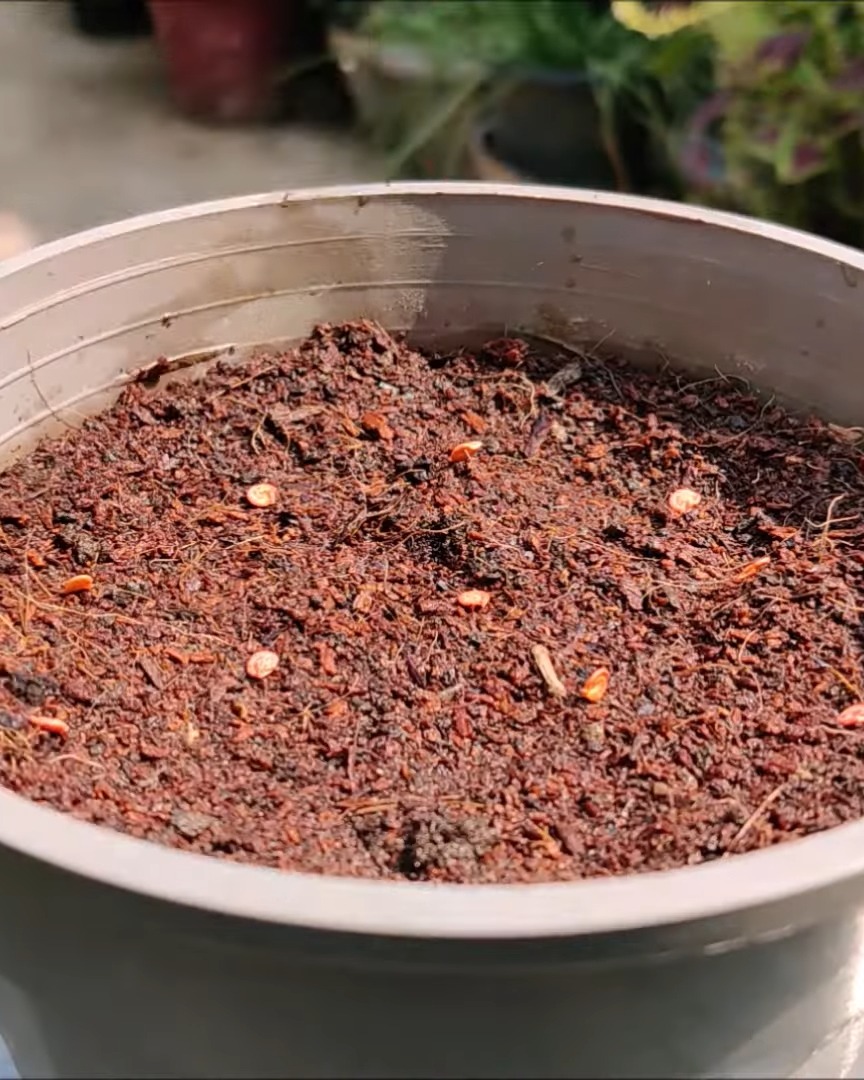
How to Place Seeds for Healthy Growth
I gently place the seeds on the surface. I space them about 1 to 2 inches apart. That gives each plant enough room to breathe and grow strong.
Covering and Pressing Seeds for Germination
Once the seeds are in place, I cover them lightly with a bit of the same soil mix.
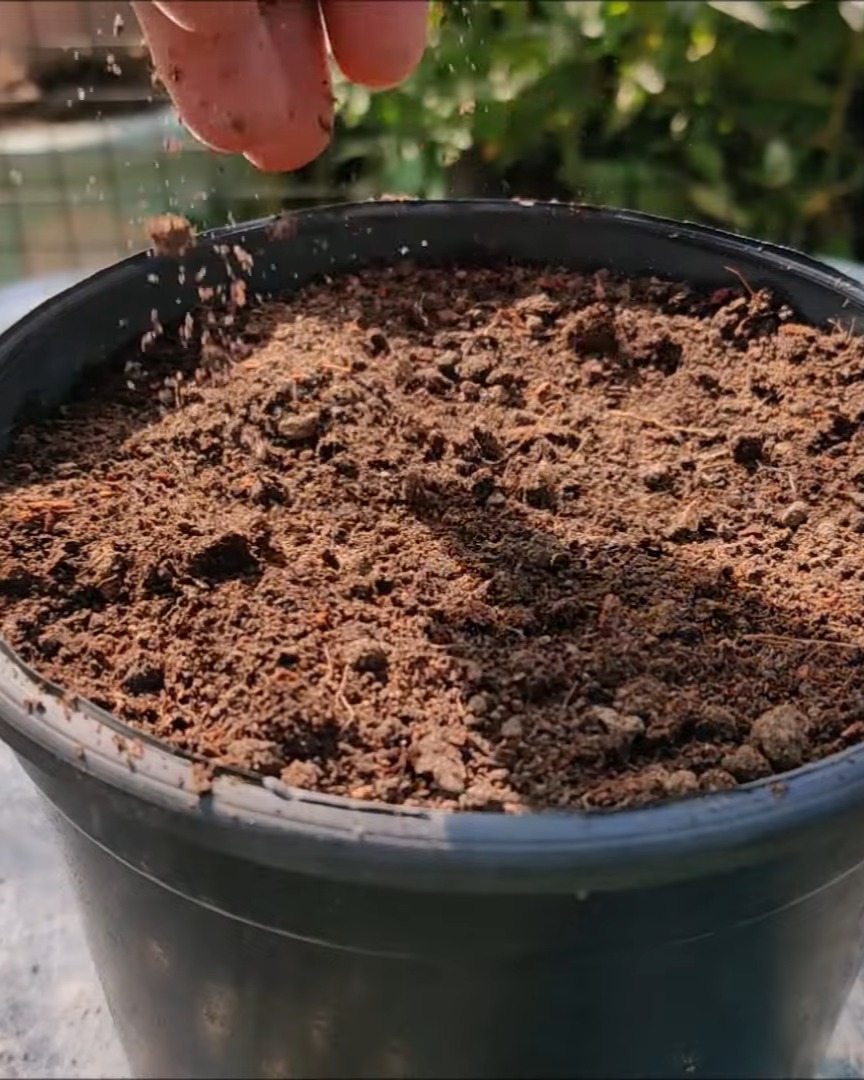
Then, I press gently with my fingers to ensure the seeds have good contact with the soil.
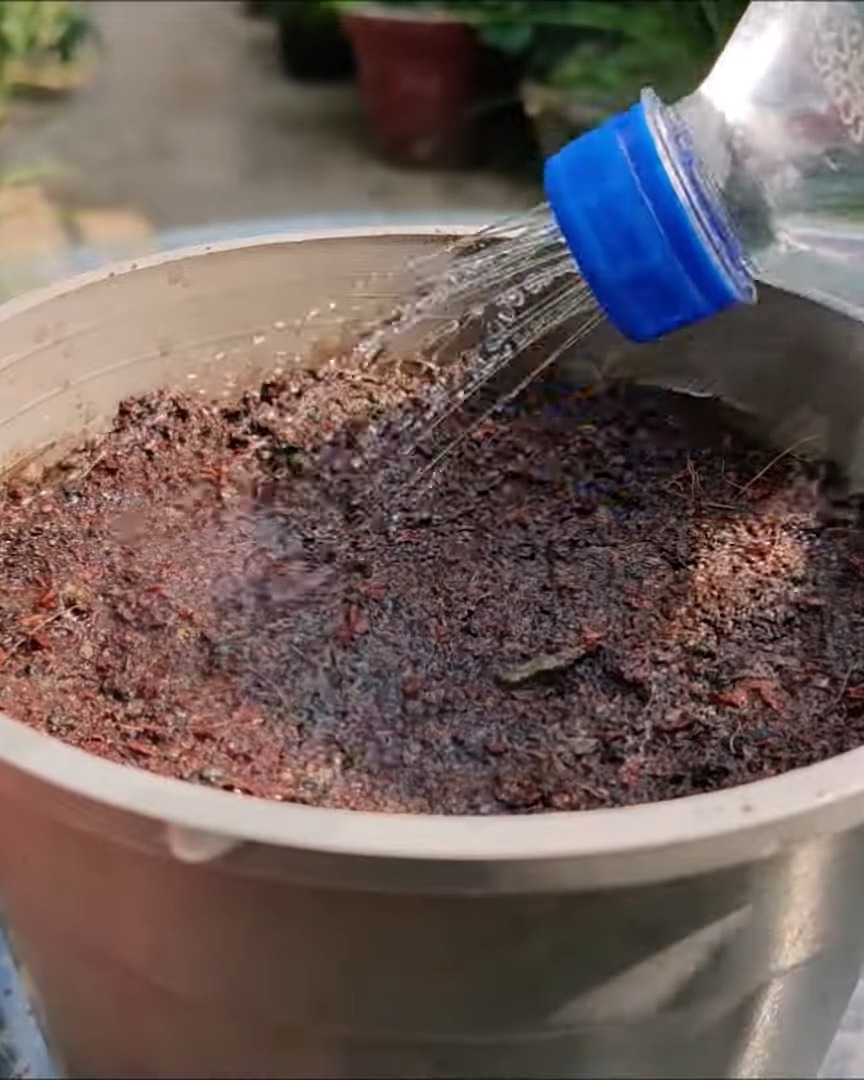
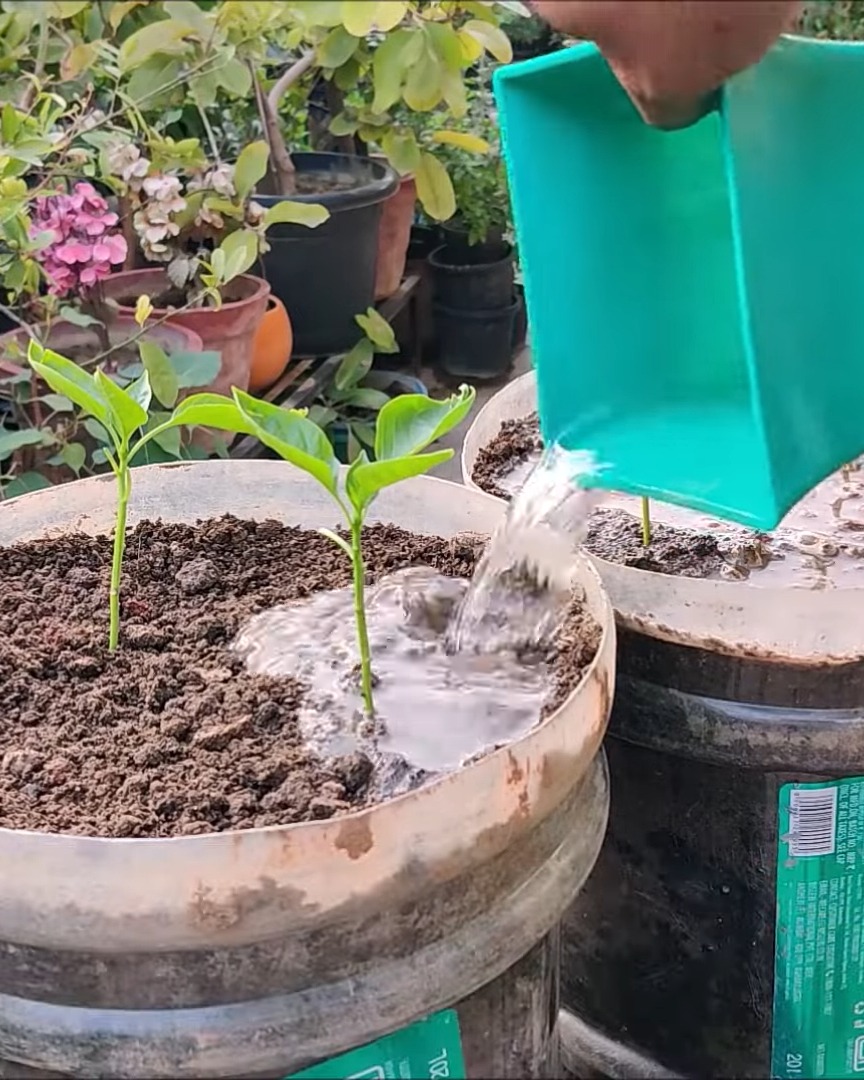
Watering and Sunlight Requirements During Germination
I sprinkle water lightly — just enough to keep the soil damp. Then, I move the pot to a sunny spot.
For the next 12 to 15 days, I never let the soil dry out, but I’m careful not to soak it either.
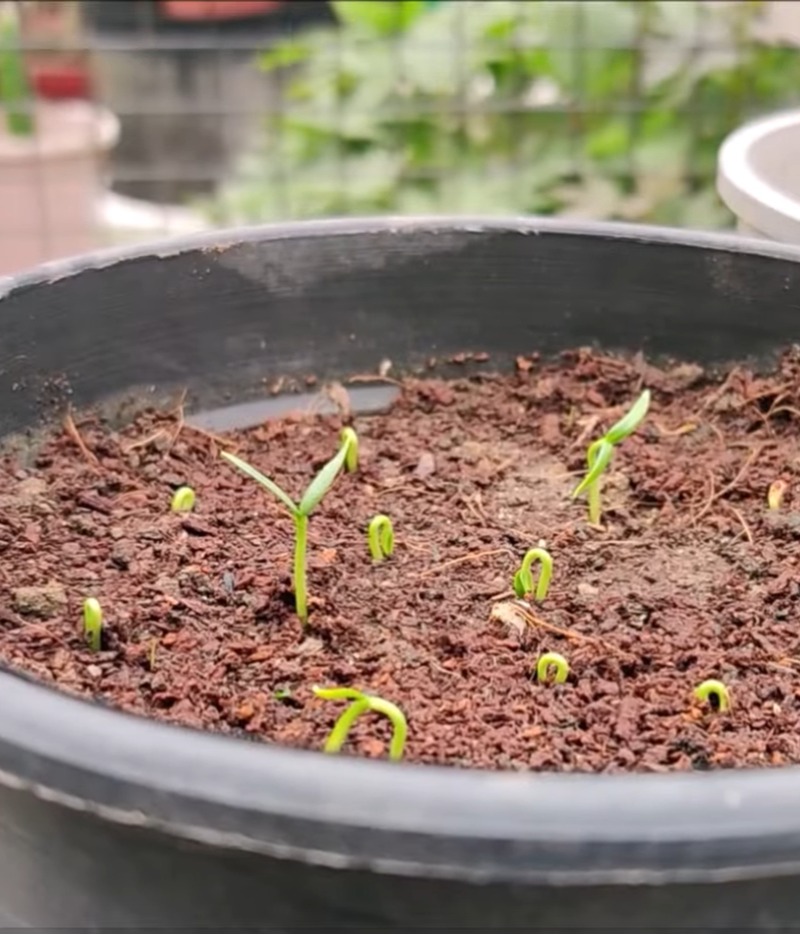
Germination Timeline and Soil Moisture Management
Germination usually happens in 7 to 9 days. During this time, I check the soil every day to make sure it stays just moist. This stage is so delicate, but once the seeds sprout, it’s so exciting!
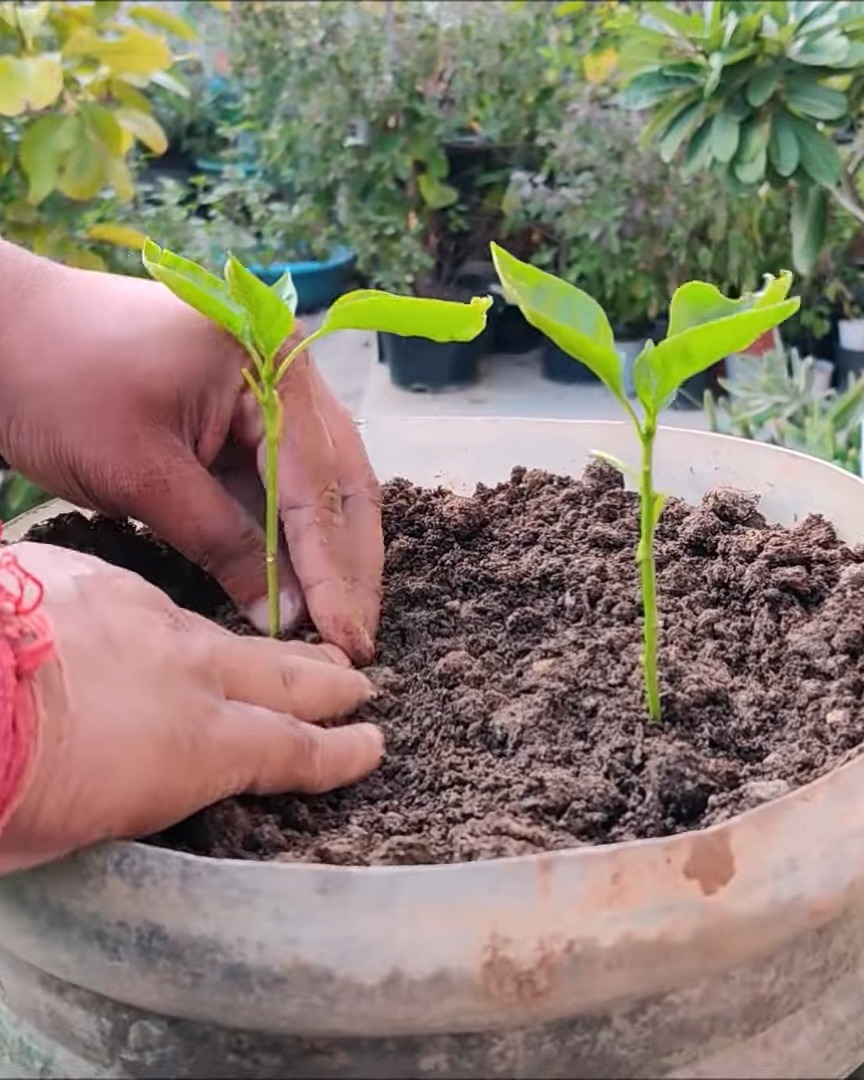
Transplanting Seedlings to Larger Containers
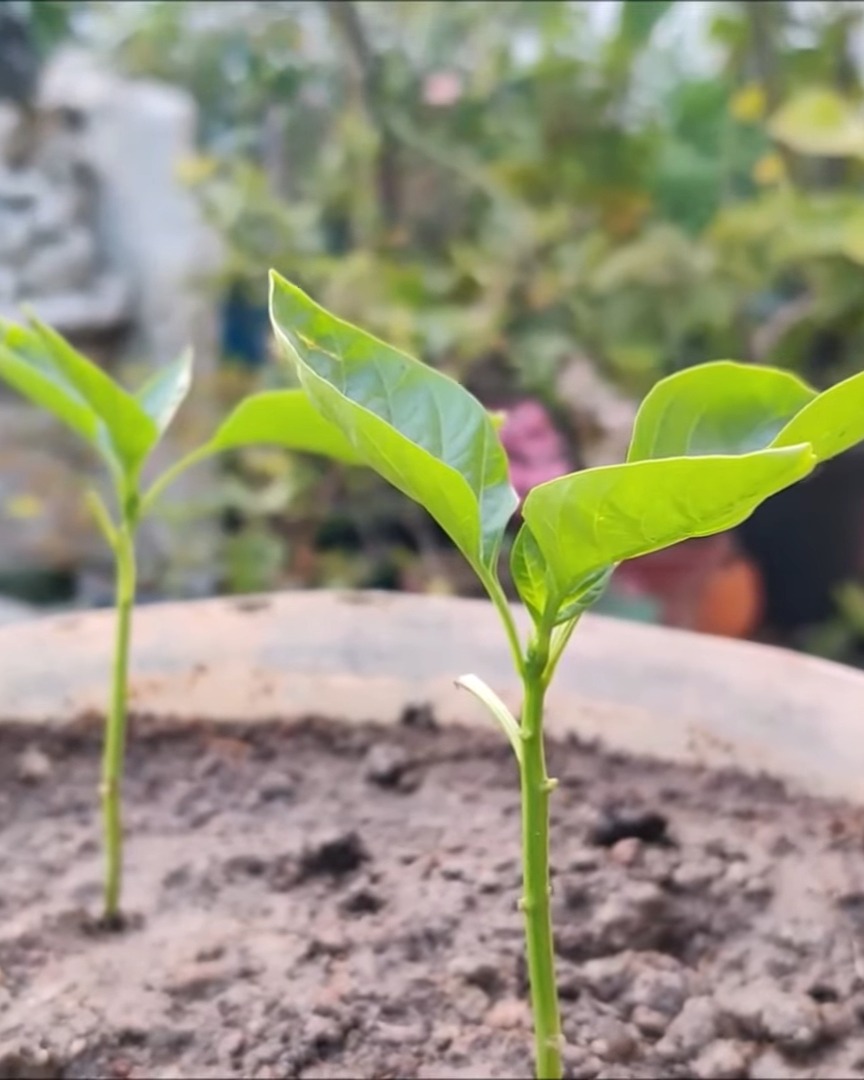
After 23 days, those seedlings are a few inches tall.
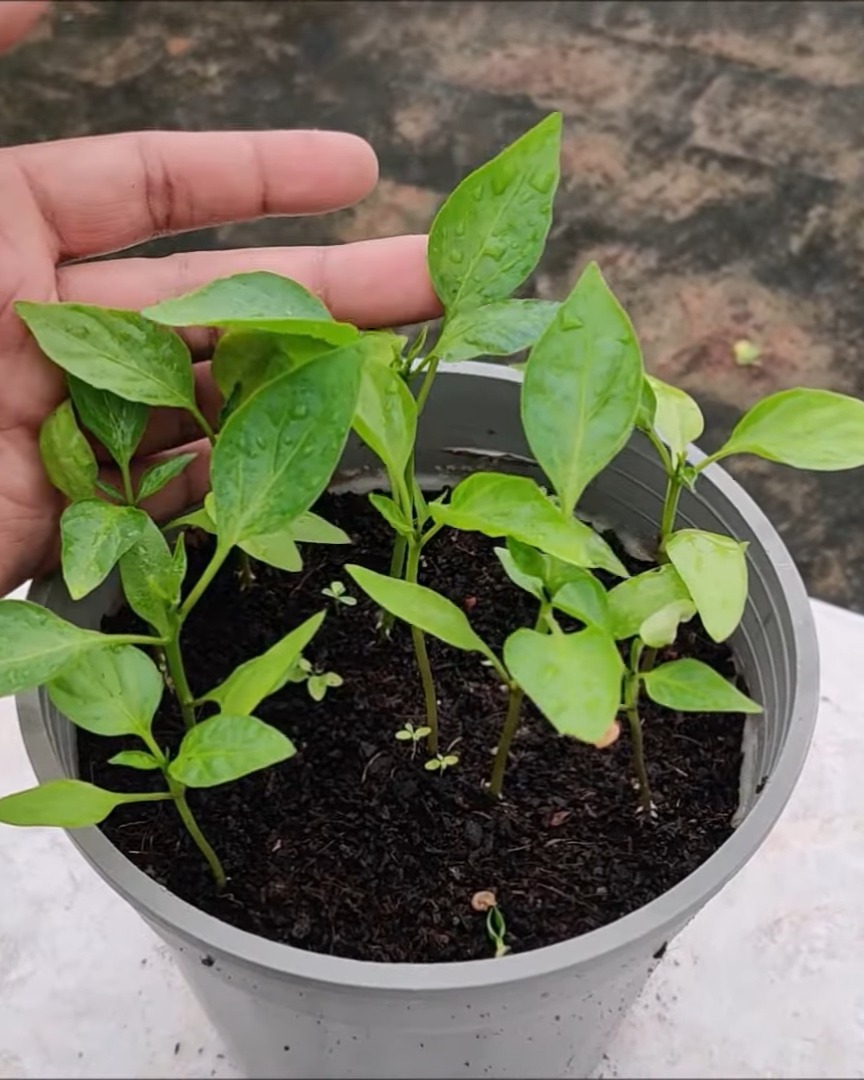
Day 28 – It’s time to give them more space.
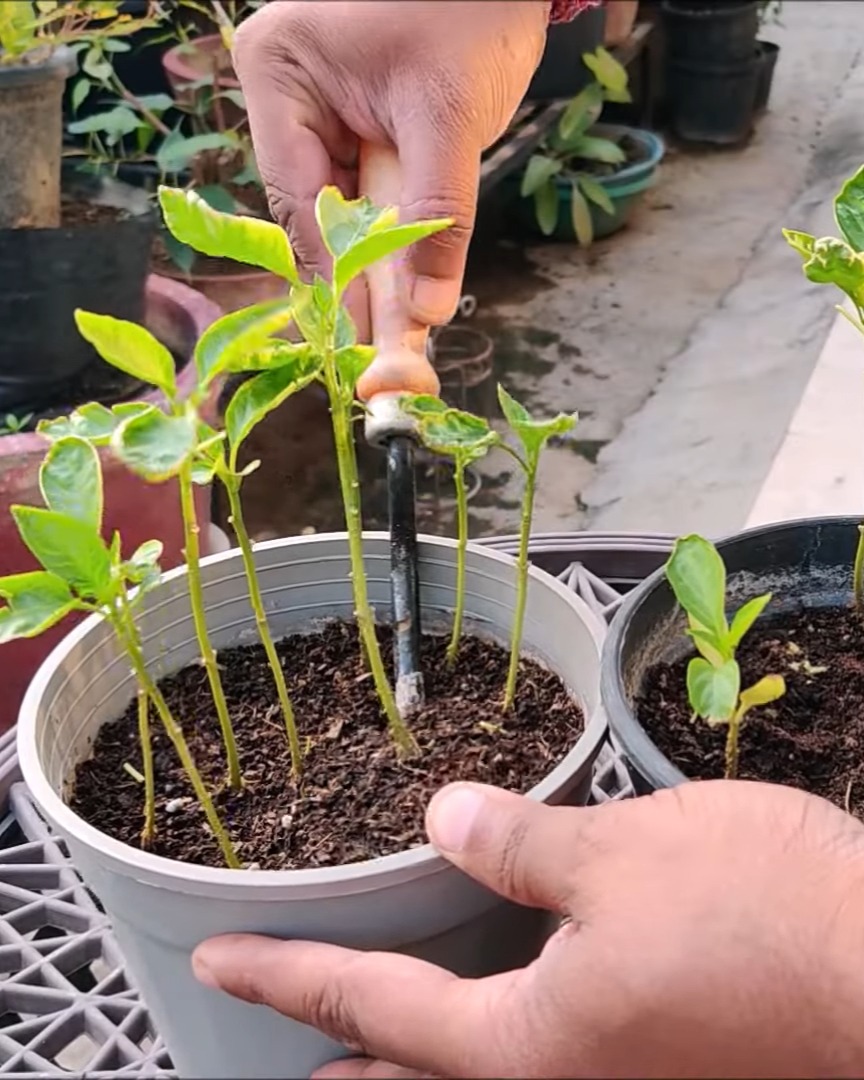
When and How to Transplant Capsicum Seedlings
I wait until the seedlings are strong enough, then I use a small trowel to lift them out gently. I work around the root ball to avoid any damage.
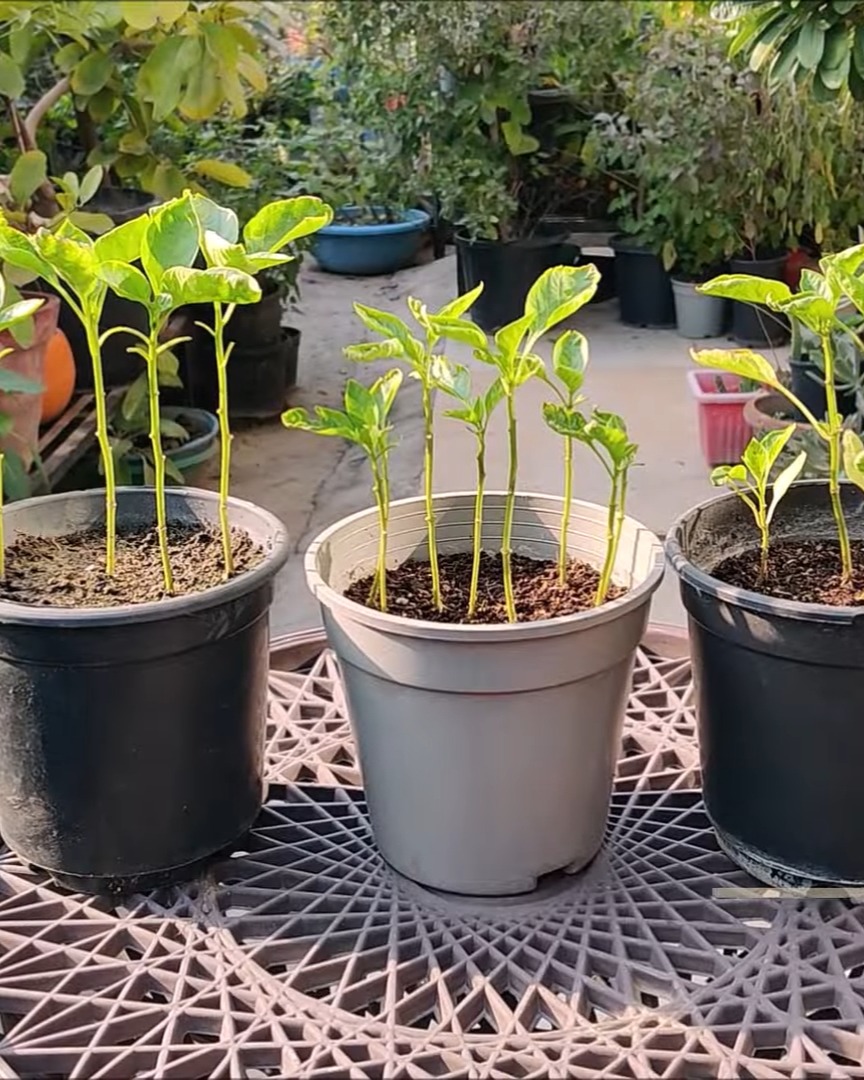
Ideal Container Size
For full growth, I use containers at least 15 to 18 inches deep and wide. Two plants fit comfortably in one pot.
Importance of Drainage Holes
I always make 3 to 4 drainage holes in each container. This keeps the soil from becoming soggy and prevents root rot — a major capsicum killer!
Best Soil Mix for Transplanting
Here’s the mix I use for transplanting:
- 50% garden soil
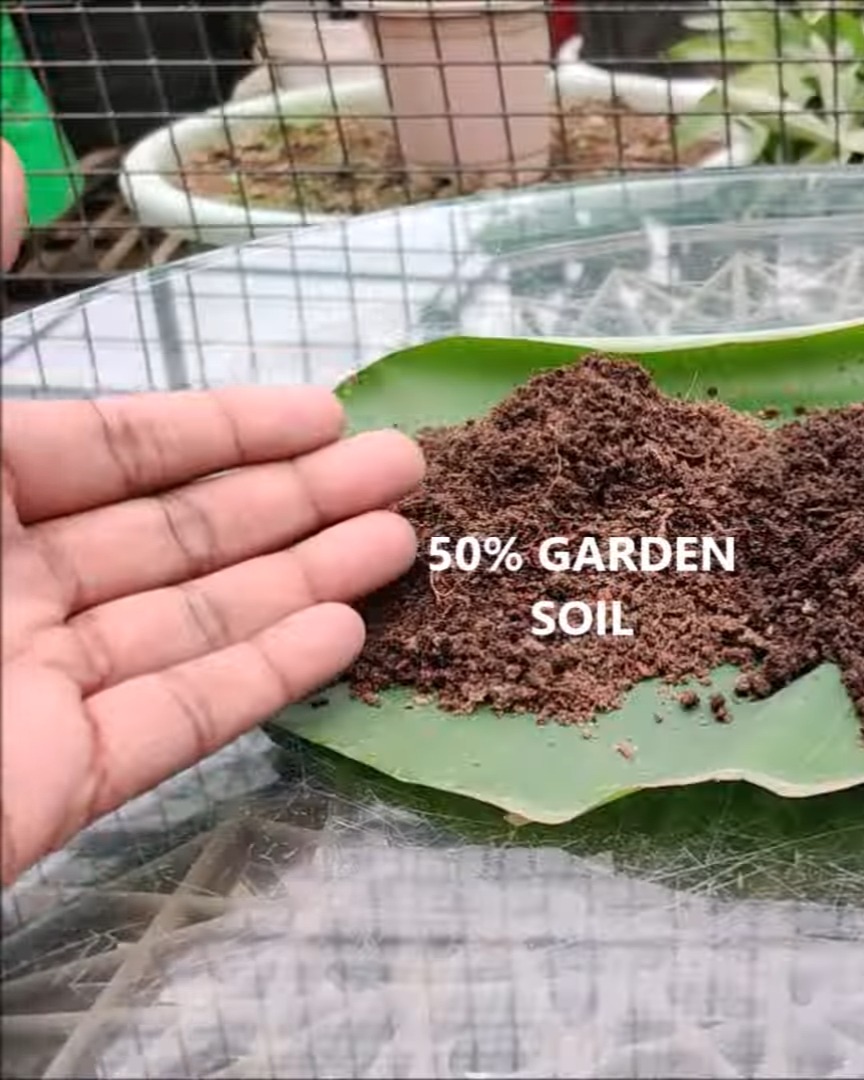
- 30% well-rotted cattle manure
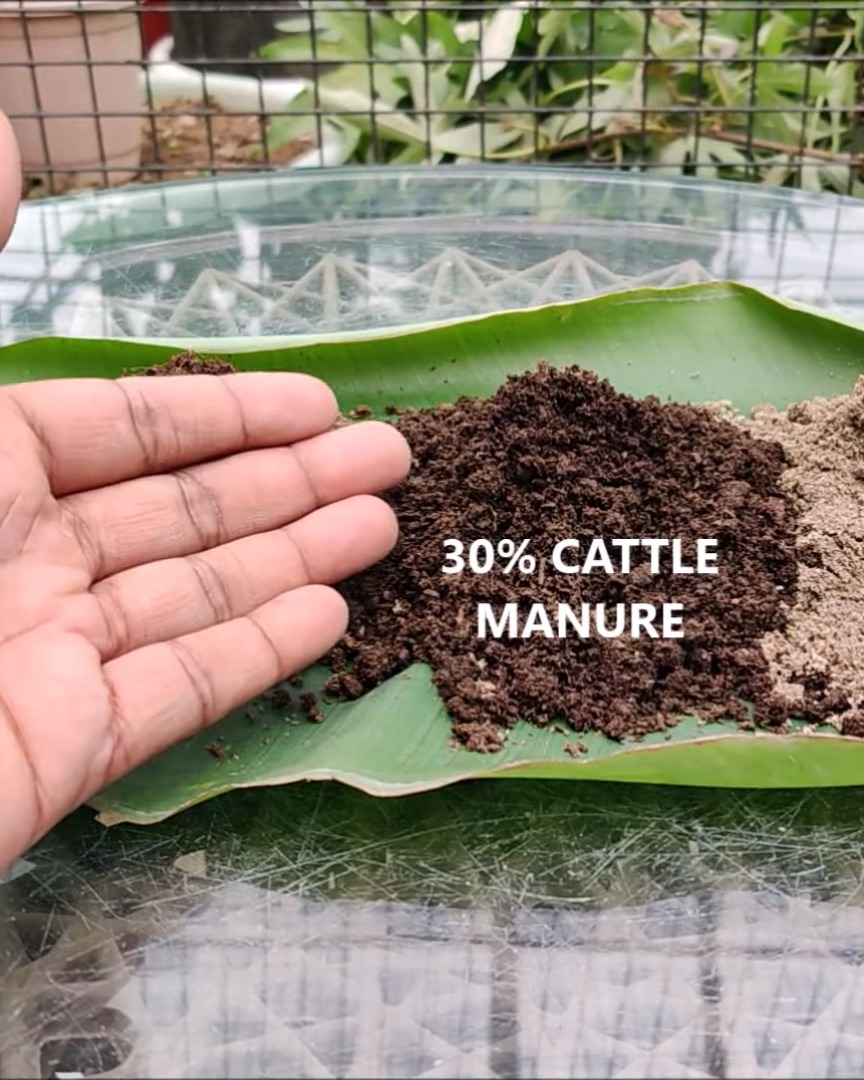
- 20% river sand
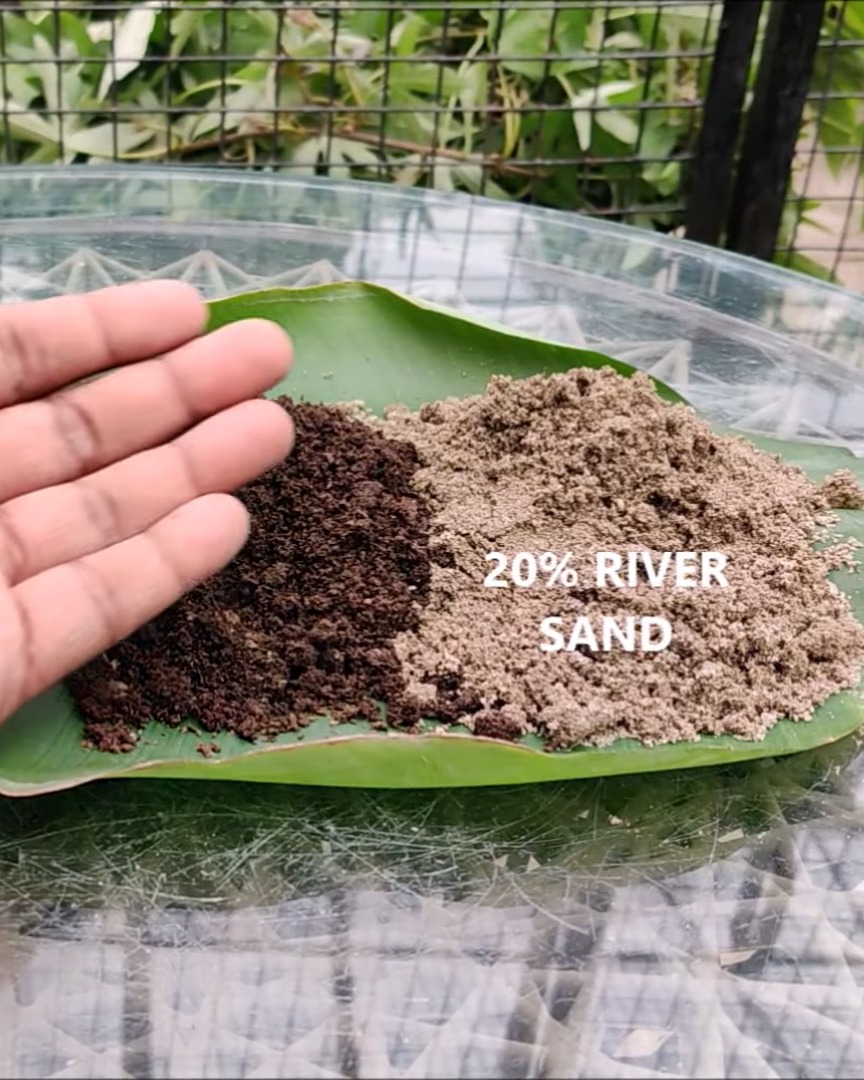
It’s airy, nutritious, and just what my pepper plants need to thrive.
Spacing Seedlings for Healthy Growth
I plant the seedlings about 6 to 8 inches apart. That gives them enough room to spread without crowding each other.
Watering to Prevent Transplant Shock
After transplanting, I water the plants well. It helps reduce transplant shock and helps them settle into their new home faster.
Best Temperature and Light Conditions
Capsicums grow best in moderate weather. Not too hot, not too cold. I always keep them in a sunny spot with partial shade during peak heat.
Caring for Your Growing Capsicum Plants
Now the fun part — watching them grow!
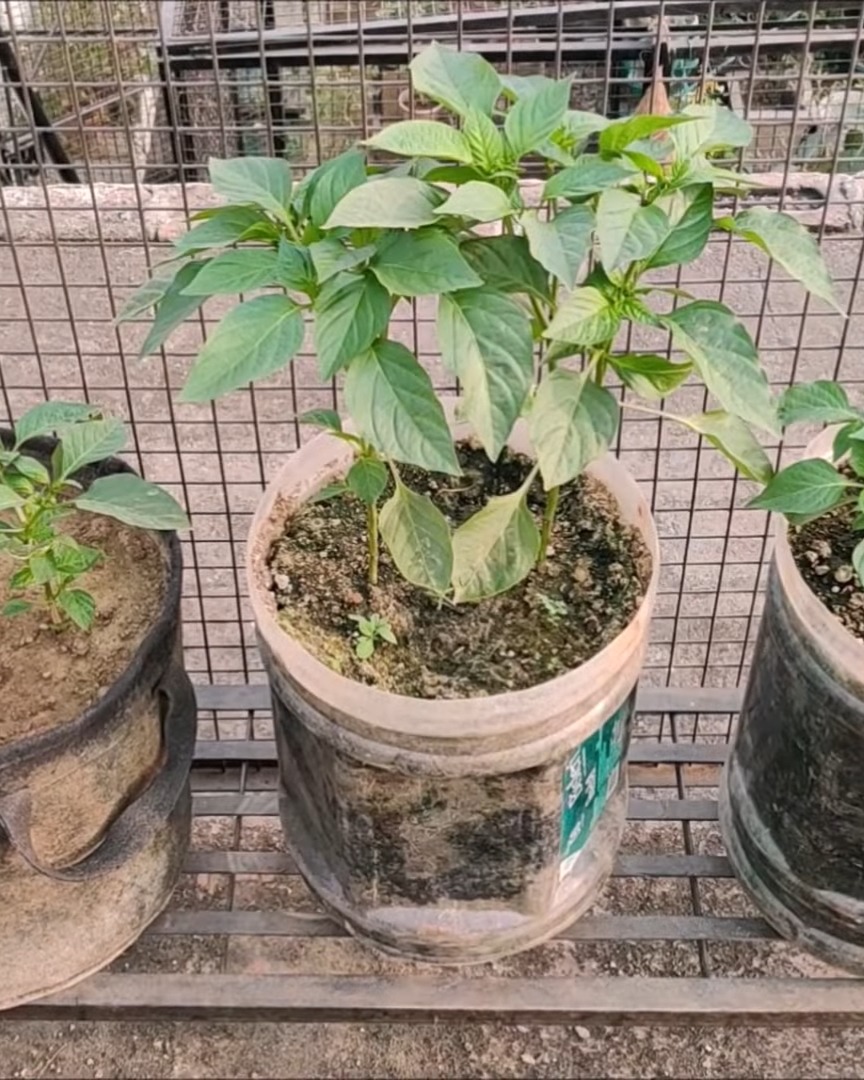
Growth Timeline After Transplant
It usually takes 2 to 4 weeks for the plants to mature in size, depending on weather and soil conditions.
Removing Weeds to Avoid Competition
I remove weeds from the pot regularly. Weeds steal nutrients and sunlight, so I pull them out from the root to make sure they don’t come back.
Feeding with Organic Fertilizer Every 15–18 Days
Every 15 to 18 days, I add 2 to 3 handfuls of organic fertilizer per plant. Then, I mix it into the soil and water right away.

Compost Boosts and Watering Tips
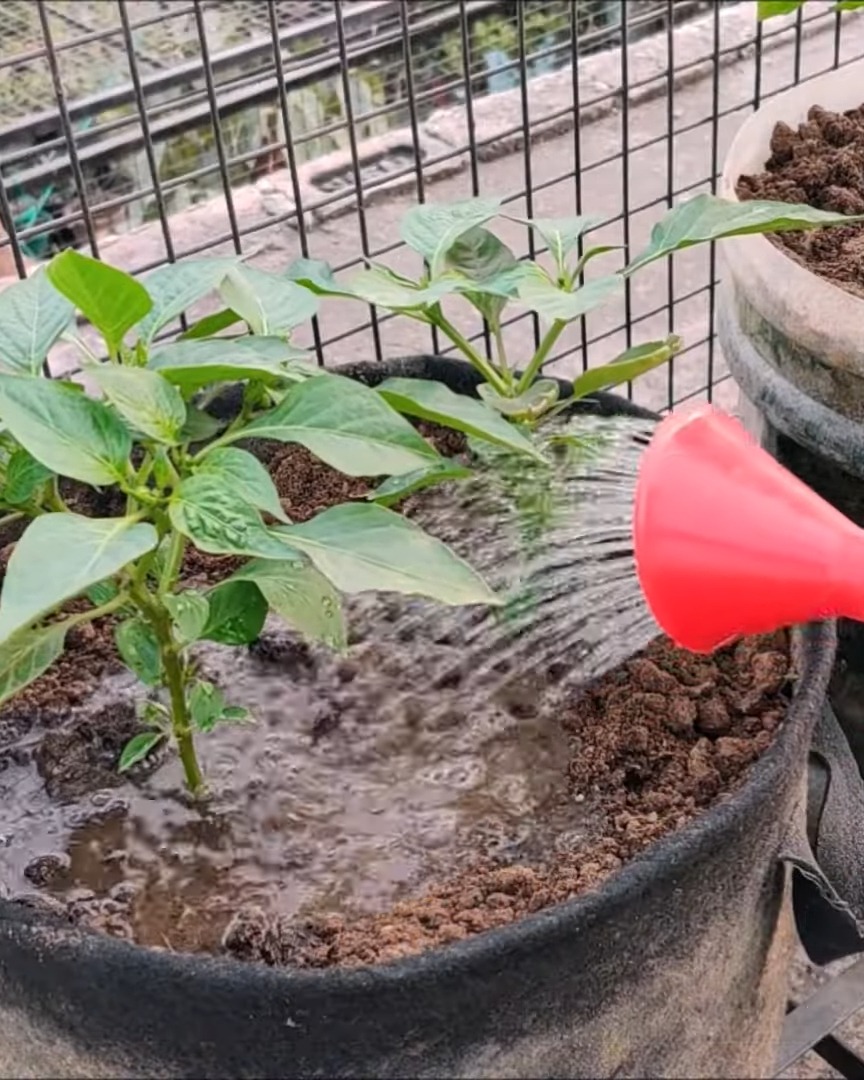
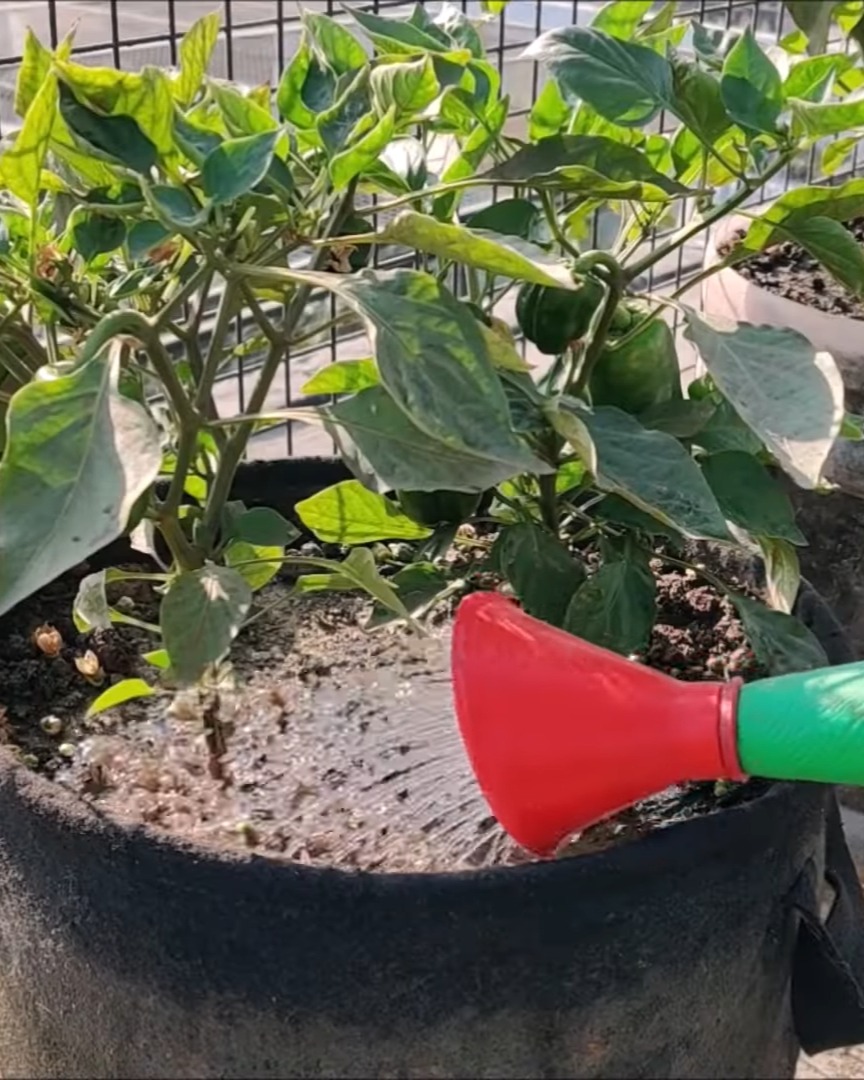
Sometimes, I add a little compost between fertilizer feeds. It keeps the plants healthy and productive. I also water at the base to avoid fungal issues.
Preventing and Managing Common Diseases
Even with good care, diseases can sneak in — but I use natural methods to fight back.
Leaf Curl Disease: Symptoms and Causes
If I spot curling leaves, I know it’s likely the chili leaf curl virus, which spreads through whiteflies and thrips.
Organic Neem-Ginger-Turmeric Spray Recipe
Here’s my homemade solution:
- Boil neem leaves and ginger in 1 liter of water for 12–15 minutes
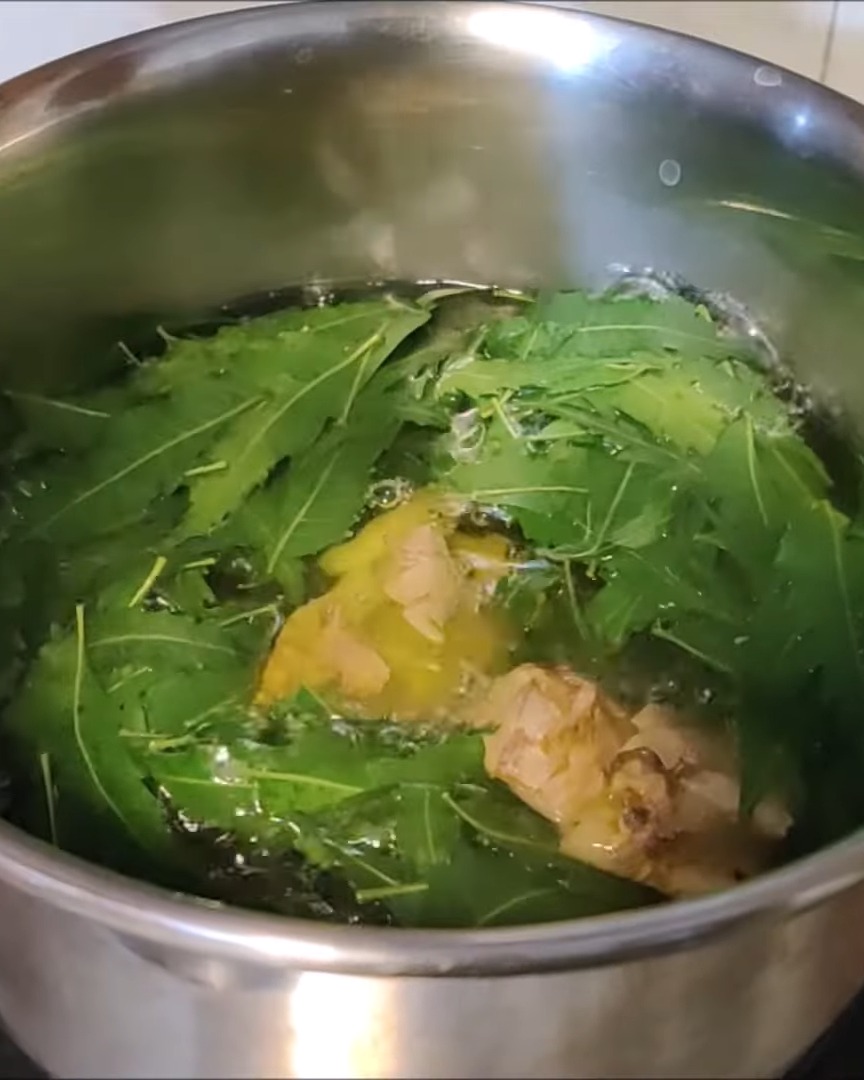
- Cool it down
- Add 2 tablespoons of turmeric
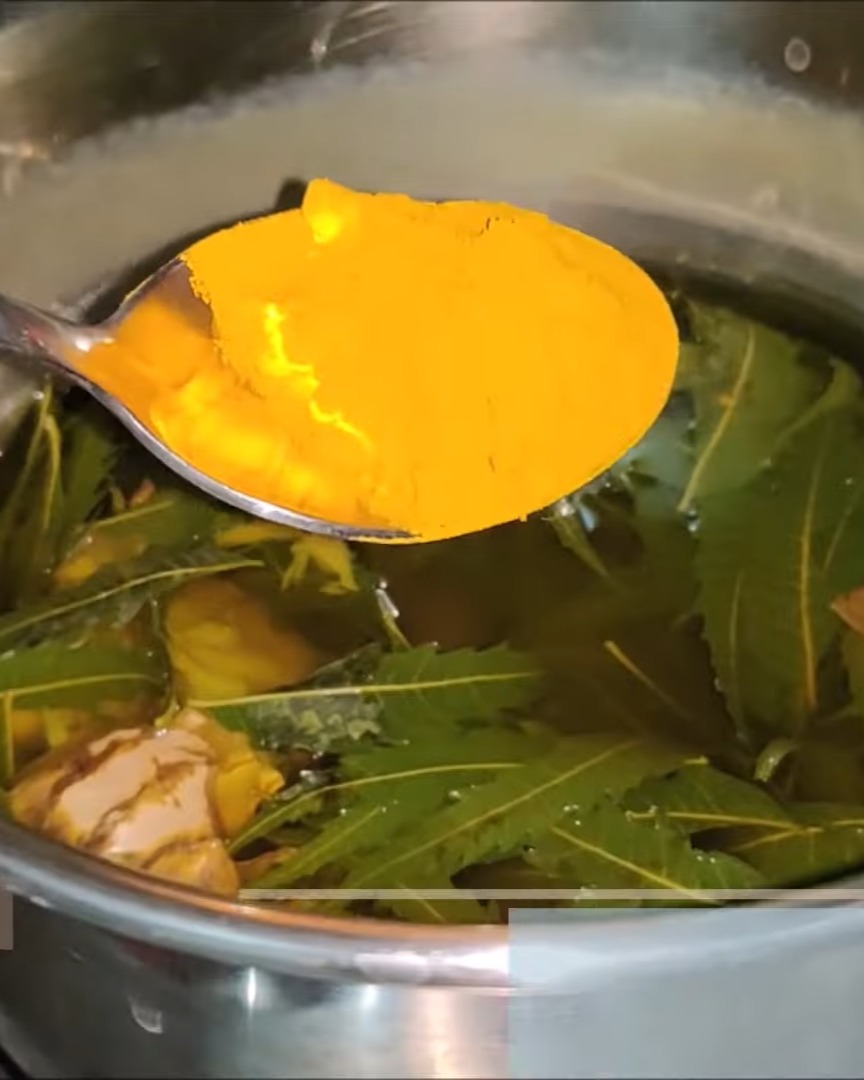
- Let it rest for 10 minutes
- Strain and store
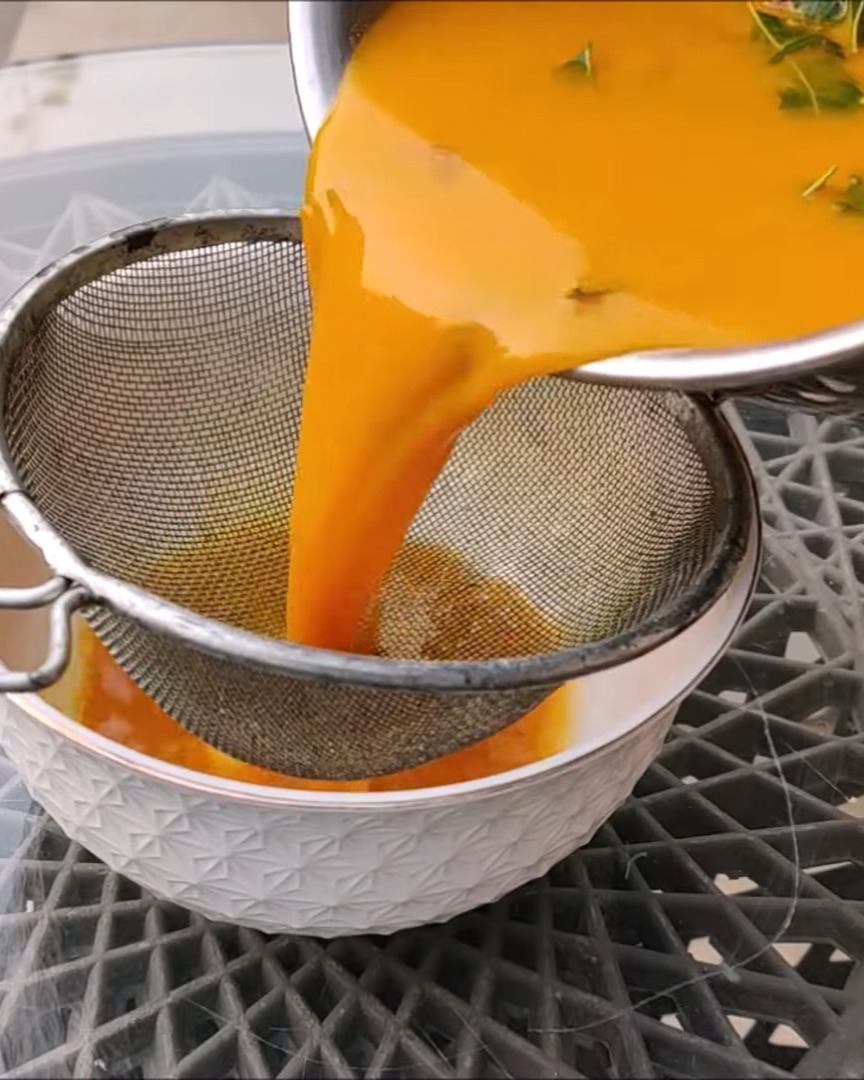
Proper Application and Timing for Pest Control
I dilute 100 ml of this mix into 500 ml of water, then spray the whole plant, especially the undersides of leaves where pests hide.
I always spray in the evening when the sun is down, and pollinators aren’t active.
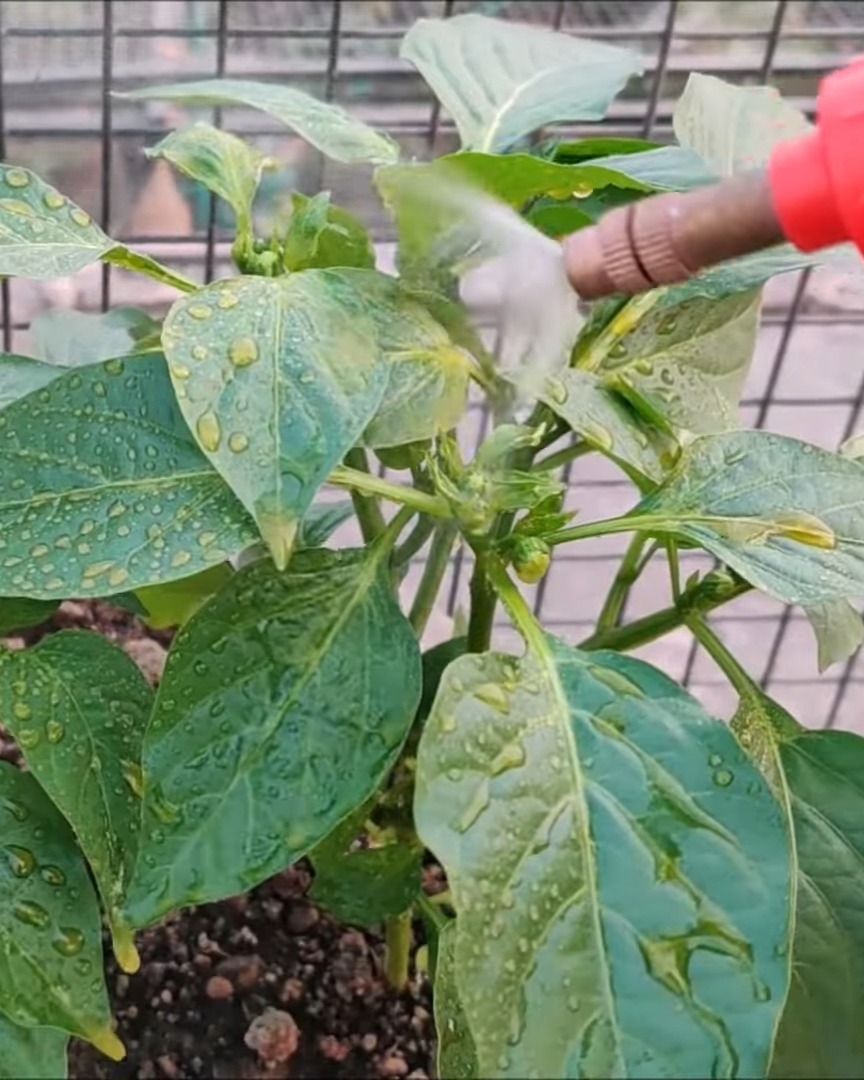
How to Avoid Leaf Damage During Spraying
Never spray under hot sunlight. That can damage the leaves. Evening sprays work best and are safest for the plant.
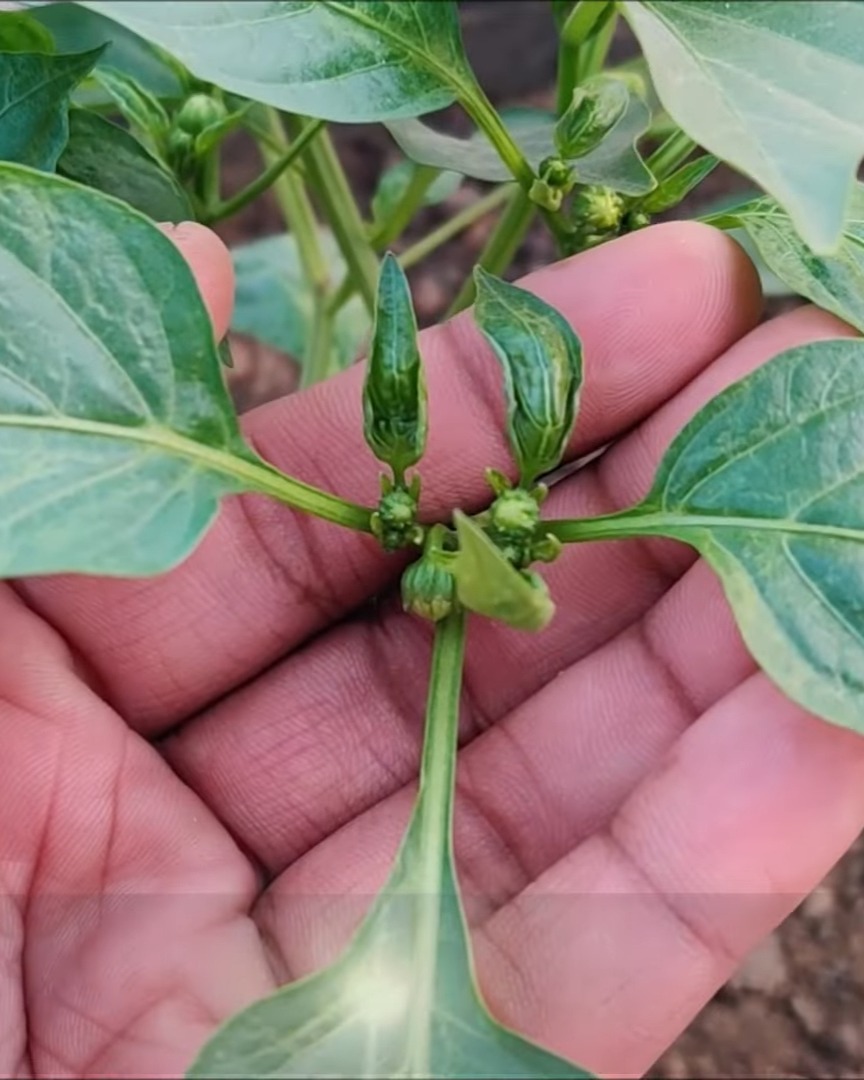
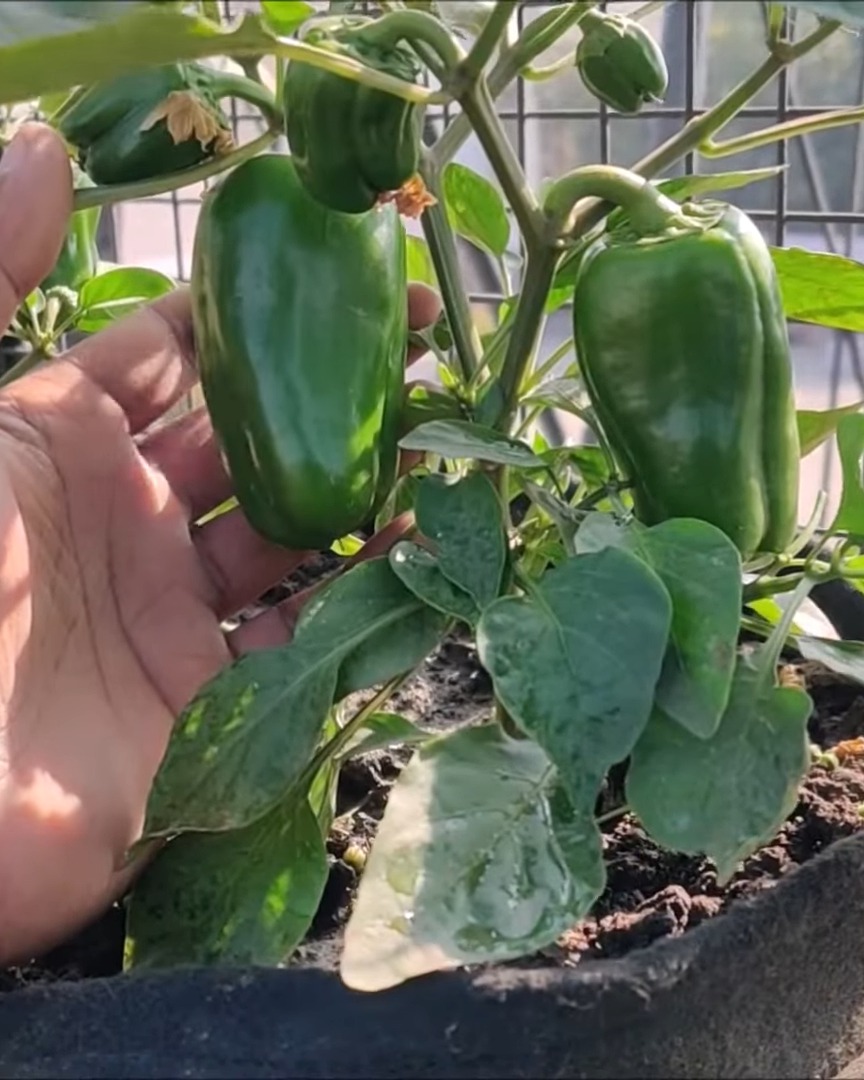
Flowering, Pollination, and Fruit Formation
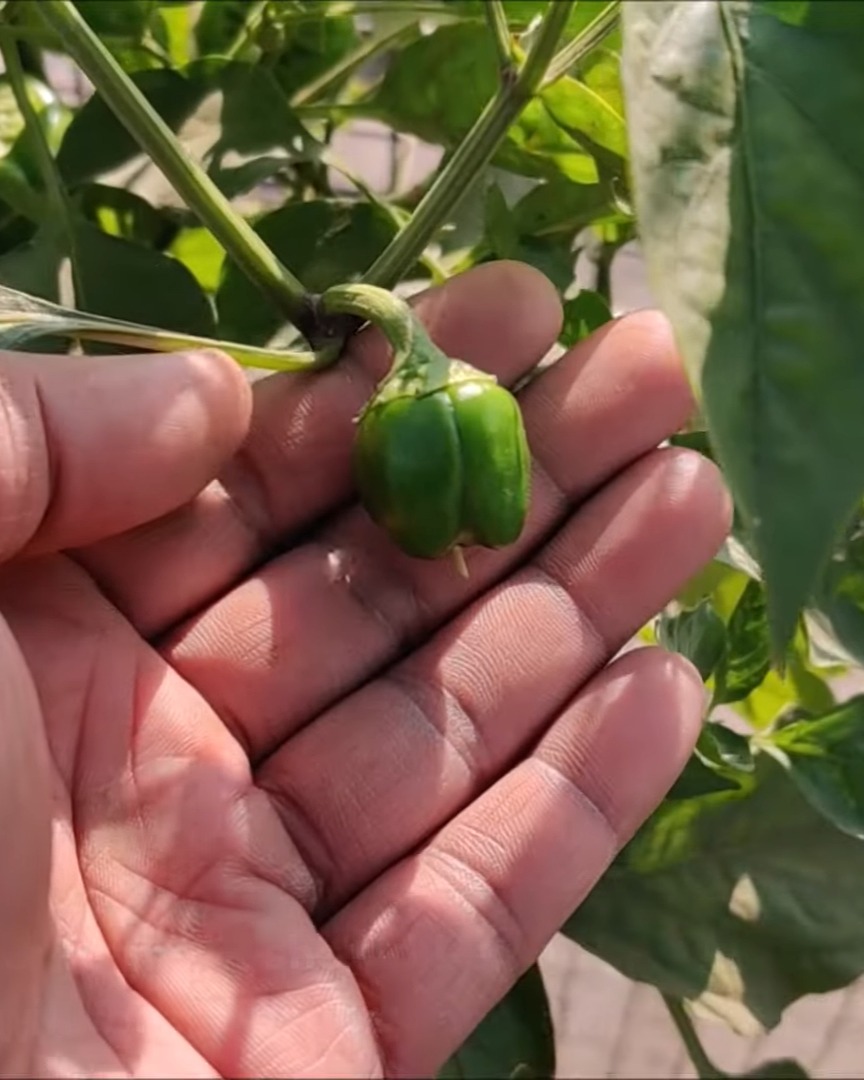
Day 62 – Watching flowers turn into fruit feels like magic!
Understanding the Reproductive Stage
After a few weeks, flowers begin to appear along the stems. That’s when I know the plant is ready to produce fruit.

Self-Pollinating Nature of Bell Pepper Plants
Capsicum plants are self-fertile. So even if I grow just one, it can still form peppers.
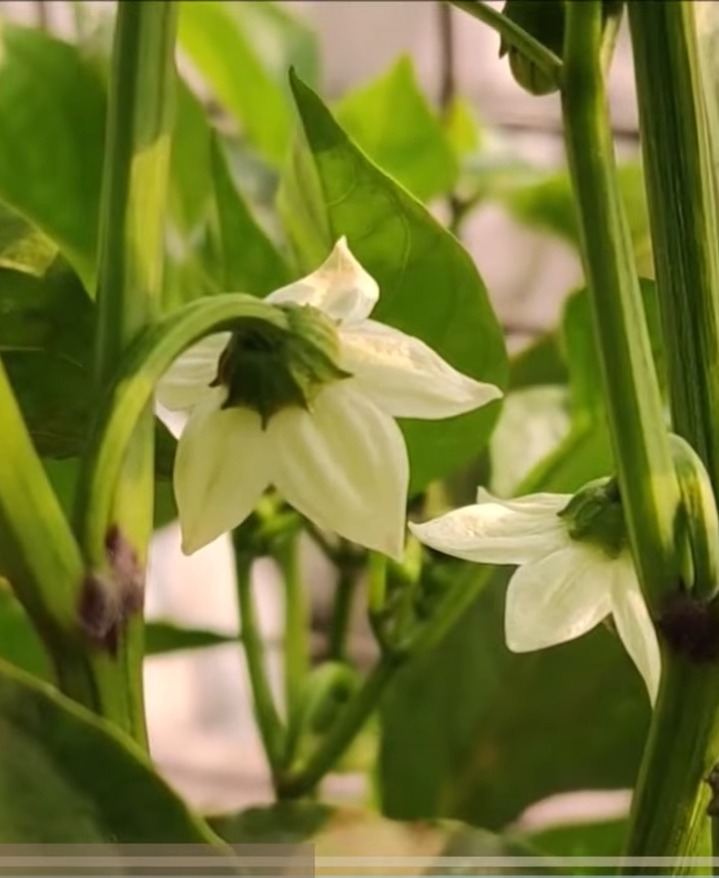
Why Some Flowers Don’t Turn Into Fruits
Not all flowers produce fruit — and that’s normal! I don’t worry if some just drop off.
Irrigation Needs During the Fruiting Stage
Day 80 – At this stage, I water more regularly. It helps the fruits grow well and prevents them from bursting.
When and How to Harvest Bell Peppers
This is the moment I look forward to most — the harvest!
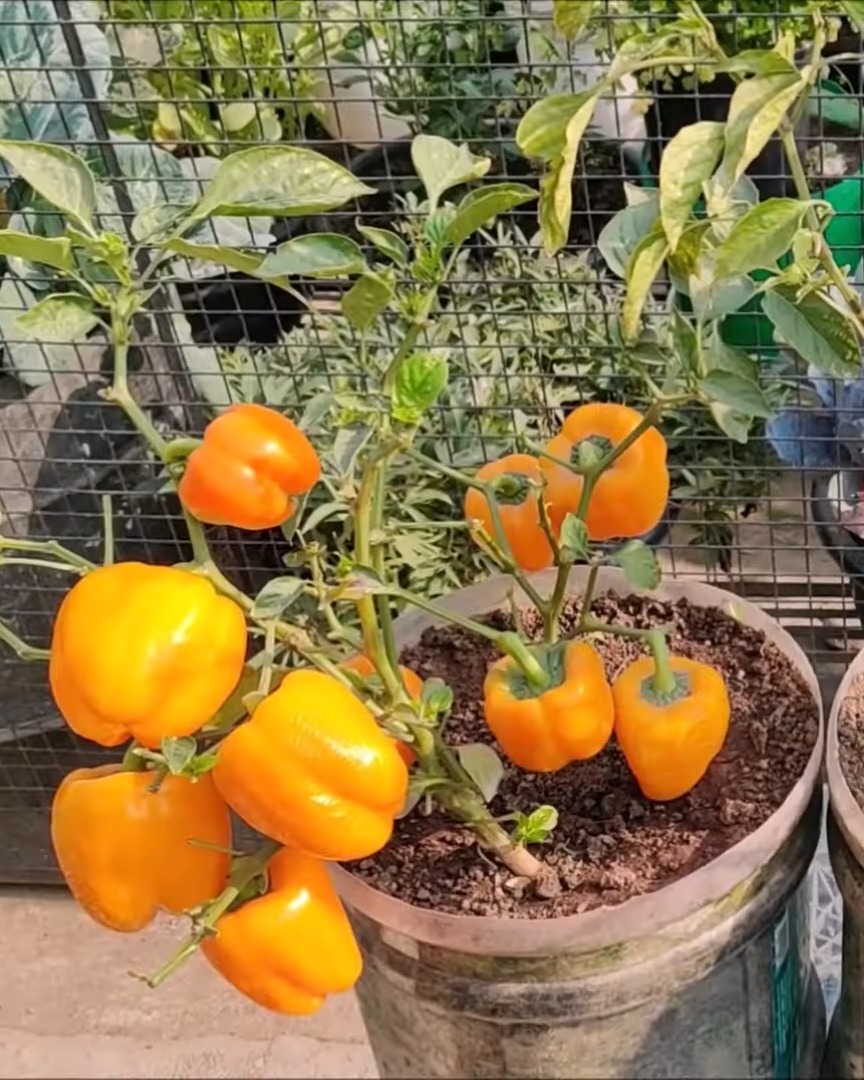
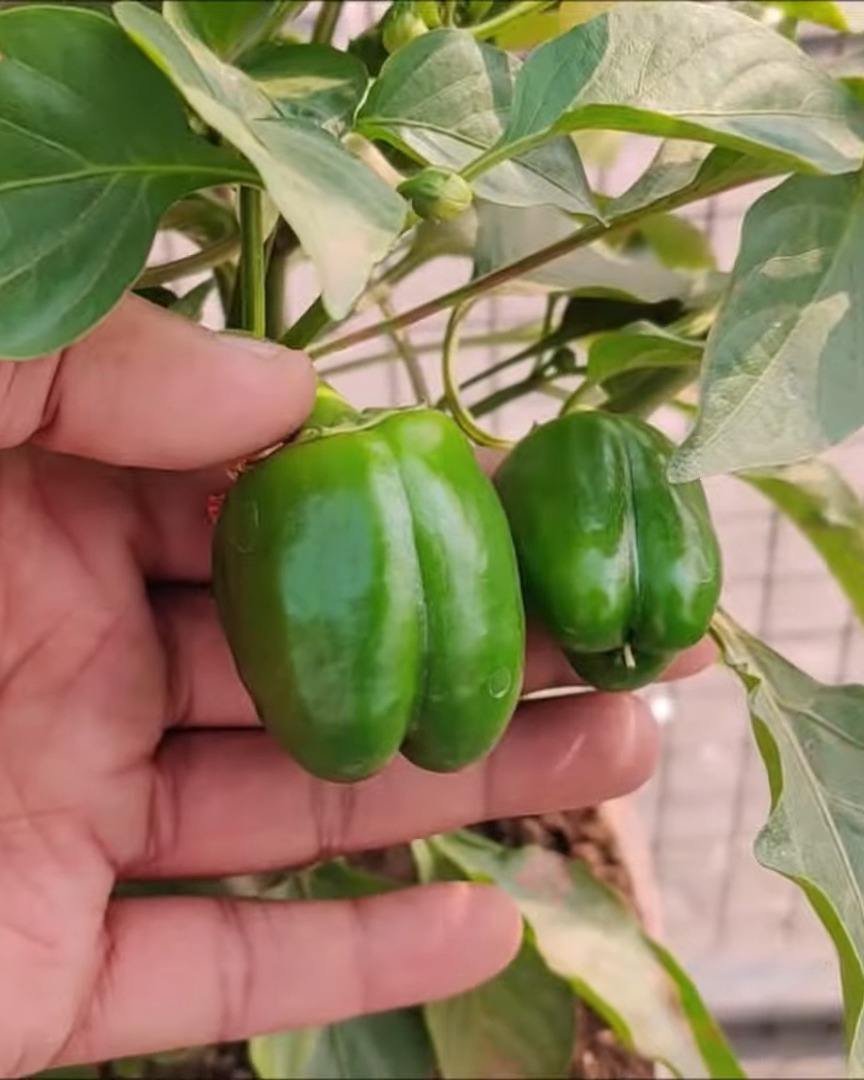
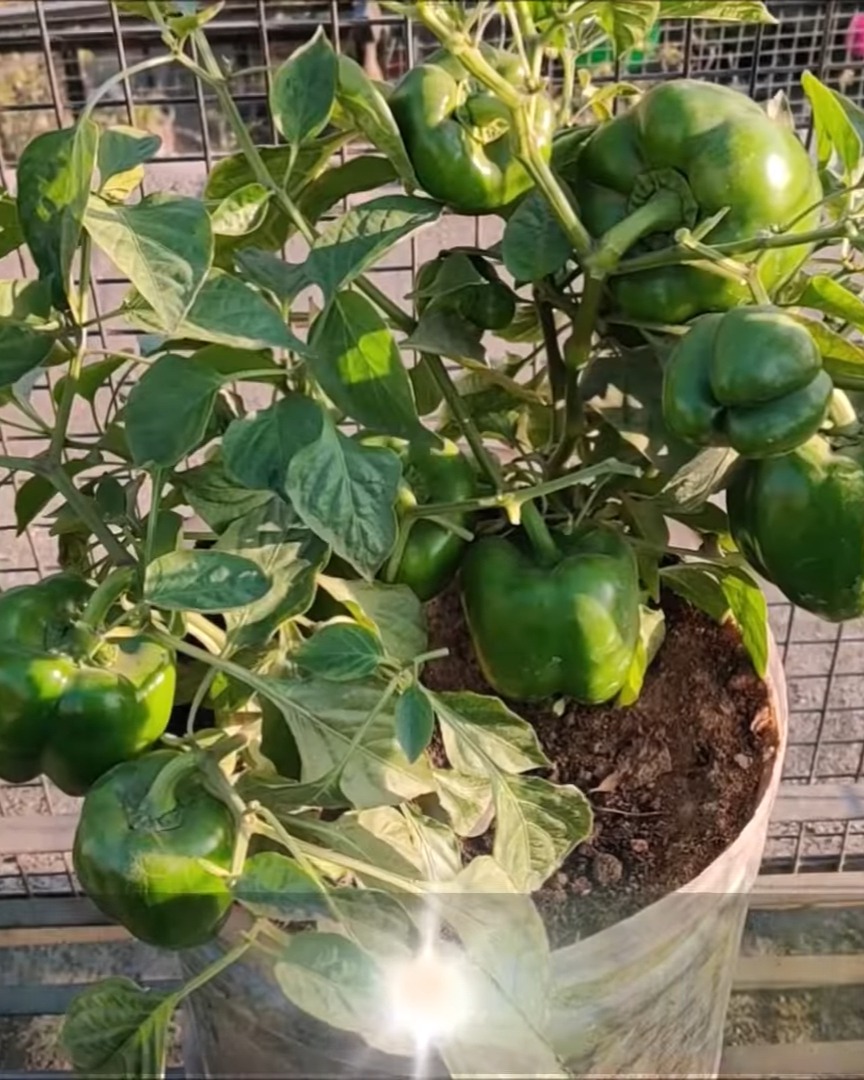
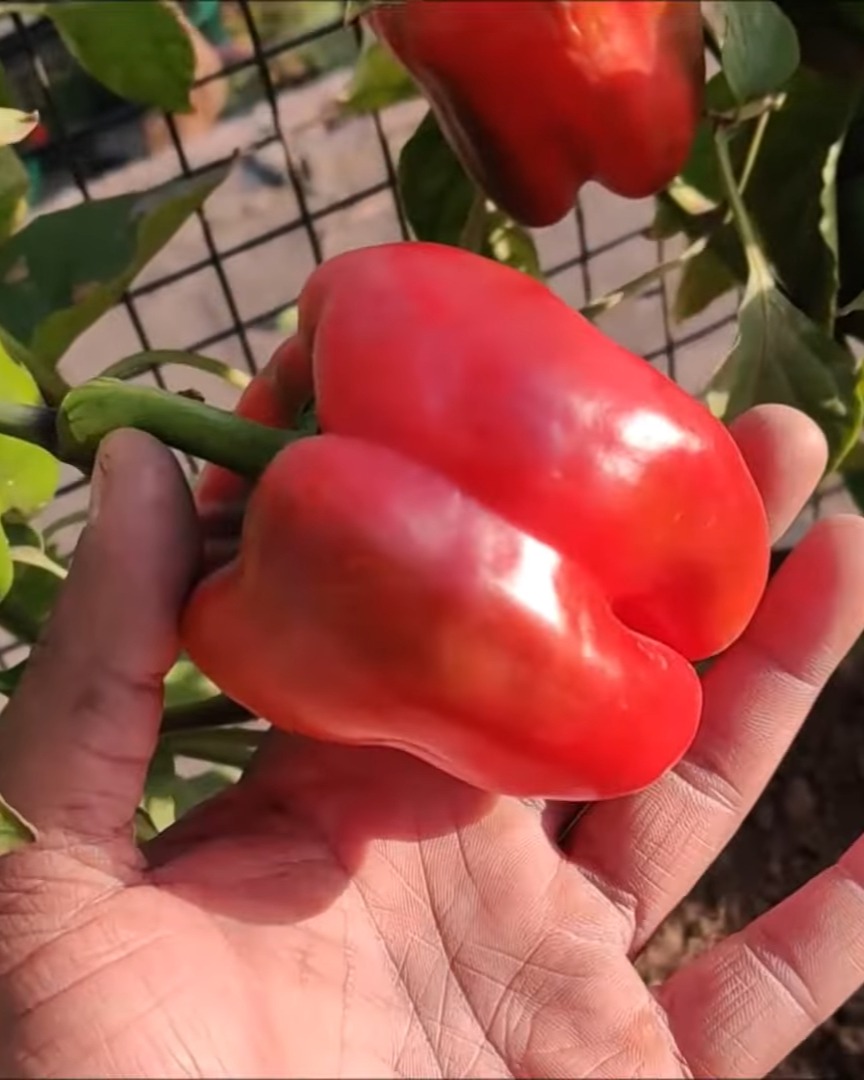
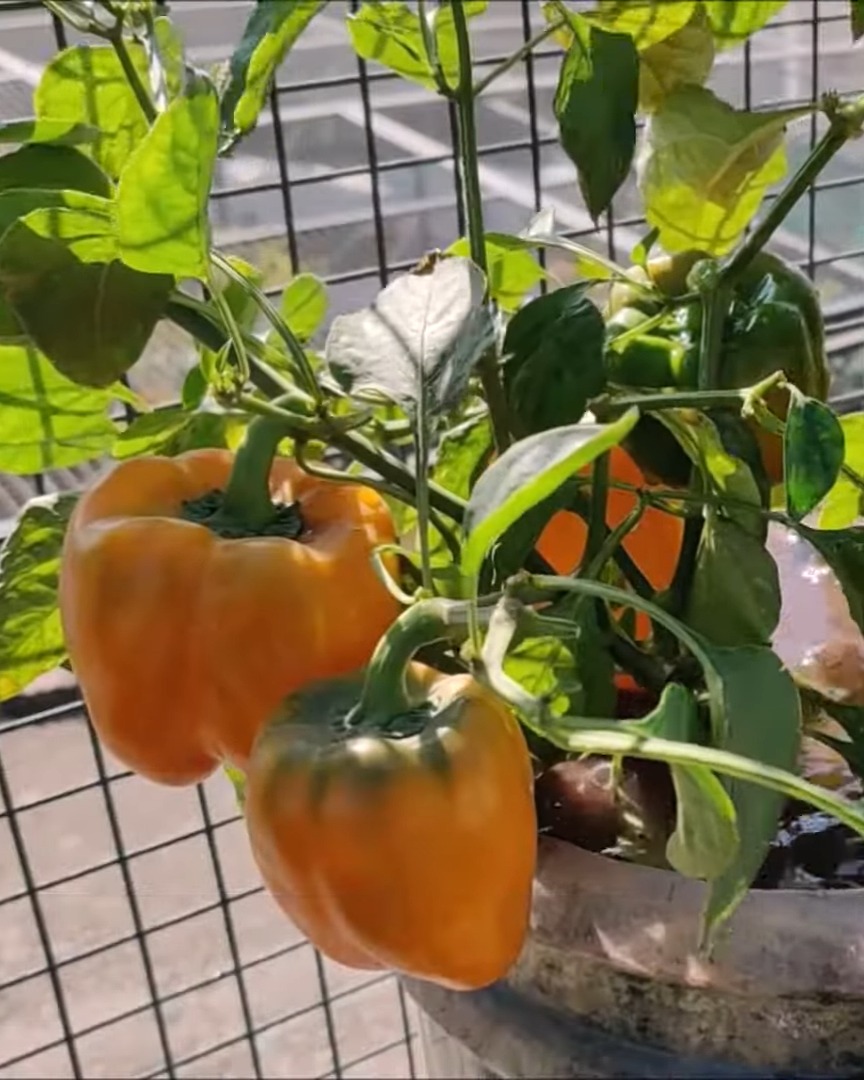
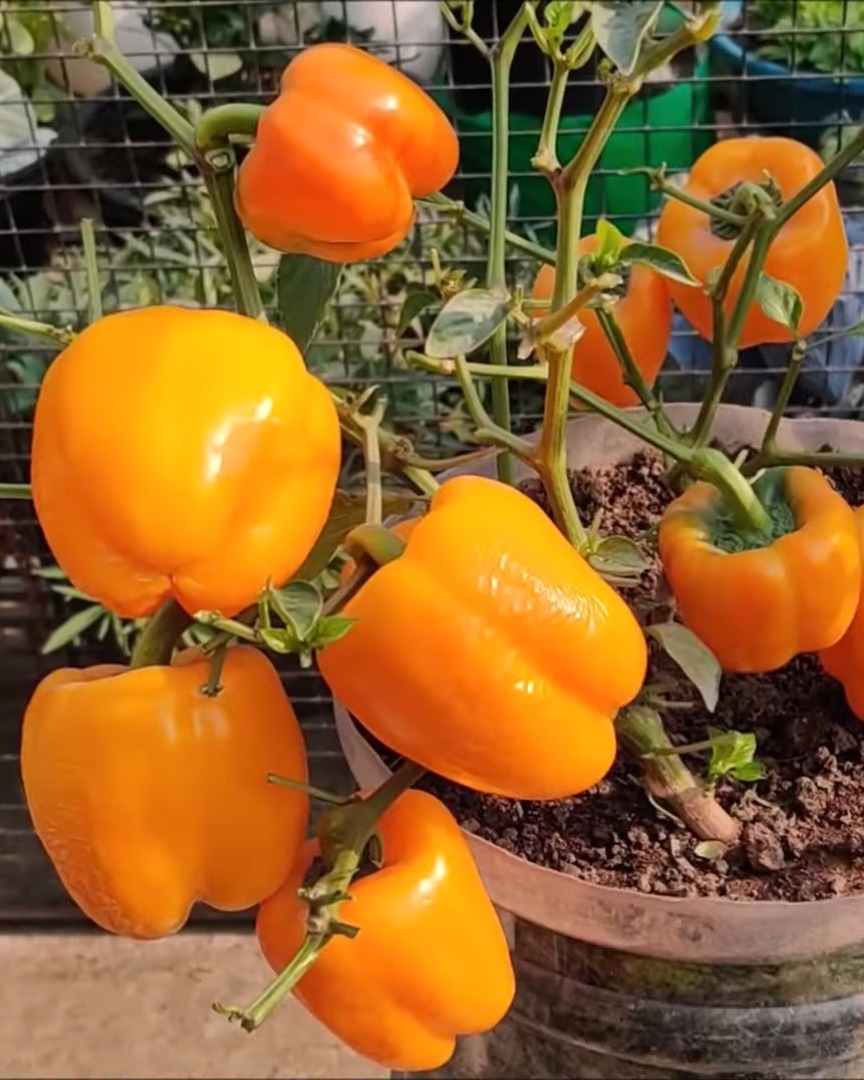
Maturity Signs: Size and Color Change
After 84 days, Capsicums start green. As they mature, they turn red, yellow, orange, or even purple, depending on the variety.
Ripening Colors and Flavors
I can harvest them green once they reach full size, or leave them longer for sweeter, colorful peppers.
I usually wait for that final color change — it’s worth it!
Ideal Temperature for Ripening and Production
Capsicums ripen best between 18–28°C. Higher temperatures can cause flowers and fruits to drop early.
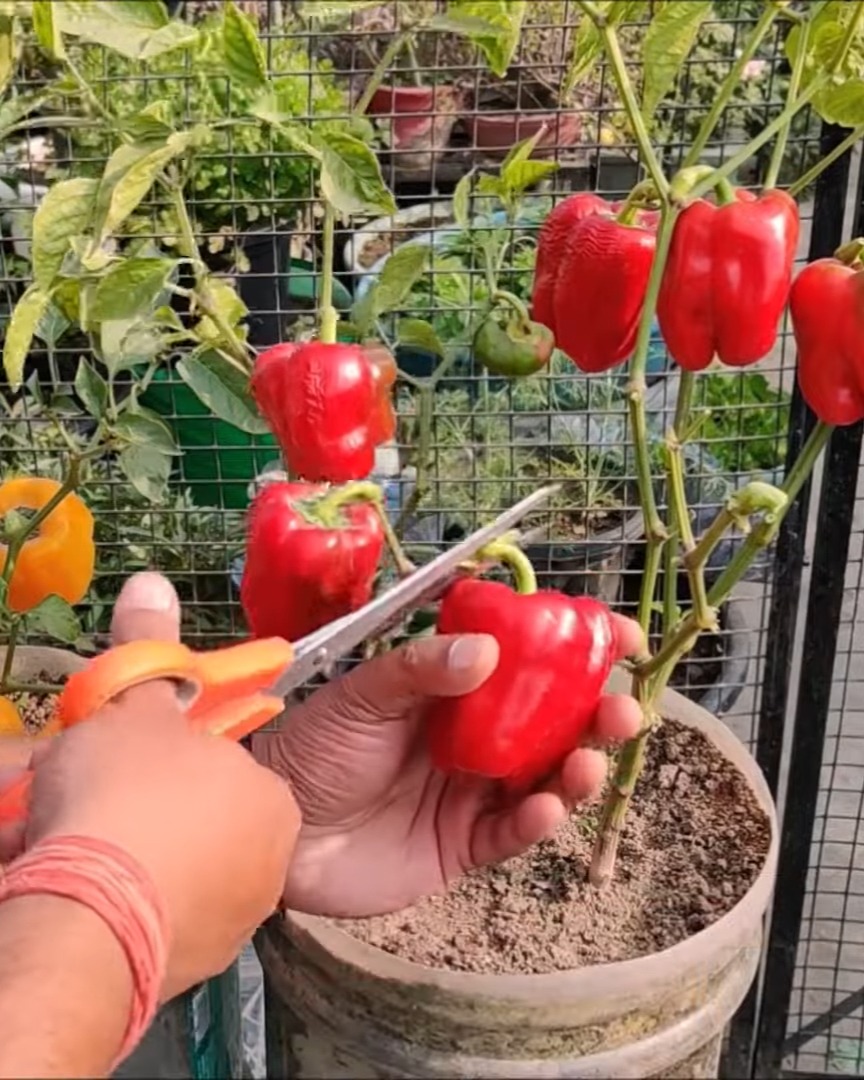
Harvesting Techniques to Avoid Plant Damage
I use scissors or a sharp knife to cut the fruits, leaving a small stem. That way, the branches don’t snap — they’re quite brittle.
Harvesting Schedule by Color
Here’s a general guide I follow:
- Green: 60–65 days after transplanting
- Yellow: 75–85 days
- Red: 90–95 days
I pick fruits every 3 to 5 days once they start ripening.
Tips for Maximizing Yield and Quality
Here’s how I make sure my bell peppers grow big, taste sweet, and keep producing more fruit, right up to the final harvest:
- The more I harvest, the more peppers my plants produce.
- Regular picking encourages continuous flowering and fruiting.
- I feed the plants regularly with organic fertilizer and compost.
- I ensure they receive at least 6 hours of direct sunlight daily.
- Healthy soil and strong sunlight lead to stronger, more productive plants.
- I always harvest in the early morning.
- Peppers are cool, crisp, and easier to handle at that time.
Post-Harvest Handling and Storage
After harvest, proper storage keeps them fresh and flavorful.
Proper Way to Cut and Handle the Fruit
I leave a little stalk on each pepper and handle them gently to avoid bruises.
Storage Conditions to Retain Freshness
I store the fruits in a cool, dry place away from direct sunlight. This keeps them fresh longer.
Nutritional Value by Color – Red vs. Green Peppers
Red bell peppers are my favorite — they’re sweeter, richer in vitamin C, and contain more beta carotene than green ones. That’s also why they’re pricier in stores!

The Bottom Line
Growing bell peppers in pots is fun, simple, and super satisfying. With just a little care and attention, I get healthy, homegrown capsicums bursting with color and flavor. Why not give it a try and fill your garden with vibrant peppers this season? Let me know how your pepper plants grow!